
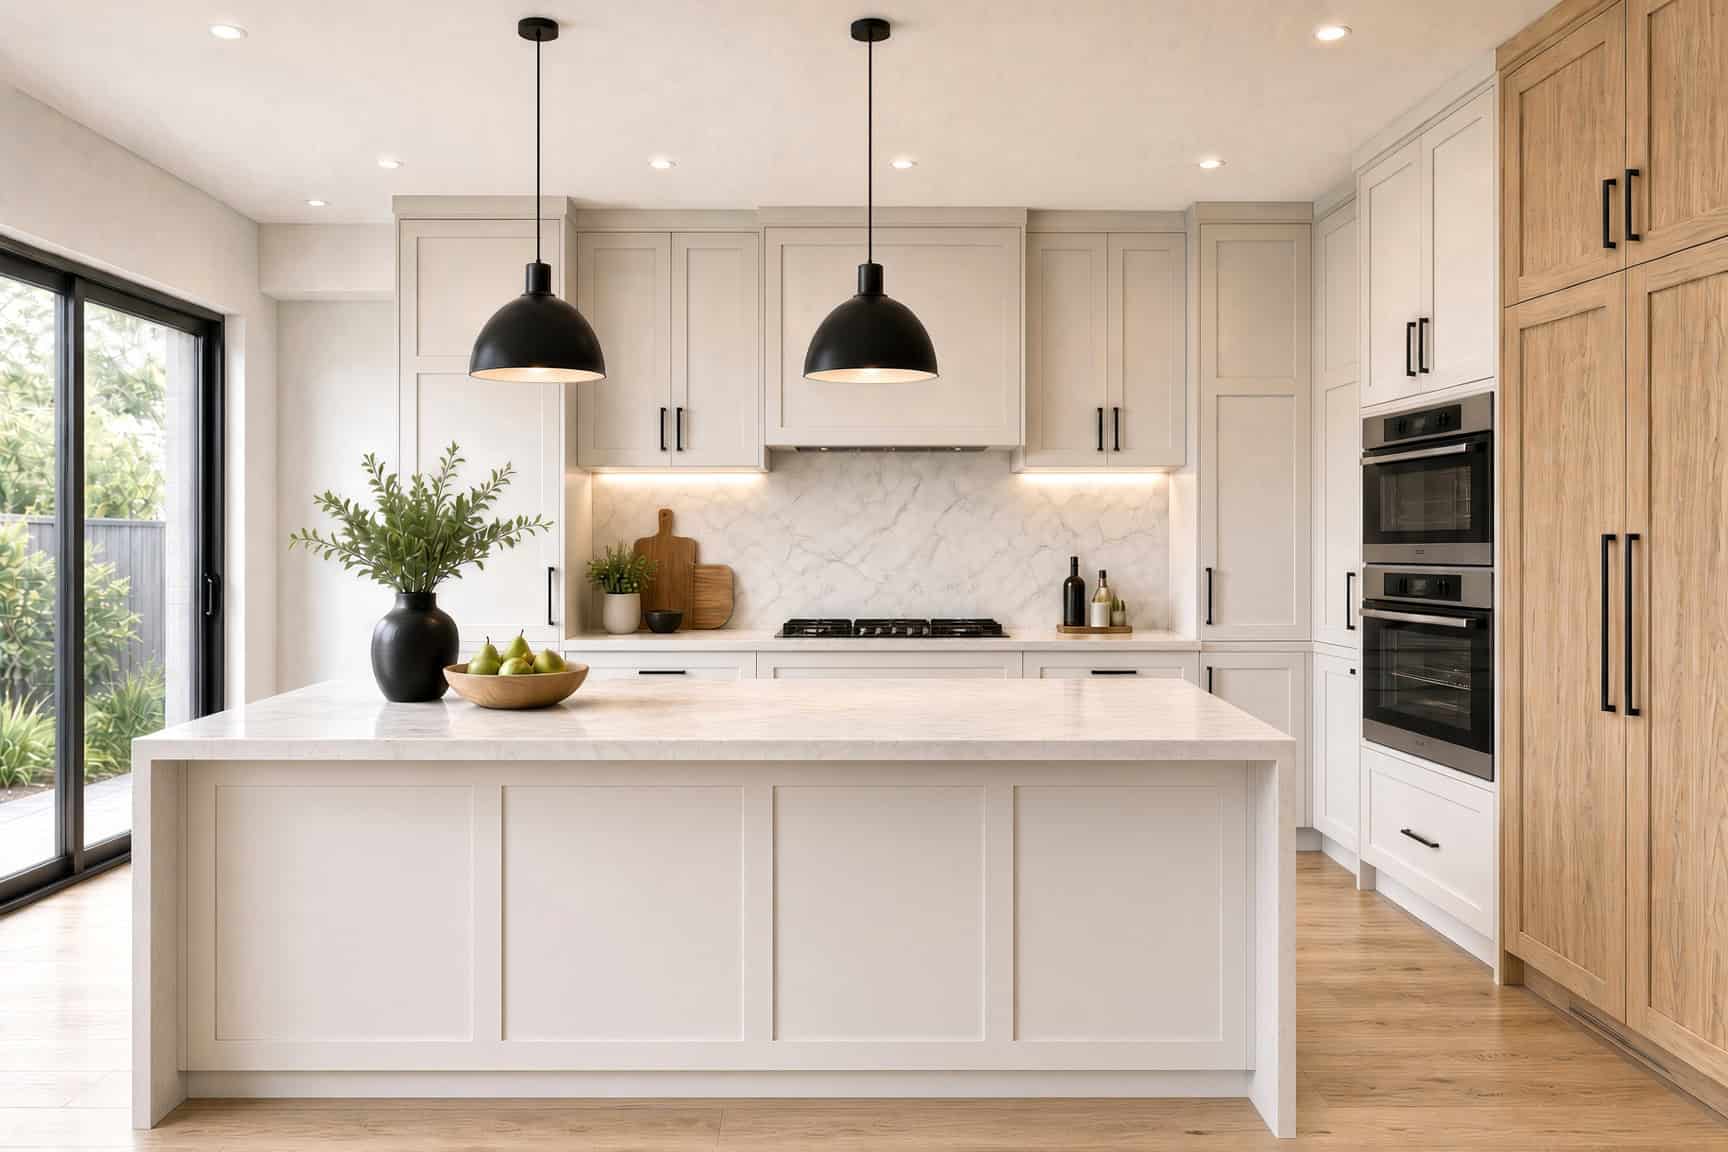

Quick answer: A shaker kitchen has doors with a square frame around a flat, recessed centre panel. In New Zealand that door is often one HDF MR board wrapped in thermoform vinyl, and the wrap sets firm rules on heat, cleaning and handles.
You’ve seen the look a hundred times on Pinterest: a white or sage door, a slim frame, a little shadow line around the centre panel, a brass knob. It reads as warm and settled, and it suits an Auckland villa as comfortably as a brand-new Hobsonville townhouse. What the photos don’t tell you is how the door you’re looking at was made, and in New Zealand that matters more than the colour.
A shaker door made here is rarely five pieces of solid timber. It’s usually a single board with the profile formed into it, then either wrapped in vinyl under heat and vacuum or left raw for a painter. Each route comes with its own rules from the people who make the doors: how hot the surface can get, what you can clean it with, whether you can drill it later, and how you make a warranty claim. We design, make and install kitchens from our Rosedale factory, and these are the rules we plan around before a single door is ordered, because each one changes what goes on the drawing.
What Makes a Kitchen a Shaker Kitchen?
The door is the whole style
Strip a shaker kitchen back and the style lives in one detail: a door with a square, flat frame around a centre panel that sits slightly lower than the frame. That step down catches light on one edge and throws a thin shadow on the other, which is what gives the door its depth from across the room. There’s no carving, no curve, no moulding beyond that single recess. Everything else in the room (the handles, the colour, the benchtop) is a choice you make around it.
The traditional version is a five-piece door: two upright stiles, two horizontal rails and a loose panel floating in a groove between them. A furniture maker builds it that way in timber, which is why so much of what you read online describes shaker as a five-piece door. In a New Zealand kitchen factory the look is far more often produced another way, which we come to in the next section. For the reader standing in a showroom, the practical point is simple. Shaker describes how a door looks, not how it’s built, so two doors that look identical on a sample board can behave very differently in your kitchen for the next decade.
Shaker, framed and slab: telling them apart
Three door families get confused in quotes. A slab door is one flat face with no profile at all, the usual partner for handleless designs.
A shaker door has the square frame and the flat recessed centre. A more detailed profile door (sometimes sold as French provincial, Hamptons or classic) adds a curved or bevelled edge to the frame, a raised centre, or both. The line between shaker and the next step up is blurry, and makers use different names for similar shapes. When you’re comparing two quotes, ask for the profile name and a physical sample, not the word “shaker”.
You’ll also hear “framed” used for a different idea: a kitchen where the doors sit inside a visible timber face frame on the cabinet instead of covering the cabinet edge. It’s a cabinet construction choice, and it can be done with shaker doors or slab doors. We cover how it affects hinges further down.
💡 Design tip: Hold the door sample at arm’s length under the light in your own kitchen. Showroom spotlights flatter everything. The shadow line is the whole effect, and it reads very differently under a skylight than under downlights.
Why shaker keeps coming back
Shaker sits between two extremes. It’s plainer than an ornate profile, so it doesn’t fight a modern benchtop or tapware, and it’s softer than a flat slab, so it doesn’t look clinical in an older house. That middle position is why it turns up in villa restorations and new builds alike, and why it ages more gently than kitchen styles built around a single trend colour or a novelty handle. The door shape itself doesn’t date quickly. The colour and the hardware you pair with it are what tie a kitchen to a year, and both are far easier to change later than the doors.
So the useful question isn’t whether shaker is still in. It’s which shaker door, made which way, in which colour, with which handle. Those four decisions come in that order, because the construction limits the other three.
How Shaker Kitchen Doors Are Made in New Zealand
Thermoform: one board, one continuous wrap
Dezignatek, the Auckland door maker whose doors are on our published warranty schedule, describes its thermoform process in its own Thermoform Technical Data Sheet: panels are made by wrapping vinyl film around the face and edges of an HDF MR door, drawer or panel. HDF MR is high-density fibreboard with moisture resistance, and the same sheet says it has “an increased fibre content making it more resistant to moisture and more stable than standard MDF”. The vinyl is applied by vacuum, heat and pressure, and the back face is traditionally melamine.
That construction suits shaker for a plain physical reason. The recess around the centre panel is an internal corner, and an internal corner is exactly where a separate edge strip or a sprayed coat is most likely to fail. A one-piece wrap runs over the frame, down into the recess, across the panel and around the outer edges with no join for moisture to get into. Dezignatek’s data sheet also describes thermoform as chip resistant, “unlike a lacquer finish”. That is the main reason so many shaker kitchens in this country are thermoformed: the construction fits the shape.
Dezignatek groups its shaker profiles in two places. Its thermoform range page says Series 2 covers “the traditional shaker-style profile” alongside more detailed shapes, and its Series 3 profiles page says “Profiles such as Ronda and Oslo meet the need for the classic Shaker-style door”. If you want the full run of profile names and how they differ in depth, our guide to thermoformed cabinet doors and their profiles goes through them one by one.
Paint-ready: the same shapes, finished by a painter
The second route uses a door that arrives unfinished. Dezignatek’s paint-ready range “includes all profiles from our thermoform range, and five that are specifically designed for paint-finishes, with deeper profiles and sharper internal corners”. The catch is in the next line of the same page: “All profiles come sanded but will require further sanding and preparation prior to painting.” In other words, a paint-ready shaker door is a blank. Its final quality depends on the preparation, the paint system and the person spraying it.
That buys you two things. First, colour freedom: any colour a paint system can mix. Second, sharper detail, because a painted door doesn’t need the slightly softened corners a vinyl wrap needs to stretch around. What it costs you is an extra trade, more time between design sign-off and installation, and a finish whose durability rests on the painter as much as the factory. A painted finish can also be touched up or recoated in future, which a vinyl wrap can’t.
Solid timber and veneer
A true five-piece timber door is still possible, and some people want exactly that: real grain, real joints, a door that can be sanded and refinished. It’s the most labour-intensive route, and because timber is a natural material, ask the maker how they finish and seal it for a kitchen. If grain is what you’re after but timber doesn’t suit the budget, it’s worth seeing a woodgrain thermoform door before deciding; Dezignatek’s own photo captions show woodgrain decors on profiled doors.
| Shaker door route | What it is | Strongest point | What to plan around |
|---|---|---|---|
| Thermoform | One HDF MR board, vinyl wrapped over face and edges | No join in the recess or on the edges; chip resistant | Heat above 50°C at the surface; no steam mops; no surface coating later |
| Paint-ready, then painted | Sanded blank, prepared and sprayed by a painter | Any colour; sharper internal corners on the dedicated profiles | Extra trade and time; finish quality depends on the paint work |
| Solid timber five-piece | Stiles, rails and a floating panel | Real joinery; can be refinished | Most labour; ask how it is finished and sealed |
| Melamine (Melteca, Bestwood) | Flat decorated board, edge-banded | Wide decor range at a lower price | A flat board gives a slab door; no shaker recess |
💡 Design tip: Ask your designer which route each quote uses, in writing. “Shaker doors, white” can mean a thermoformed door or a painted one, and the two age, clean and claim under warranty differently.
Which route fits which kitchen?
For a busy family kitchen where the doors get wiped every day, thermoform’s one-piece wrap is the practical default. It also keeps the doors inside one maker’s warranty, and the cabinets they hang on are cut in our own factory on German laser machinery, which is how the custom kitchens our in-house designers draw get a clean, consistent finish from carcass to door. A painted finish earns its extra trade when you want a colour outside a set range, a crisper profile, or a finish you can recoat in ten years. Timber suits the client who wants a piece of joinery and accepts what timber does. The mistake to avoid is choosing the look first and the construction second, so we put the construction question on the table at the first consultation, alongside the colour board.
The Heat, Steam and Sun Rules Behind a Shaker Kitchen
The 50 degree line
This is the rule that shapes a thermoformed shaker kitchen more than any other, and it’s printed plainly in Dezignatek’s data sheet: “Surface temperatures above 50 degrees Celsius may result in delamination and will not be covered by warranty. This includes delamination caused by heat-generating appliances or steam-mops used under doors.” The same section warns that prolonged or excessive exposure to high temperatures or direct sun should be avoided, and that this is “especially true for darker colours that will absorb more heat”.
Delamination means the vinyl lifting away from the board. A bubble or a lifting edge on the door or panel closest to the heat is the sign to look for. Once it happens, the warranty position is clear from the maker’s own words, so the only reliable fix is to design the heat out before the doors are made.
Ovens, cooktops and the doors beside them
Dezignatek’s sheet also says care should be taken not to expose thermoform to high-moisture applications, and it names the places that matter: “This includes above hobs and ovens where exposure to heat and steam may occur.” Its warranty guide lists, among the things the warranty doesn’t cover, “poor design or detailing resulting in the doors being installed incorrectly or too close to heat-generating appliances”.
In practice that turns into a short list of design questions for any shaker kitchen with thermoformed doors:
- Where does the oven sit, and what’s directly beside and above it?
- If it’s under the bench, how close is the nearest door edge to the oven door when it’s open?
- If it’s in a tall housing, does the cupboard above it get warm after the oven’s been on for an hour?
- Which panels sit closest to the cooktop, and does steam from a boiling pot rise straight onto a door edge?
These aren’t questions your installer should be answering on the day. They’re drawing decisions, and the time to settle them is at the design stage, with the appliance installation instructions open on the desk.
Imagine a sage-green shaker kitchen in a renovated villa, with the oven in a tall housing beside the scullery door. The doors look perfect for a year. Then the cupboard above the oven, opened twice a week, starts to show a ripple along its lower edge. Nothing was faulty in the door; the heat had nowhere to go but up into it. That’s the scenario the data sheet is warning about, and it’s avoidable on paper.
💡 Design tip: If you love a dark shaker colour, ask to see where it sits relative to the oven and any north-facing glass on the plan. Dark thermoform absorbs more heat by the maker’s own account, so the darkest doors belong away from both.
Sun through big glass
New Auckland homes often put the kitchen against a wall of glazing, and character renovations often open the back of a villa to the deck with large sliders. Direct sun on a dark door in a west-facing kitchen in February is the kind of prolonged exposure the data sheet means. Dezignatek’s warranty guide also excludes “general fading, and discolouration from UV exposure”, which applies whatever the colour. Lighter colours, a deeper roof overhang, or blinds that actually get used all help. So does placing the run of tall doors on the wall that doesn’t take the afternoon sun.
Steam mops and the cleaning bucket
The other heat source is one people don’t think of as heat at all. Dezignatek’s warranty and care guide says: “Don’t use steam cleaners on or around your Dezignatek doors as this could allow moisture to permeate around the door edge and lead to delamination of the thermoform vinyl.” A steam mop pushed along the kickboard line is hot moisture at exactly the height of the lowest door edges. If steam-mopping the floor is part of your routine, tell your designer early; it’s a reason to think hard about the kickboard and bottom-edge detail, or about a painted or different finish on the lowest fronts.
Shaker Kitchens in Auckland Homes: Villas, Bungalows and New Builds
Villas and the high stud
Shaker is a natural fit for a villa, and the reason is obvious when you stand in one: the square frame echoes the panelled doors, skirtings and sash windows the house already has. But villas in Grey Lynn, Ponsonby and Mt Eden tend to have high studs, and that changes the maths. A shaker kitchen with tall cabinetry to the ceiling becomes a wall of repeated frames, and a deep profile repeated up a tall wall can start to look busy. A slimmer frame, fewer and wider doors on the upper run, or open shelving at the top often keeps the proportion right.
Old houses also bring walls that are out of square, floors that aren’t level and chimney breasts in odd places. Shaker exposes those faults more than a slab door does, because the eye follows the straight lines of every frame and notices when the gap beside a wall tapers. That’s why the measurement stage matters. In our process the final measure happens on site after the deposit, and those measurements feed straight into the factory machines. Scribe panels, the filler strips cut to follow a wall’s actual line, are where a villa shaker kitchen looks either crafted or patched.
Bungalows and 1970s-80s homes
Californian bungalows around Epsom and Mt Albert usually have lower studs and smaller kitchens than villas. Shaker suits them well, but the proportions run the other way: shallow recesses and narrower frames stop a small room from feeling crowded. In 1970s and 1980s brick-and-tile homes across East and South Auckland, shaker is often the bridge between an original, plain house and a client who doesn’t want a kitchen that looks like it belongs in a glass apartment. A light colour, a simple frame and modern benchtop material keep it from tipping into “country kitchen”.
New builds and townhouses
In a new Hobsonville or Flat Bush townhouse, shaker does a different job. The house has crisp plaster, square corners and modern glazing, and a shaker door adds texture without adding fuss. This is also where the hybrid styles live: shaker on the base cabinets with slab uppers, or shaker proportions paired with a finger-pull instead of a handle. If you’re torn between shaker and flat and handle-free, our page on how handleless kitchens are detailed explains why the edge treatment matters on that side of the choice.
💡 Design tip: Count the doors on your elevation drawing. If the tall wall alone has more than a dozen small shaker fronts, ask your designer to show you the same wall with fewer, wider doors before you sign off.
Where shaker doesn’t fit
We’ll tell you when shaker isn’t the answer. A very small apartment kitchen with no window can feel heavier with a profiled door than a plain one. A kitchen with a wall oven tower, a lot of glass and a dark colour palette puts thermoform under exactly the conditions its maker warns about. And if you plan to change the kitchen colour in a few years, a thermoformed shaker door isn’t the route, for a reason we cover in the hardware section. None of these rules shaker out; they just mean the construction or the layout has to answer the problem.
Handles, Hinges and Hardware for Shaker Kitchen Cabinets
Pick handle positions before the doors are made
Shaker doors are the natural home for knobs, cup pulls and short bar handles, and the handle is the cheapest way to shift the mood of the whole room. Brass leans traditional, black leans modern, and a slim bar in the same colour as the door almost disappears. What most people don’t realise is that the handle decision has a warranty side.
Dezignatek’s warranty guide says the warranty won’t apply where “the relevant defect” results from “the door being modified in any way, such as being cut or drilled through the surface or edge”. A handle hole is drilled through the surface by definition, so the sensible approach is to fix handle types, sizes and positions at the design stage and have them drilled once, cleanly and to the drawing. Swapping to a different handle with a different hole spacing in a few years means new holes in a wrapped surface, and that’s a decision best made knowing the maker’s position.
A small practical point on top: on a shaker door, the handle sits on the frame, not the recessed panel, so the frame width limits which handles fit. A wide bar handle on a narrow drawer frame looks crammed. Bring the handle you love to the consultation, or at least its dimensions.
Hinges and soft close
Blum and Hettich hardware both carry a lifetime warranty on our guarantee schedule. Blum’s CLIP top BLUMOTION overview explains that the soft-close mechanism is integrated into the hinge boss, adapts to the size and weight of each door, and can be deactivated on smaller or lighter doors. On a shaker kitchen with many small upper doors, that last point is worth knowing.
Door thickness matters for hinge choice. Blum’s hinge programme for New Zealand lists standard hinges for fronts 15 mm to 24 mm thick, a separate range for “thick doors and profile/thick doors”, and finishes in nickel or onyx black depending on the hinge. A profiled door can need a different hinge from a slab door of the same size, and that’s a specification for your manufacturer to settle before the doors are drilled.
Overlay or inset?
Most kitchens use overlay doors, which cover the front edge of the cabinet. An inset look, with the door sitting inside a frame and flush with it, is a more traditional style that suits some villa kitchens. It’s a different cabinet build, and the gap around every door is on show. If you’re drawn to it, raise it at the first meeting, because it changes the cabinet construction and the hinges as well as the doors.
💡 Design tip: Decide on knobs or bars for drawers separately from doors. Many shaker kitchens look best with knobs on doors and short bars on drawers, and that decision has to be on the drawing before the drilling.
No painting over the wrap later
This one surprises people. The same Dezignatek warranty guide lists “any application of a surface coating” as something the warranty doesn’t cover. So if you choose a thermoformed shaker door in white today and fancy deep green in five years, painting over the vinyl isn’t a route the maker supports. If you think your colour taste will move, that’s a genuine argument for a painted finish from day one, or for keeping the doors neutral and letting the walls, benchtop and handles carry the colour.
Colours, Finishes and Benchtops for a Shaker Style Kitchen
What the thermoform colour range covers
Dezignatek’s thermoform range page lists 45 colours, including 12 new additions, with textures across matt, satin, texture, suede and gloss, and its Series 3 page says every profile can be made in any colour from the thermoform range. Its data sheet adds that solid colours carry Eco Choice Aotearoa accreditation when pressed on 9 mm to 30 mm HDF, and that the HDF has an E0 formaldehyde emission rating under AS/NZS 1859.2. For a shaker kitchen, texture is the decision people underrate. A satin or matt finish lets the shadow line in the recess do its work. A high gloss on a shaker profile bounces light off every edge and tends to look busier.
Choosing the colour without regretting it
White and warm whites are the safe base, and they’re kind to small and dark rooms. In a south-facing villa kitchen that gets little direct light, a mid-tone green or blue can turn murky by mid-afternoon, so judge it in the room at that hour, against the timber floor it will sit on.
Two-tone kitchens, with a coloured island or lower run and lighter uppers, are a good way to use a stronger colour without committing every door to it. Whatever you choose, don’t choose it from a screen. Dezignatek’s warranty guide is blunt that a change of mind because a colour “has only a slight variation from the colour sample or door sample provided or printed or online illustrations” isn’t covered. Door samples go to joinery and design professionals, according to Dezignatek’s profile pages, so ask your designer to bring them to your house and look at them in morning and evening light.
💡 Design tip: Put the door sample, the benchtop sample and the handle together on the floor where the kitchen will be, then look at them standing up. Three samples seen together tell you more than any render.
Benchtops that suit shaker
Shaker is forgiving on benchtops. A thin, square-edged engineered stone top keeps a shaker kitchen crisp; a timber top warms it up; a laminate top keeps the budget in check. A heavy bevelled or ogee stone edge can tip a shaker kitchen into the more ornate end of the style, so most people pair the simple door with a simple edge. Price is usually the deciding factor here, and benchtops are a separate line from cabinetry in every quote we write. If you’re comparing materials on cost, our kitchen cabinet cost guide below lists benchtops as an add-on to the cabinetry bands.
Splashbacks, lighting and the rest
A shaker kitchen doesn’t need a statement splashback, and often looks better without one. Subway-style tiles laid simply, a plain glass panel or a slab of the benchtop material all work. Lighting deserves more thought than it usually gets, because the profile relies on light raking across it. Think in layers: general ceiling light for the room, task lighting under the wall cabinets for the bench, and any accent lighting in open shelves. The under-cabinet task layer is the one that picks out the frame on the base doors; downlights directly overhead flatten it. Settle the light positions on the drawing before the cabinets are made.
Important note: Under-cabinet lighting, benchtop power and any new circuits are electrical work. Have a registered electrician design and install them, and plan the cable routes with your kitchen designer before manufacture.
What a Shaker Kitchen Costs in Auckland, and How to Brief One
The published cabinetry bands
There’s no honest single price for “a shaker kitchen”, because the door style is only one variable. Our kitchen cabinet cost guide publishes these 2026 Auckland ranges for kitchen cabinetry supply and installation, excluding benchtops and appliances:
| Cabinetry tier | Typical range (Auckland) | What’s included |
|---|---|---|
| Budget / Flat-pack modular | $8,000–$14,000 | Standard melamine, basic hardware, simple layout |
| Mid-range custom | $15,000–$24,000 | Custom-sized cabinets, Melteca or moisture-resistant board, Blum or Hettich soft-close |
| Upper mid / premium | $25,000–$35,000 | Full-height cabinets, polyurethane or veneer finish, drawer-heavy, pantry systems, integrated hardware |
| High-end / bespoke | $35,000–$55,000+ | Handleless profiles, premium veneer or lacquer, full-extension pull-outs, integrated appliance panels |
The same guide notes that most Auckland family kitchens land in the $15,000–$28,000 range for cabinetry alone. Where a shaker kitchen falls depends far more on size, the number of drawers, full-height cabinets and the finish route than on the profile itself.
What moves a shaker kitchen up or down
Four things push a shaker quote around more than anything else.
The first is the number of fronts: a shaker kitchen with many small doors costs more than one with fewer, larger ones, because each front is made, wrapped or painted, drilled and hung. The second is the finish route: a painted finish adds a trade and preparation time that a thermoformed door doesn’t. The third is drawers versus doors, since drawer runners and boxes cost more than a hinge. The fourth is height, because cabinetry to the ceiling in a high-stud villa means more cabinetry. The quickest way to a real number is to put your own room size and layout into the calculator, which emails you an Auckland range, then bring that to a consultation.
How to brief a shaker kitchen so the quotes compare
If you get more than one quote, make sure each one answers the same questions:
- Which door profile, by name, and from which maker?
- Thermoform, paint-ready and painted, or timber?
- Which colour and texture?
- Which hinge and drawer system?
- Which handle, and who drills it?
- Which panels sit beside the oven and the cooktop, and what’s the detail there?
- Is the benchtop in the quote or separate?
A quote that just says “shaker doors, white, soft close” leaves every one of those open, and the cheapest quote on paper is often the one that’s left the most out.
Our own process runs in a set order. After the first consultation, the designer develops an estimate and a 3D design that reflects the conversation, sent to you within 1-2 days. Once you’ve chosen the final design and materials, the kitchen is costed and you get a detailed fixed quote before manufacturing begins. On installation day the cabinetry takes between 1-2 days to install, then the benchtops are templated, with installation about 10 days later.
💡 Design tip: Ask each quoting company for the warranty on the doors and the hardware by name. Ours are listed line by line, and a quote that can’t name its door maker can’t tell you whose warranty you’d be relying on.
Living With a Shaker Kitchen: Cleaning, Care and Warranty Claims
Cleaning the recess
The recessed panel is the one place a shaker door collects more than a slab does: a thin line of dust and grease where the panel meets the frame. Dezignatek’s care advice for thermoform is simple. Wipe down with a clean, damp cloth, then wipe dry. For spills, splashes and greasy marks, use warm water and detergent or a general-purpose spray and wipe cleaner, then rinse with a clean damp cloth and dry. A soft cloth folded over a fingertip gets into the corner of the recess without scrubbing.
The list of what not to use is longer, and worth sticking on the inside of the pantry door. The data sheet rules out abrasive cleaners and tools (“Jif, Vim, Brasso, steel wool or abrasive sponges”), paint thinners, solvents and methylated spirits “under any circumstances”, and citrus-based cleaners, which “may cause damage and leave a sticky residue on the surface”. The care guide adds hard-bristle brushes such as nylon or bamboo, and scrapers or blades. An old toothbrush in the recess is exactly the tool it means.
The first week after installation
Thermoformed doors usually arrive with a protective film on the face. Dezignatek’s care guide says to leave it on until all trades have finished, and warns that the film itself may show scuffs, scratches and marks from manufacturing, transport and installation when it comes off, which “does not mean that the surface is faulty or has been damaged”. Peel it carefully, inspect the surface, wipe it with a damp cloth and dry it. If there’s a genuine mark on the door underneath, that’s the moment to raise it with your installer.
💡 Design tip: Leave the film on through painting, electrical and plumbing work. Pulling it off early to admire the doors is how sawdust and paint end up in the recess.
How a door warranty claim actually works
Dezignatek offers a 10-year warranty against product and manufacturing defects, from the date the joiner or kitchen manufacturer buys the doors, and the benefit transfers to the homeowner on installation. The Dezignatek Product Warranty and Care Guide sets out how a claim works: claims go to Dezignatek in the first instance through the joiner or kitchen manufacturer who installed the doors, after they’ve inspected them, and they must be submitted within 30 days of the defect becoming apparent. The guide also says the warranty is in addition to your rights under the Consumer Guarantees Act 1993.
Two things follow for you. Keep the name of the company that made and installed your kitchen, because that’s your route to the door maker. And don’t sit on a bubble or a lifting edge for a season; tell your kitchen company as soon as you see it. On our kitchens, the door, the hinge, the installation and the workmanship sit with one company, and our guarantee on the kitchen transfers to the next owner if you sell.
What a well-specified shaker kitchen asks of you
Not much, as long as the design did its job. A wipe with a damp cloth, no steam mop near the doors, no abrasive cleaners in the recess, and a quick call if something lifts. The hard work happens earlier: choosing the construction, keeping heat and sun away from the doors on paper, fixing the handles before the drilling, and seeing real samples in your own light.
Getting Your Shaker Kitchen Right First Time
A shaker kitchen is one of the easiest styles to like and one of the easiest to get slightly wrong. The door you choose in the showroom is a construction as much as a look, and its maker has already written down where it will and won’t behave. Read those rules into the drawing and you get a kitchen that looks as settled years from now as it did on the day the film came off. Bring your floor plan, a photo of the room and the handle you’ve fallen for, and we’ll show you real door samples in your own light. You can reach Little Giant Interiors on 09 837 3450.
➡ Book your free in-home design consultation with Little Giant Interiors
➡ See how our design and build process works
➡ Shaker, slab and everything between: custom kitchens our designers draw
What is a shaker kitchen?
A shaker kitchen is defined by its doors: a square, flat frame around a centre panel set slightly lower than the frame. There is no carving or curved moulding, just that single recess and the shadow line it throws. The style takes its name from a traditional five-piece timber door, but in New Zealand the look is often made from one HDF MR board wrapped in thermoform vinyl, or from a paint-ready blank that a painter finishes.
Are shaker kitchens dated?
The door shape itself ages slowly because it sits between a plain slab and an ornate profile, so it suits villas and new townhouses alike. What dates a kitchen faster is the colour and the hardware chosen around it. Keep the doors in a colour you can live with for a long time and let handles, walls and the benchtop carry any trend colour, since those are far easier to change than the doors.
How are shaker doors made in New Zealand?
There are three main routes. Thermoform wraps vinyl over the face and edges of an HDF MR board under heat, vacuum and pressure, with the profile already in the board. Paint-ready doors arrive sanded and need further sanding, preparation and painting by a painter. Solid timber five-piece doors use stiles, rails and a floating panel. Melamine boards such as Melteca make flat slab doors rather than a shaker profile.
Can you put a thermoform shaker door next to an oven?
You can, but the detail has to be designed. Dezignatek's data sheet says surface temperatures above 50 degrees Celsius may cause delamination that the warranty does not cover, and it names hobs and ovens as places where heat and steam occur. Its warranty also excludes doors installed too close to heat-generating appliances. Settle what sits beside and above the oven on the drawing, and keep the darkest colours away from it.
Can I paint my thermoform shaker doors later?
Not if you want to keep the maker's warranty. Dezignatek's warranty guide lists any application of a surface coating as something it does not cover. If you expect your colour taste to change, consider a painted finish from the start, which can be recoated later, or choose a neutral thermoform door and put the stronger colour on the walls, the island or the handles instead.
How much does a shaker kitchen cost in Auckland?
Little Giant Interiors publishes 2026 Auckland bands for kitchen cabinetry supply and installation, excluding benchtops and appliances: $8,000 to $14,000 budget or flat-pack modular, $15,000 to $24,000 mid-range custom, $25,000 to $35,000 upper mid or premium, and $35,000 to $55,000+ high-end or bespoke. Most Auckland family kitchens land at $15,000 to $28,000 for cabinetry alone. Size, drawers, height and the finish route move a shaker kitchen within those bands.
What handles suit a shaker kitchen?
Knobs, cup pulls and short bar handles are the usual choices, set on the frame rather than the recessed panel, so the frame width limits the size. Brass leans traditional, black leans modern. Fix the handle type and positions at the design stage, because Dezignatek's warranty does not cover defects that result from a door being cut or drilled through its surface or edge after the fact.
How do you clean shaker cabinet doors?
Wipe with a clean, damp cloth and dry it off. For grease and spills use warm water and detergent or a general-purpose spray and wipe, then rinse with a damp cloth and dry. A soft cloth over a fingertip reaches the corner of the recess. Dezignatek says never use abrasive cleaners, steel wool, solvents, methylated spirits, citrus-based cleaners, hard-bristle brushes or steam cleaners on thermoform doors.
Do shaker doors need special hinges?
Sometimes. Blum's New Zealand hinge programme lists standard hinges for fronts 15 mm to 24 mm thick and a separate range for thick and profiled doors, in nickel or onyx black depending on the hinge. Its CLIP top BLUMOTION hinges have soft close built into the hinge boss, which can be switched off on small, light doors. Your manufacturer should match the hinge to the actual door thickness and profile.
How long does a Dezignatek door warranty last and how do I claim?
Dezignatek offers a 10-year warranty against product and manufacturing defects, from the date the joiner or kitchen manufacturer buys the doors, and the benefit transfers to the homeowner on installation. Claims go through the company that installed the doors, after they inspect them, and must reach Dezignatek within 30 days of the defect becoming apparent. Contact your kitchen company as soon as you notice a problem.
Related guides
- Kitchen cabinet doors compared: thermoform, melamine, acrylic and more
- How to compare kitchen quotes line by line
- Looking after kitchen cabinets once they’re installed
Have you been putting off your kitchen renovation?
We offer flexible finance options to help you get your dream kitchen sooner. Learn more about our interest-free finance options.