
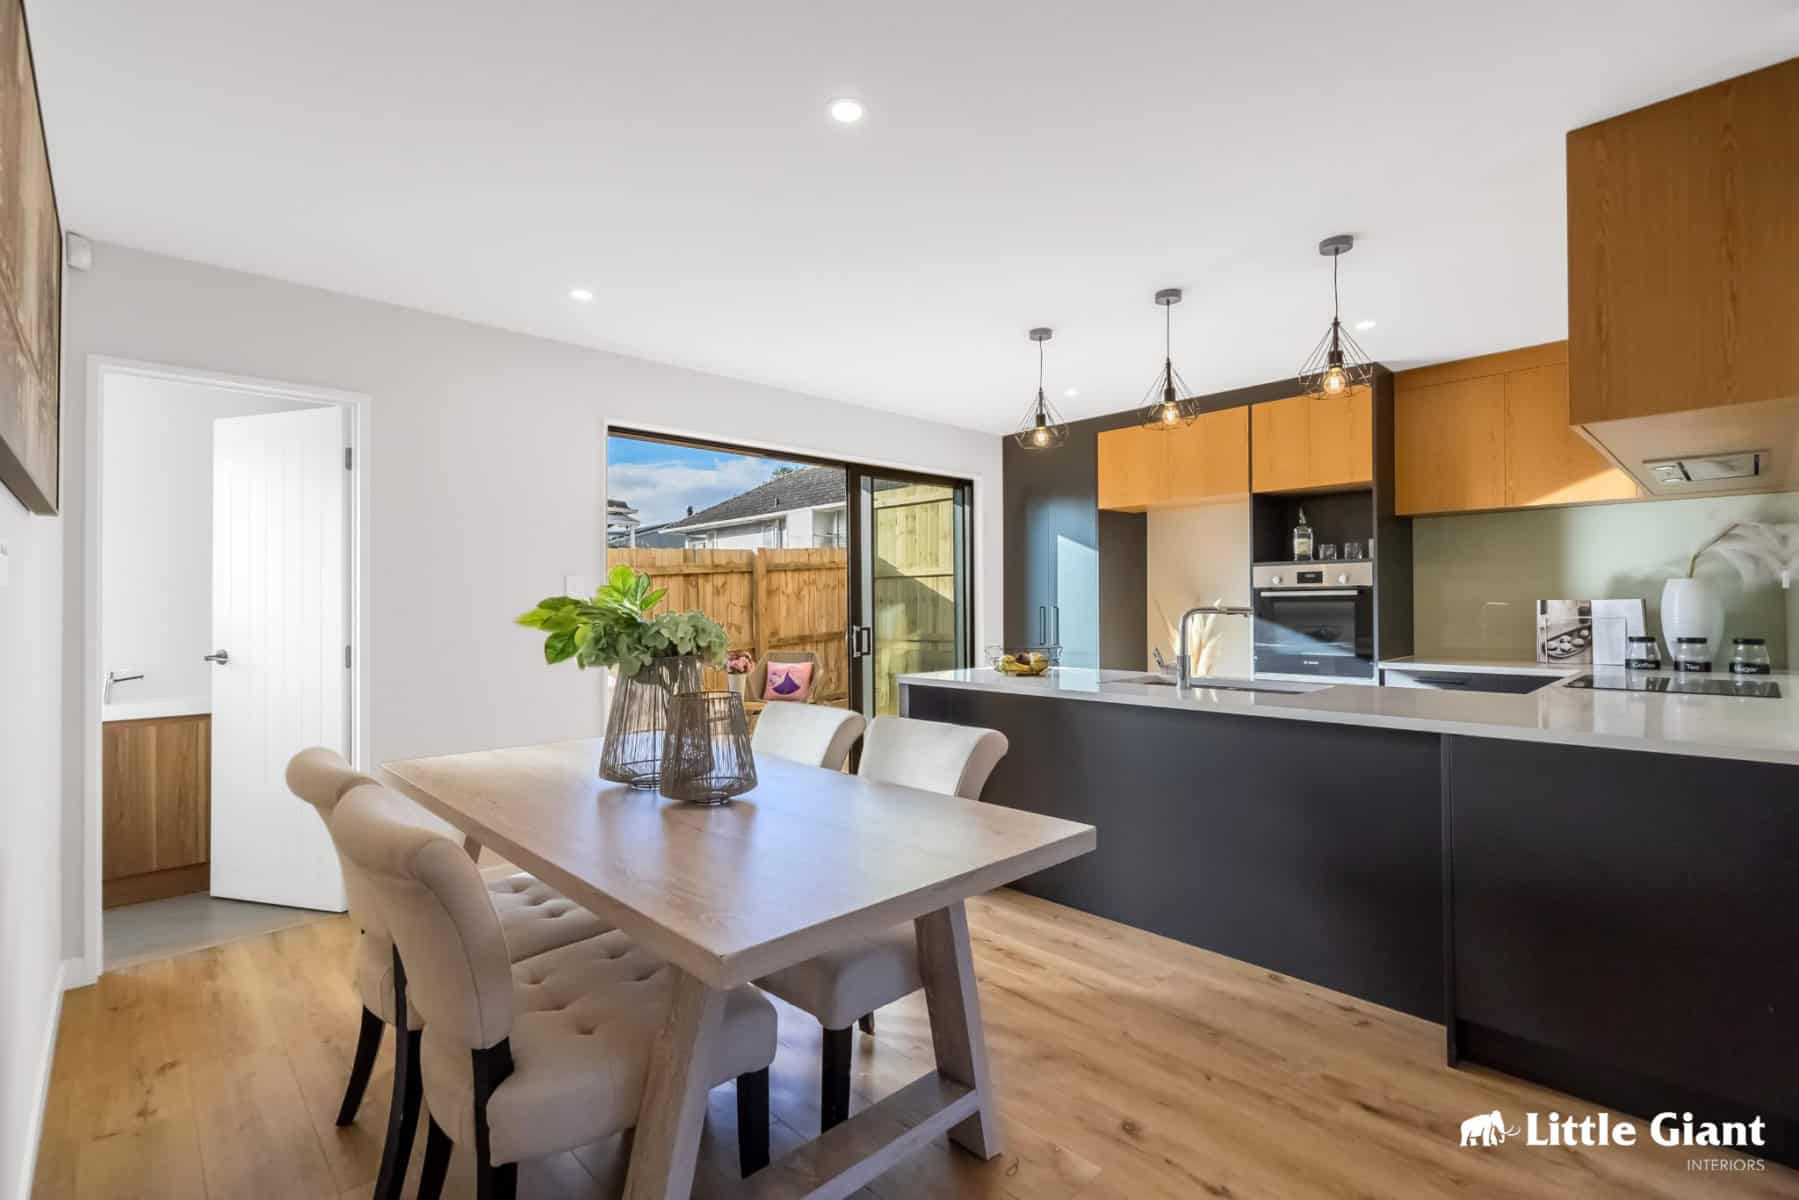

Quick answer: The best kitchen lighting ideas are decided in the cabinetry drawing: light under the wall cabinets, inside the pantry and along the plinth needs channels, cable holes and driver space cut before the carcass is made.
You’ve picked the doors, the benchtop and the handles. Then, a fortnight before install, someone asks where the strip lighting goes and whether there’s room for the driver, and nobody has an answer. That’s the moment a lot of kitchen lighting gets downgraded to a row of downlights and a stick-on strip. It doesn’t have to be. Most of what makes a kitchen pleasant to cook in after dark is built into the cabinetry, and cabinetry is the part of the room that’s easiest to get right on paper and hardest to change once it’s cut.
We design, make and install kitchens from our Rosedale factory, so we see lighting from the cabinetmaker’s bench: the groove routed for a strip, the hole drilled for a cable, the void left behind a panel for a driver. This guide works through each place light can live in a kitchen and what the cabinetry has to do to carry it. Where a rule or a limit decides the answer, we’ve taken it from the source: New Zealand’s electrical regulations, the Building Code, and the technical documents Laminex and Dezignatek publish for the boards and doors we build with.
Kitchen Lighting Ideas That Start in the Cabinetry Drawing
Lighting designers talk about layers, and the idea holds up in a kitchen better than anywhere else in the house. One light source can’t do every job. A ceiling full of downlights lights the floor and the tops of your head nicely, then leaves the bench in shadow the moment you lean over it. A single pendant looks lovely and lights a circle. The kitchens that work at 6pm in July use several kinds of light, each doing one thing well.

The four jobs light does in a kitchen
Think of it as four jobs. General light lets you move around safely and find things: usually ceiling downlights or a couple of surface fittings. Task light puts light exactly where your hands are: the benchtop, the sink, the cooktop. Display or accent light picks out something you want seen, such as glass-fronted cabinets, open shelves or a textured splashback. Storage light is the one people forget, and it’s the light that switches on when you open a pantry door or a tall cupboard so you can see the back of the shelf.
There’s a fifth, softer job too. A low strip under the plinth or along the toe of the island gives you enough light to cross the room at night without switching on the whole kitchen. It’s a small thing until you’ve lived with it.
Which of those jobs the cabinetry carries
Look at that list again and notice where the fittings sit. General light is in the ceiling, and that’s the electrician’s and the ceiling’s business. Everything else lives in or on the cabinetry: under the wall cabinets, inside the pantry, behind a glass door, under the plinth, beneath the overhang of an island. Three of the four jobs are carried by the joinery. That changes who has to think about it, and when.
A strip light under a wall cabinet is only as good as the detail that hides it. A sensor light in a pantry needs a switch position, a cable path and somewhere for its driver to live. A lit glass cabinet needs a decision about whether the shelves are glass or board, because a board shelf blocks the light from reaching anything below it. All of that is joinery design. If it isn’t on the drawing, it isn’t in the cabinets when they arrive on site.
💡 Design tip: Ask for the lighting to be marked on the cabinetry elevations themselves. A ceiling plan alone won’t get it cut. If a strip, a sensor or a driver isn’t drawn on the cabinet it belongs to, it won’t be cut for in the factory.
There’s no Building Code lighting level for your kitchen
People sometimes assume there’s a minimum standard they have to meet. For a house kitchen, there isn’t one in the Building Code. Clause G8 (Artificial light) in Schedule 1 of the Building Regulations 1992 sets a level of no less than 20 lux at floor level, but it applies to exitways in multi-unit dwellings, group dwellings and communal and commercial buildings, to access routes, and to the common spaces of multi-unit dwellings. The inside of your own kitchen isn’t on that list.
That’s worth knowing for two reasons. First, nobody will sign your kitchen lighting off as adequate; the only test it has to pass is yours. Second, it means the decisions are design decisions, and the earlier they’re made the cheaper they are. The electrical work itself is a different matter, and it is tightly regulated. We’ll come to that further down.
The useful question is which jobs you need light to do in your kitchen, and which of those the cabinetry has to be built to carry. The rest of this guide takes them one at a time.
Under-Cabinet Lighting: Light on the Bench Without the Glare
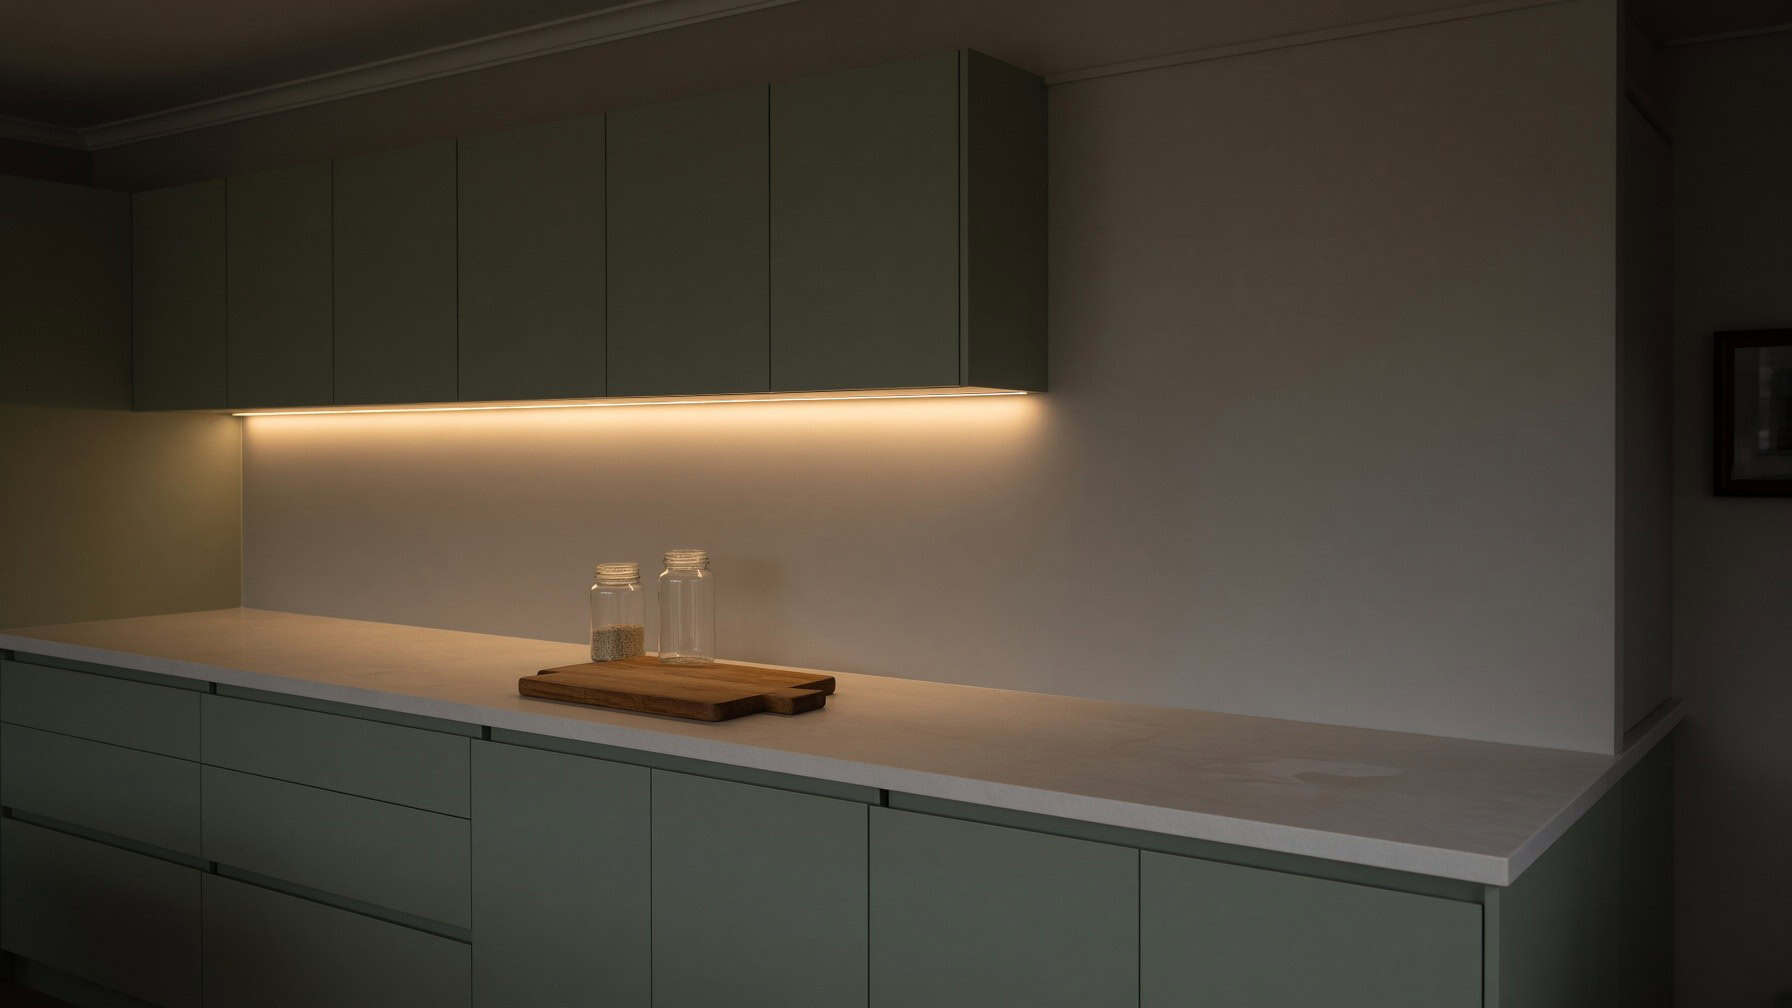
If you only spend money on one kind of cabinetry lighting, make it this one. Light from under the wall cabinets lands straight on the benchtop, which is where you chop, read recipes, check whether the chicken is done and wipe up. It’s the single biggest difference between a kitchen that feels bright when you’re working and one that only looks bright from the doorway.
Why ceiling lights leave you working in your own shadow
Picture a typical wall run. The benchtop sits against the wall, the wall cabinets hang above it, and the downlights are in the ceiling somewhere behind where you stand. When you face the bench, your head and shoulders are between those downlights and your hands. The light comes over your back and you cast a shadow exactly where you’re working. Move the downlights closer to the wall and the wall cabinets themselves start to block them, so the bench under the cabinets actually gets darker.
A strip mounted under the wall cabinets solves both problems at once. It’s in front of you, it’s close to the work, and nothing stands between it and the bench. That’s why it does more for a working kitchen than doubling the downlights would.
Front, middle or back of the cabinet
Where the strip sits across the depth of the cabinet changes what it lights. Set towards the back, near the splashback, it washes the wall and makes a tiled or stone splashback glow, but it lights the front of the bench less well and shows every bump in the wall. Set towards the front edge, it throws light forward onto the area where your hands actually are and leaves the splashback in softer light.
For a working bench, we generally draw the strip towards the front of the cabinet underside, set back far enough that you can’t see the light source itself when you stand at the bench. If the splashback is the feature you want lit, a second strip at the back is an option, but it’s a design choice with a cost, and it’s worth seeing in the 3D design before you commit.
Recessed into the base or hidden behind a lip
A strip can be fixed to the underside of a cabinet in two broad ways. The first is surface-mounted: an aluminium channel screwed to the bottom panel. It’s simple and it can be added late, but it hangs below the cabinet and anyone sitting at an island or a table can see it.
The second is integrated. The channel is let into a groove routed into the cabinet base, or the bottom panel is set up inside the carcass so the cabinet sides and front form a shallow lip that hides the strip. Either way the light source disappears and you see only light on the bench. An integrated strip has to be designed before the cabinet is made, because the groove, the raised base or the lip is part of how the carcass is cut and assembled. Ask for it after the cabinets are built and you’re back to surface mounting.
This is where making the cabinets ourselves matters. Every cabinet is made in our Rosedale factory on German laser machinery for a precise finish, so a groove or a cable hole that’s on the drawing is made with the rest of the panel, before the carcass is assembled. There’s no reason to drill it on site.
💡 Design tip: Sit on a bar stool at the island in the 3D design and look up at the wall cabinets. If you can see a strip or its channel from there, ask for a lip or a recess before the design is signed off.
What a glossy benchtop or splashback does to the strip
Polished surfaces reflect the light source itself. A high-gloss benchtop, a polished stone splashback or a glass splashback will mirror the strip back at you, and if the strip shows individual points of light you’ll see a neat row of bright dots reflected in the surface. A strip with a diffuser cover reads as a continuous line instead, and a matt or honed benchtop softens the reflection further.
This is one of those details that’s easy to miss on a sample board under showroom lighting and obvious on the first night in the finished kitchen. If you’re choosing a gloss finish anywhere near the bench, talk about the diffuser and the strip position at the same time.
Planning for the end of the run
Strips run between the cabinet sides, so think about the ends. A wall cabinet run that stops short of a tall pantry, or a run broken by a rangehood, gives you several short strips rather than one long one. Each short strip needs its own feed, so the cable path between them has to be planned: through the cabinet sides, behind the back panels, or up into the cabinets and across. That route is drawn and drilled in the factory, which is far tidier than cables clipped along the underside on site.
The rangehood deserves its own thought. Many rangehoods carry their own lights over the cooktop, in which case the strip stops either side of it. Where the rangehood is concealed inside a cabinet, the cabinet around it is a heat zone, which matters for where drivers and cables can go. We cover that in the section on heat below.
Lighting Inside Pantries, Tall Cupboards and Display Cabinets
The storage you can’t see into is the storage you stop using. A floor-to-ceiling pantry with a deep shelf at shoulder height is wonderful until it’s 7pm and the jar you want is at the back in shadow. Light inside cabinetry turns that cupboard into somewhere you can actually find things, and because it only comes on when you need it, it’s one of the cheapest kinds of light to run.
Pantries and tall cupboards
A pantry light works best when you never touch a switch. There are two common ways to do it. A door-activated switch turns the light on as the door opens, the way a fridge light does. A motion sensor inside the cabinet does the same thing without a contact in the door frame. Either way the light sits at the front of the cabinet, usually on the inside face of the cabinet side or under each shelf edge, shining back into the cupboard so it lights the contents and stays out of your eyes.
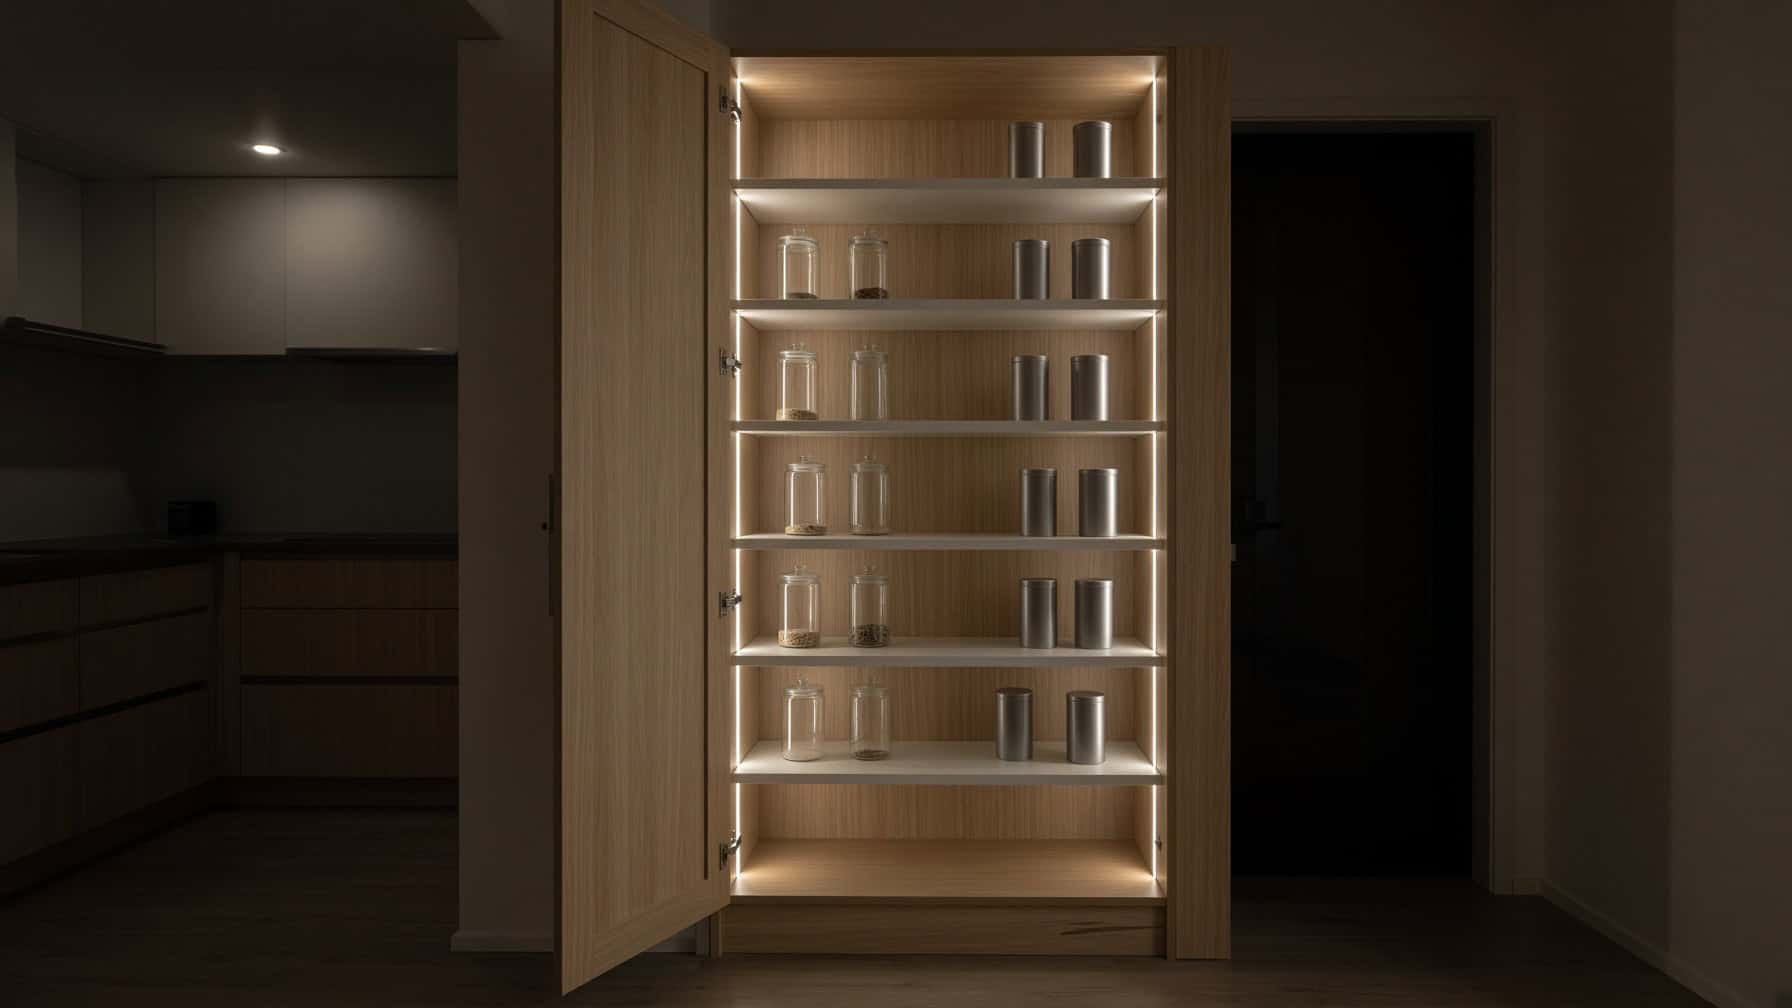
The cabinetry has to allow for it. The switch or sensor needs a position that the door or the shelf won’t knock. The strip needs a groove or a channel so a box sliding off the shelf doesn’t snag it. The cable has to travel from the strip to the driver without crossing a hinge or a moving part. In a pantry with adjustable shelves, the light belongs on the cabinet sides, not under the shelves, because a light fixed to a shelf can’t move when you move the shelf.
Walk-in pantries and sculleries are a halfway case. They’re small rooms, so they usually get a ceiling light on a switch or sensor at the door, but the shelves along the back wall can still use the same under-shelf strip as a kitchen wall cabinet. A separate pantry raises its own questions about layout and storage, which our butler’s pantry guide in the related reading below covers.
Glass-fronted display cabinets
A glass door is an invitation to light the inside. The trick is to decide what you want lit. If the cabinet holds glassware, light from above through glass shelves lets the light fall through every level, and the glasses catch it nicely. If the shelves are board, each shelf blocks the light below it, so each level needs its own strip under the shelf above, which is more cabling and more drivers.
The back panel matters as much as the light. A light-coloured back reflects the light forward and makes the cabinet glow. A dark back absorbs it, which can look dramatic but needs more light to read. Choose the back panel and the shelf material at the same time as the lighting.
Drawers and deep base units
Lights inside drawers exist, but they’re a harder detail than a pantry because the drawer moves and the cable can’t. Where the drawer box itself carries the light, the simplest option is a battery or rechargeable unit with its own sensor. Where the light is fixed to the cabinet and shines down into an open drawer, the cabinet needs a strip at the front of the opening, above the drawer, which only works on the top drawer or in a tall unit with internal drawers.
Honestly, for most base drawers, good under-cabinet lighting above the bench and a light-coloured drawer interior do the job. Save cabinet lighting for the tall units and the dark corners where it actually earns its place.
💡 Design tip: If you’re not sure about wired lights in a particular cupboard, ask for the cable path and a driver position to be built in anyway. An empty route costs little in the factory, and you can add the light later without drilling a finished panel.
When a plug-in or battery light is the honest answer
Not every cupboard needs wiring. A rechargeable stick-on light in a seldom-used cupboard, a battery puck in a linen press, a plug-in strip in a cabinet that already has a socket inside it for an appliance: any of those can be the right answer, and none of them needs an electrician to install.
We’d rather tell you that than build wiring into a cupboard you open twice a month. The rule of thumb is simple. If you’ll open it every day, wire it. If you won’t, don’t.
Accent Lighting: Plinths, Open Shelves and Over the Cabinets
Accent light is the layer that makes a kitchen feel finished in the evening. It won’t help you cook. In an open-plan home, though, the kitchen is part of the living room for most of the evening, and that’s when this layer earns its keep.

Plinth and kickboard lighting
A strip along the plinth at the base of the cabinets washes the floor with a low line of light. It makes the cabinets look as if they float, and at night it’s enough to get a glass of water without switching on anything else. It’s also one of the easiest accent lights to build in, because the kickboard is already a separate panel set back under the cabinets.
The strip sits in the recess under the cabinet base, aimed down and forward at the floor. Two things are worth getting right. First, the light shows every mark on the floor, so a glossy tile or a dark timber will show crumbs and footprints more than a mid-tone matt floor. Second, the kickboard area takes knocks from feet, vacuum cleaners and mops, so the strip sits up inside the recess where it’s protected. On the face of the kickboard it won’t last.
Open shelves and feature niches
Open shelving looks best lit from above, with a strip under each shelf lighting what’s on the shelf below. On a run of floating shelves the cable is the hard part, because there’s no cabinet to hide it in. It either runs inside the shelf itself, which means the shelf is built hollow or grooved for it, or it runs in a channel in the wall behind, which means coordinating with the wall lining before the shelves go up. A built-in media wall in the living room has exactly the same problem, and the same answer.
A niche, such as a recessed shelf for cookbooks in the end of a tall unit, is easier. The light sits in the top of the niche and the cable runs up through the cabinet above, out of sight.
Light above the wall cabinets
Where the wall cabinets stop short of the ceiling, a strip on top of them, aimed up, bounces light off the ceiling. It’s soft, indirect and makes a low room feel taller. It only works if there’s a reasonable gap between the cabinet tops and the ceiling, and it shows whatever lives up there, so it suits kitchens where the cabinet tops are kept clear or closed in with a bulkhead that has a lip at the front.
If your wall cabinets go to the ceiling, which also removes the dust shelf on top, this option disappears and the under-cabinet strip and pendants carry more of the job.
One colour of light across the whole kitchen
Every lamp and every strip is labelled with a colour temperature, given in kelvin. The lower the number, the warmer and yellower the light; the higher it is, the cooler and bluer. Pick one colour temperature and use it on every fitting in the kitchen, ceiling, strip, pantry and plinth alike. A warm under-cabinet strip next to cool downlights makes the bench look a different colour from the floor, and the eye notices it straight away, especially on white or stone surfaces.
It also matters for your finishes. A warm oak-look Melteca board, a white thermoform door and a grey stone benchtop all shift in colour under different light. Look at your actual samples under the colour of light you’ve chosen before you sign the colours off, ideally in the evening.
💡 Design tip: Put the plinth and over-cabinet strips on their own dimmable circuit, separate from the task lighting. Then the kitchen can be bright for cooking and low for the rest of the evening without changing a fitting.
Pendants Over the Island: Let the Bench Decide Where They Hang
Pendants are the lights everyone notices, and they’re usually chosen first. That’s fine. Just let the island and the benchtop decide where they hang.
Centre on the bench, not the room
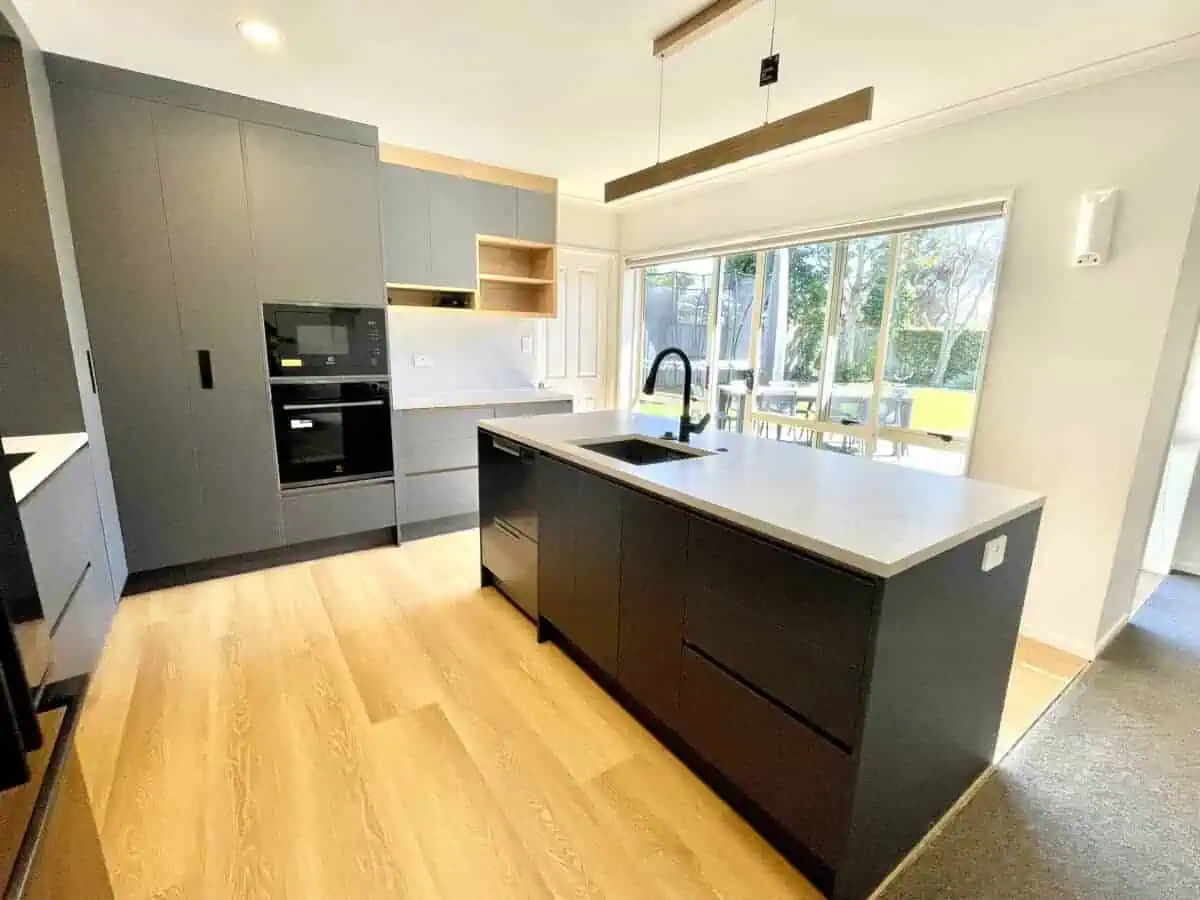
An island is rarely in the exact centre of a room, and its benchtop is rarely centred on the cabinets below it. Overhangs for stools, a waterfall end or a sink off to one side all move the useful centre of the bench. Pendants hung on the centre line of the ceiling can end up over the edge of the bench or over the stools.
The fix is to set the pendant positions from the cabinetry drawing. Once the island and its benchtop are drawn, the centre line of the benchtop is known, and the electrician can put the ceiling outlets exactly there. That’s another reason the cabinetry design needs to come before the electrical first fix, and another reason we liaise with your electrician about locations, as our custom kitchen design service includes.
How many pendants and how high
The number of pendants follows the length of the bench and the size of the fittings. Two large pendants suit a shorter island; a longer bench may take three smaller ones or a linear fitting. Space them evenly along the working length, leaving a little room at each end, so the light lands on the bench and stops short of the floor beyond it.
Height is a balance between light and sightlines. Lower pendants put more light on the bench and feel more intimate, but they block the view across the island to the living room and can catch tall people. Higher pendants clear the view but spread the light. Mark the height on the elevation in the 3D design and stand there with a tape measure before the ceiling outlets go in.
What the island cabinetry has to carry
An island often needs power of its own: a socket for appliances, sometimes a cooktop or a dishwasher, sometimes under-bench lighting along the stool side. All of that power comes up through the floor or along the cabinetry, so the island cabinets need cable routes and service voids planned in from the start. If you’re adding strip lighting under the overhang on the seating side, it needs the same thought as under a wall cabinet: a recess so the strip can’t be seen from the stools, and a route for its cable.
The island itself has more to plan than the light. Our guide to building an island around its cabinetry and benchtop covers the overhangs, supports and service runs in detail.
💡 Design tip: Hang a paper template or a cardboard box at your chosen pendant height and live with it for an evening. It’s the cheapest way to find out whether the pendants block the view or bump a head.
Heat, Drivers and the 50°C Line Two Makers Draw
This is the part of kitchen lighting nobody puts in the brochure, and it’s the part that decides whether your cabinetry lasts. Light fittings and the electronics that power them give off heat. Cabinetry boards and doors have published heat limits. If the two meet in an enclosed space, the boards and doors lose.
What a driver is and why it needs a home
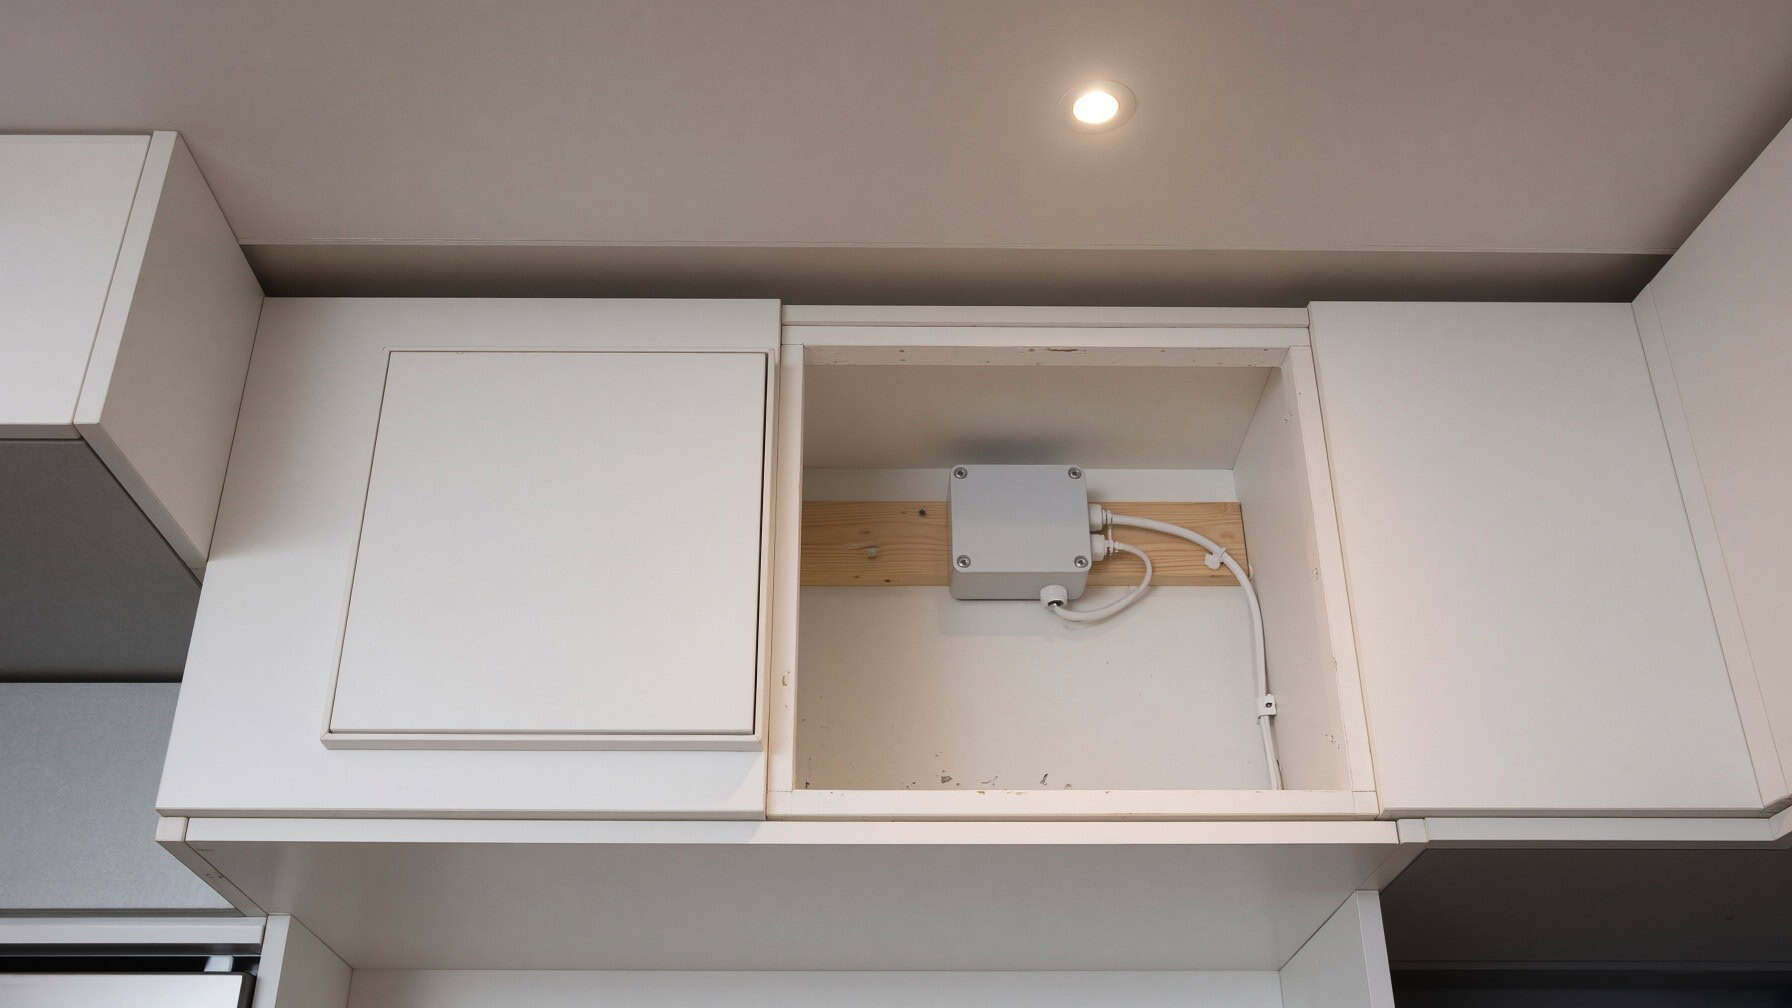
LED strips are usually supplied as extra-low-voltage products, powered through a driver: a small box that converts mains power to the low voltage the strip runs on. Every strip or group of strips needs one, and the driver has to live somewhere. It can’t be buried where nobody can reach it, because drivers can fail and need replacing, and it shouldn’t be packed into a sealed void with no air, because it warms up while it works.
In a well-planned kitchen the drivers live in a known, accessible spot: above the wall cabinets behind a removable panel, in a ventilated void at the end of a run, or in a base cabinet where a panel can be lifted. That spot is a decision for the cabinetry drawing, because it’s a space the carcass has to leave open.
What Laminex says about heat and Melteca
Laminex’s Melteca Technical Data Sheet (issued November 2022) is direct about heat. It says precautions must be taken to keep Melteca clear of nearby heat sources, and that the structural life of the substrate may be impaired if temperatures exceed 50°C for prolonged periods. It adds that Melteca can withstand short-term exposure to 65°C above ambient without fear of ignition, and that the manufacturers of heat appliances must be consulted to make sure the correct clearances and ventilation are provided.
The same sheet also says that any exposed substrate must be sealed before service. That’s directly relevant to lighting, because every cable hole and every routed groove for a strip opens up the particleboard or MDF core of the panel. That’s one reason we’d rather make those cuts in the factory, where they’re planned as part of the cabinet and can be dealt with before it’s assembled. A hole drilled on site with a hole saw is a raw edge unless someone goes back and seals it.
What Dezignatek says about heat and its doors
Dezignatek’s Technical Data Sheet (November 2024) sets the same number for thermoformed doors. It says prolonged or excessive exposure to high temperatures or direct sun should be avoided, that this is especially true for darker colours because they absorb more heat, and that surface temperatures above 50 degrees Celsius may result in delamination and will not be covered by warranty. It names delamination caused by heat-generating appliances among the causes.
The Dezignatek Warranty and Care Guide (April 2025) lists what its warranty won’t cover.
Two items bear directly on lighting. One is a defect resulting from the door being modified in any way, such as being cut or drilled through the surface or edge. Another is poor design or detailing resulting in the doors being installed too close to heat-generating appliances. Put simply, a thermoform door must not be drilled for a sensor or a cable after it’s made, and a driver or a hot fitting shouldn’t sit hard against the back of one. If you’ve chosen thermoform, our guide to thermoform doors and the heat limit they carry goes further into placement around ovens and cooktops.
Putting the two limits into the design
Neither document says a light fitting will reach 50°C, and we won’t claim it will. What they tell you is where the line sits for the materials, and that the responsibility for clearances and ventilation sits with the design.
In practice that means a few simple rules on the drawing. Drivers go somewhere air can move and a hand can reach. Nothing that runs warm is packed against the back of a door, especially a dark one. Sensors and switches go on the cabinet. Door faces stay uncut. Cable holes and grooves are made in the factory, before assembly, where they can be finished properly.
The concealed rangehood cabinet deserves the most care. It’s already a heat and steam zone, and Dezignatek’s sheet says care should be taken not to expose its doors to high moisture applications, including above hobs and ovens where heat and steam may occur. Keep drivers and cable junctions out of that cabinet altogether.
💡 Design tip: Choosing a dark thermoform colour? Ask your designer to show you on the drawing where every driver and warm fitting sits relative to the doors. Dezignatek’s own sheet singles out darker colours for heat.
Who Does the Wiring, and When It Has to Be Decided
Good kitchen lighting is a joint effort between the cabinet designer and a registered electrician. The cabinetry decides where the light can go and how it hides. The electrician decides how it’s powered, switched and certified. The two need to talk before the cabinets are made.
What New Zealand law lets a homeowner do
Plenty of homeowners are handy, and the law does allow some owner electrical work on your own home. Regulation 57 of the Electricity (Safety) Regulations 2010 lists it, for domestic installations within the regulation’s maximum-demand limits. An owner may remove and replace fuse links, connect and disconnect fixed-wired appliances, relocate existing switches, socket-outlets and lighting outlets supplied by tough plastic-sheathed cables, and remove and replace switches, socket-outlets and light fittings (but only if the work doesn’t involve work on a switchboard). An owner may also install, extend and alter subcircuits, but only without entering any enclosure where live conductors are likely to be present, and only if the work is tested and certified under Part 2 of AS/NZS 3000 by a person authorised to inspect mains work before it’s connected. The regulation also requires owner work to be carried out and tested in accordance with ECP 51.
Read that list closely and you’ll see that new lighting circuits for under-cabinet strips, pantry sensors and pendants go well beyond swapping a fitting. Regulation 59 adds that low and extra-low voltage domestic installations must be installed, tested, inspected and connected to comply with Part 2 of AS/NZS 3000, so the low-voltage side of an LED system is inside the rules too.
Important note: Electrical work for kitchen lighting, including new circuits, drivers and connections inside cabinetry, should be carried out by a registered electrician, who can tell you what certification your job needs. This guide explains what the cabinetry has to allow for; it isn’t electrical advice for your installation.
For the paperwork side, Superior Property Services explains what an electrical certificate of compliance covers and when you need one.
Who supplies what in a custom kitchen
Be clear early about who’s doing which part. We design and make the cabinetry, including the grooves, lips, cable holes and driver voids that the lighting needs. The strips, drivers, sensors and wiring are electrical work. When you compare prices, check that the electrician’s quote includes every one of them, and that the cabinetry quote includes the details that hold them.
That split works well when both sides are working from the same drawing. It fails when the cabinets are designed with no lighting on them and the electrician arrives to find nowhere to put anything. If you’re bringing your own electrician, introduce them to the designer early and send them the cabinetry elevations.
💡 Design tip: Get the electrician’s quote after the cabinetry layout is drawn, with the elevations attached. A lighting price written against a ceiling plan alone will miss the strips, sensors and drivers inside the cabinets.
The order things happen in
The sequence matters because each step locks in the one before it. The lighting plan has to exist while the cabinetry is still a drawing. The cable routes and outlet positions have to be roughed in before the walls and ceiling are closed up. The cabinets are then made with the matching holes and grooves, installed, and the fittings connected at the end. Miss the first step and every later step becomes a workaround.
Custom cabinetry is made to order, which is its strength and its constraint. Once the panels are cut, moving a strip or adding a cable hole means remaking a panel, and that takes time on a made-to-order job. A lighting change made on the drawing costs nothing. The same change made after production starts can hold up the install.
On our side, that’s why the lighting conversation belongs at the design stage, before materials are confirmed and the cabinetry goes into production. You can see where that sits in our design and build process, which runs from the in-home consultation through design, manufacture and installation.
A checklist to take to your design meeting
- Which jobs do you want light to do: task at the bench, pantry and tall cupboards, display, plinth, over the cabinets?
- Where does each strip sit on its cabinet, and is it recessed or hidden behind a lip?
- Where does each driver live, and can you reach it later without removing a cabinet?
- Where are the switches and sensors, and are any of them on a door face (they shouldn’t be on thermoform)?
- Which circuits are dimmable, and which are separate from the task lighting?
- What colour temperature will every fitting share?
- Where exactly do the pendant outlets go, measured from the benchtop drawing?
- Who is the electrician, and have they seen the cabinetry elevations?
If you can answer all eight before the design is signed off, the lighting will arrive as part of the kitchen. It won’t be an afterthought.
Budgeting for Lighting in a Custom Kitchen
Lighting is one of the few parts of a kitchen where small decisions make a big difference to how the room feels every evening, and the costs sit in two places. Some is cabinetry: the routing, the recessed bases, the lips and the driver voids. Some is electrical: the strips, the drivers, the sensors and the wiring. We can’t give you a single honest number for kitchen lighting, because it depends almost entirely on how many of the jobs above you want light to do and how many separate runs that creates.
What moves the cost
In rough order of impact, the number of separate strip runs comes first, because each needs its own feed and often its own driver. Integrated details come next: a recessed groove or a raised base costs more to make than a surface-mounted channel, though it looks far better. Sensors and dimmable circuits add to the electrical side. Display cabinets with glass shelves and lit backs sit at the top. A kitchen with task strips under the wall cabinets and a sensor in the pantry is a very different job from one with lit glass cabinets, plinth lighting and three dimmable circuits.
Where to spend first
If the budget is tight, spend it in this order. Task light under the wall cabinets comes first, because it’s the light you’ll use every day. A pantry or tall-cupboard light comes second, for the same reason. Accent light, plinth strips and display cabinets come last. And if you’re not sure about a cupboard, ask for the empty cable route and driver space anyway: it’s cheap to build in and expensive to retrofit.
For the cabinetry itself, our guide to what kitchen cabinetry costs in Auckland sets out the price tiers we publish, with what each tier includes. The cost calculator above will email you an Auckland range for your own kitchen.
💡 Design tip: Ask for the lighting to be shown as its own line in your cabinetry quote: the grooves, lips and driver voids. It makes it easy to see what the lighting details add and to compare them fairly against other quotes.
Bringing Light Into the Design Early
Lighting is the last thing most people think about in a new kitchen and one of the first things they notice when they live in it. The fittings can be chosen late. The places they live can’t. Get the strip positions, cable routes, driver spaces and switch positions onto the cabinetry drawing while it’s still a drawing, and the kitchen will be easy to cook in at night and lovely to sit in afterwards.
➡ Book your free in-home design consultation with Little Giant Interiors
➡ See how our design and build process works
➡ Plan a kitchen with the lighting drawn in from day one
What are the best kitchen lighting ideas for a new kitchen?
Plan the light in layers: ceiling lights for general light, strips under the wall cabinets for the benchtop, sensor lights inside pantries and tall cupboards, and a low strip along the plinth for night-time. Pendants over an island add both light and style. Three of those four jobs are carried by the cabinetry, so decide them while the cabinets are still being designed.
Where should under-cabinet lighting go?
For a working bench, the strip usually goes towards the front of the wall cabinet underside, set back so you cannot see the light source from where you stand. That puts the light on your hands rather than the splashback. A strip at the back washes the splashback instead. Recessing the strip or hiding it behind a lip keeps it out of sight from stools and tables.
Can under-cabinet lighting be added after the kitchen is installed?
Usually, but only as a surface-mounted strip screwed to the underside of the cabinets, which hangs below the cabinet and can be seen from seated positions. Recessed strips, raised cabinet bases and hidden lips have to be cut and built into the carcass during manufacture. Cable routes are also far tidier when they are drilled in the factory rather than on site.
Is there a minimum lighting level for a kitchen in the NZ Building Code?
Not for the inside of a house kitchen. Building Code clause G8 sets a minimum of 20 lux at floor level, but it applies to exitways in multi-unit dwellings, group dwellings and communal and commercial buildings, to access routes, and to common spaces in multi-unit dwellings. The lighting inside your own kitchen is a design decision, though the electrical work itself is regulated.
Can I install kitchen strip lighting myself in NZ?
The Electricity (Safety) Regulations 2010 let owners do limited work, such as replacing light fittings or switches and relocating existing outlets. New subcircuits need testing and certification by an authorised inspector before connection, and regulation 59 covers extra-low voltage installations too. For new lighting circuits, drivers and connections in cabinetry, use a registered electrician.
Where should LED drivers go in kitchen cabinets?
Somewhere accessible and with air around it, such as above the wall cabinets behind a removable panel, in a ventilated void at the end of a run, or in a base cabinet with a lift-out panel. Drivers can fail and need replacing, and they warm up while they work, so they should not be sealed in or packed against the back of a door.
Can lighting damage kitchen cabinet doors?
Heat can. Dezignatek says surface temperatures above 50 degrees Celsius may cause delamination of its thermoform doors and will not be covered by warranty, and that darker colours absorb more heat. Laminex says the structural life of the Melteca substrate may be impaired above 50 degrees for prolonged periods. Keep drivers and warm fittings away from door backs.
Can I drill a thermoform cabinet door for a sensor or cable?
It is best not to. Dezignatek's warranty and care guide excludes defects resulting from a door being modified, such as being cut or drilled through the surface or edge. Put sensors and switches on the cabinet carcass instead, and have any holes for lighting cut in the factory before the cabinetry is assembled.
What colour light is best in a kitchen?
There is no single right colour, but every fitting in the kitchen should share the same colour temperature, shown in kelvin on the packaging. Lower numbers are warmer and higher numbers cooler. Mixing a warm strip with cool downlights makes surfaces look different colours. Check your door, board and benchtop samples under your chosen light, ideally in the evening.
How high should pendant lights hang over a kitchen island?
It depends on the fittings, the bench and your household. Lower pendants put more light on the bench but can block the view across the room or catch tall people; higher ones keep sightlines clear. Set the positions from the benchtop drawing, mark the height on the 3D design, and test it with a template before the ceiling outlets are fixed.
Related guides
- How handleless kitchens are detailed, from finger rails to push-to-open
- Planning a butler’s pantry that works as hard as the kitchen
- Designing a media wall with the cabling built in
Have you been putting off your kitchen renovation?
We offer flexible finance options to help you get your dream kitchen sooner. Learn more about our interest-free finance options.
References
- New Zealand Legislation, Electricity (Safety) Regulations 2010 (regulations 57 and 59)
- New Zealand Legislation, Building Regulations 1992, Schedule 1 Building Code clause G8 Artificial light
- Laminex New Zealand, Melteca Technical Data Sheet (issued November 2022)
- Dezignatek, Technical Data Sheet (November 2024)
- Dezignatek, Product Warranty and Care Guide (April 2025)