

Last updated:
Quick answer: A handleless kitchen has no visible handles — using a recessed shadow-gap channel, a J-pull groove cut into the panel, or push-to-open hardware like BLUM TIP-ON. On our published price bands, cabinetry with handleless profiles sits in the high-end tier, about $35,000–$55,000+ for the cabinetry alone. Spend on the edge-banding: that’s what makes it last.
Walk through any high-end Auckland kitchen showroom and you’ll see it — smooth, uninterrupted cabinetry that suits a Ponsonby villa reno as readily as a Hobsonville new build. No handles. No knobs. Just clean lines and quiet confidence.
Then look closer.
Run your eye along the top edge of every door. Check where the panel meets the carcass. Look inside the J-pull groove if there is one. Here’s why that matters: on a handled kitchen, a rough edge can hide behind a handle. On a handleless kitchen, every edge is on show — and a badly edge-banded door at year five looks nothing like it did at year one.
This guide is for Auckland homeowners who’ve decided they want the handleless look and now want to get it right. We’ll walk you through the three mainstream styles (true handleless with a recessed channel, J-pull, and push-to-open), what drives the cost, what works in villas versus modern builds, the BLUM TIP-ON and SERVO-DRIVE hardware question, the finger-mark reality nobody likes to talk about, and, the bit most guides skip, why the quality of the edge-banding on your cabinets is the single biggest predictor of whether your handleless kitchen still looks premium in five years.
We’re Little Giant Interiors. We design, manufacture, and install custom kitchens out of our 700m² Rosedale factory, and we use a German laser edge-bander that takes manual finishing out of the equation. We mention that because the edge finish discussion matters more in handleless than almost any other style — and we’ve seen enough handleless kitchens done badly elsewhere to want to write this one down properly.
One last thing. A handleless kitchen is a design choice, not a functional upgrade. The push-to-open drawers are clever, the shadow-gap channels are beautiful, but the reason you’re here is aesthetic. So this guide leans into that — while being honest about the maintenance, the cost, and the finishing quality you should be demanding from whoever’s building it.
What a Handleless Kitchen Actually Is (And the Three Styles Auckland Homeowners Choose Between)
A handleless kitchen isn’t one thing. It’s a category of cabinetry design where the hardware you’d normally grab (a handle, a knob, a D-pull) has been removed and replaced with one of three alternatives. Which one you choose changes the look, the cost, the maintenance, and the hardware spec. So this is where most kitchen decisions start.
Below is how each one works, and which Auckland homes each one suits.
True Handleless — The Recessed Channel (Shadow Gap)
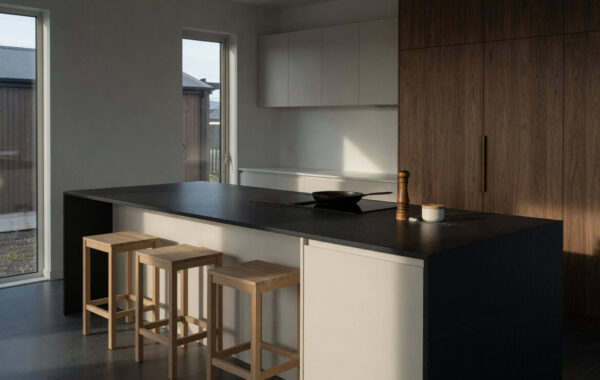
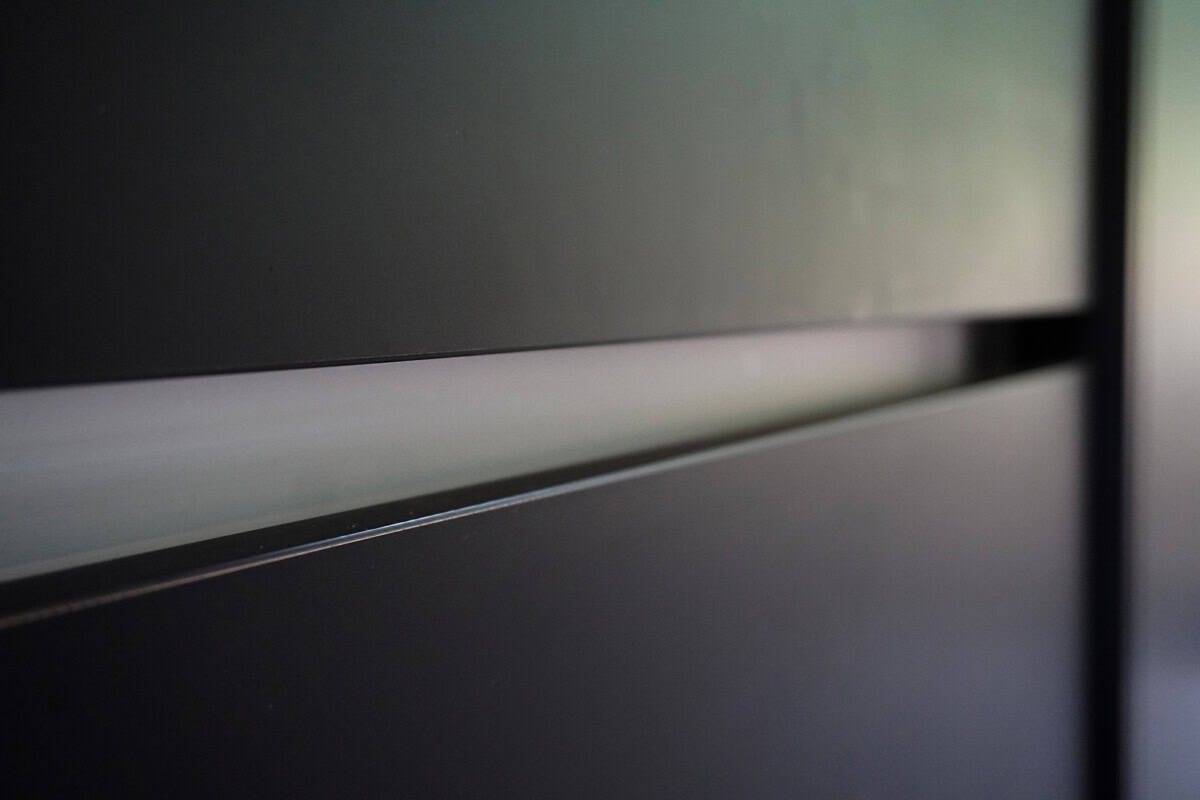
True handleless is the most dramatic of the three. A continuous channel, usually in stainless steel, matte aluminium, or colour-matched laminate, is recessed into the top of the base cabinets and drawers, creating a gap your fingers can hook into to pull the door open. The same treatment runs between the top edge of wall units and the bottom of the unit above. On tall units, a vertical C-channel is inserted between cabinets to let you grip the edge.
The finger gap is sized to take a grown hand without being so wide it breaks the clean line. Standard channel colours are stainless, matte black, and white, but we specify custom colours to match the cabinetry often enough — there’s a slight shadow effect inside the recess so even an identical colour reads a shade darker, which you’ll either like or not.
The look: quiet, architectural, premium. The kind of finish you see in European kitchen magazines and assume costs three times as much as it does.
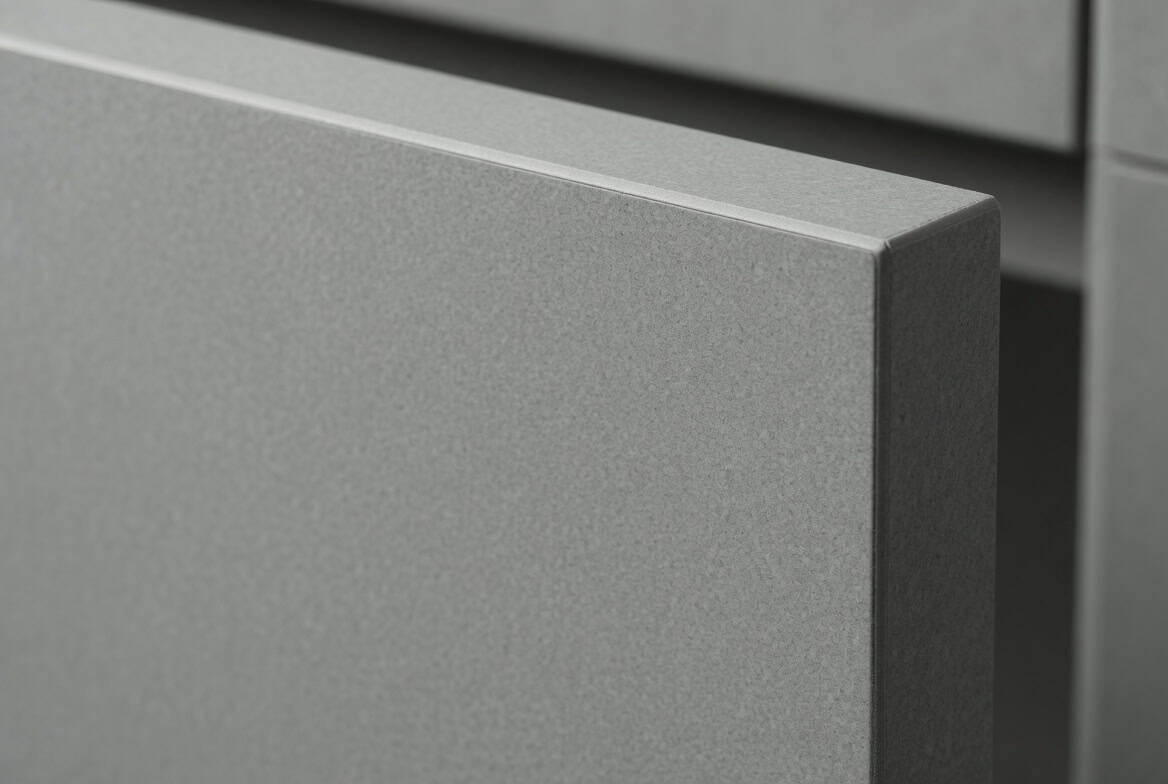
True handleless is also the version that most demands a beautiful edge finish, because your eye travels uninterrupted along every door and drawer. There’s no handle drawing attention away from the panel itself. If the edge-banding has any glue line, any lift, any corner curl, you’ll see it from across the room.
💡 Design tip: True handleless looks best on long, continuous runs of cabinetry — island fronts, a full wall of base cabinets, scullery walls. On a tight corner or a two-cabinet run it can read as incomplete rather than minimalist. If your kitchen is small or broken up, J-pull often suits better.
J-Pull Handleless — The Groove Cut Into the Panel
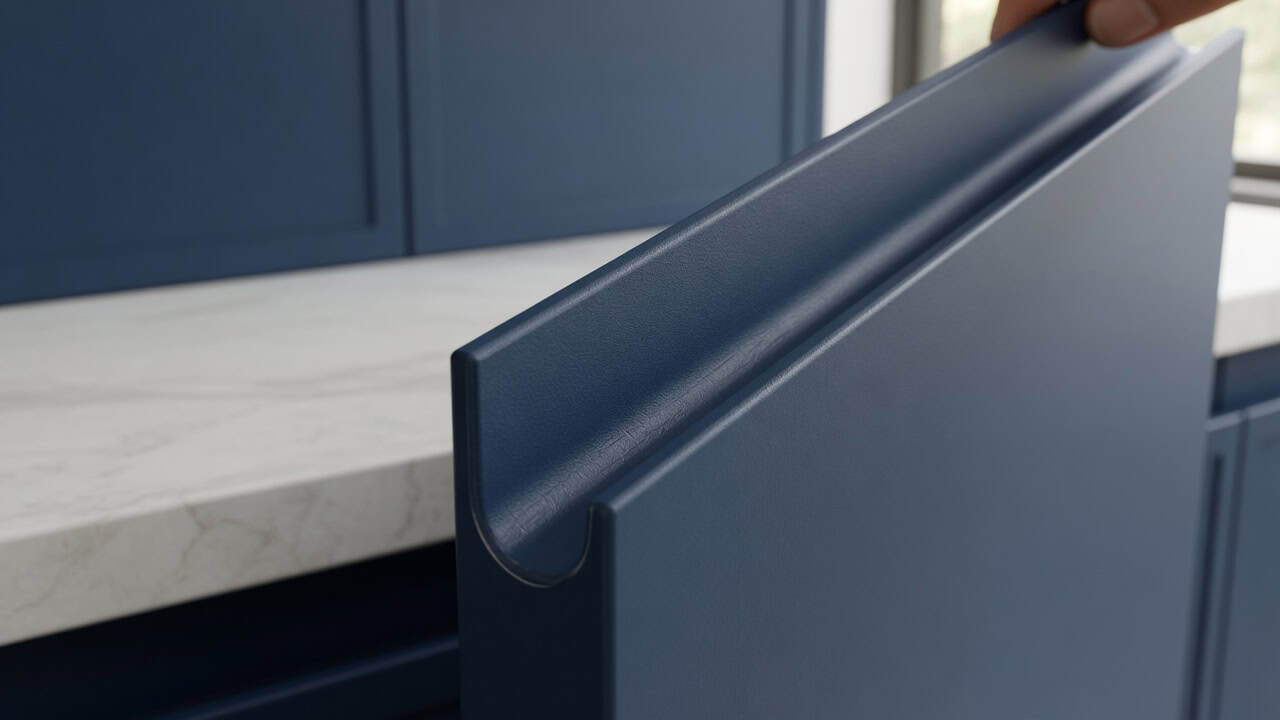
J-pull is the workhorse of handleless design. Instead of recessing a channel into the cabinet carcass, the cabinet door itself has a J-shaped (or L-shaped) profile cut into its top or bottom edge. Your fingers hook into the groove and pull. No separate channel, no additional hardware — just a different door profile.
J-pull costs less than true handleless because there’s no extra channel component to supply and install. It also opens up more material options — you can run J-pull on thermoformed Dezignatek doors, painted MDF, timber veneer, and laminate wraps in a way that true handleless (which needs a continuous straight edge to align with the channel) doesn’t always allow.
The compromise is the look. A J-pull groove is visually more prominent than a shadow-gap recess — you can see the bevel from most angles, and on a high-gloss door the light catches the inside of the groove differently. Some people love that. Others want the hardcore minimalism of a true shadow-gap and find J-pull looks softer, less architectural.
J-pull is usually the right call, especially in villas and bungalows where a pure shadow-gap can feel too clinical against period details.
Push-to-Open Handleless — BLUM TIP-ON and SERVO-DRIVE
Push-to-open is the third route, and it works on mechanism rather than door profile. There’s no channel, no groove — the door or drawer is completely flat, and you press it gently to release a spring or electric catch that pops it open a few centimetres so you can grab the edge.
The push-to-open hardware we specify is from Austrian maker BLUM, which describes four motion technologies. Three of them matter here: TIP-ON, TIP-ON BLUMOTION and SERVO-DRIVE.
TIP-ON is the mechanical option. A spring-loaded trigger mounts inside the cabinet; a light push on the door face activates the trigger and a synchronisation bar pops the door or drawer open. It needs no power. Blum lists it for selected wall cabinets, slide-in door systems, pull-outs and doors, and it closes with a press, without a soft-close. On drawers, TIP-ON BLUMOTION is the version to ask for: a touch opens the pull-out and integrated BLUMOTION closes it softly.
SERVO-DRIVE is the electric option. A small electric motor inside the cabinet responds to a touch trigger and smoothly opens the drawer or lift door under its own power. Blum says it closes softly in combination with BLUMOTION, and lists it for wall cabinets, pull-outs, dishwashers and integrated fridges and freezers. You need a power connection hidden in the cabinetry, which adds to cost and installation complexity, so it’s priced per unit and is usually kept to the places it earns its keep. Blum’s warranty statement gives its electronic components 5 years, against a lifetime warranty on its mechanical fittings.
A note on terminology: people often conflate TIP-ON with handleless, but TIP-ON works on both handled and handleless doors. Handleless specifically means no handle. TIP-ON is just the mechanism that makes handleless practical on door cabinets (where you can’t always reach in and grip the top edge).
Which Style Is Right for You?
The short version:
- True handleless — best for long runs, modern builds, architectural homes, and anyone who wants the hardest-line minimalist look. Most expensive of the three on a base level.
- J-pull — best for most Auckland kitchens. Works in villas, bungalows, modern builds, apartments. Most flexible on material and the least expensive of the three.
- Push-to-open (TIP-ON / SERVO-DRIVE) — best as an add-on to either of the above, especially on upper cabinets and big drawer stacks. Rarely the whole solution; usually specified where door grips aren’t practical.
The single most common setup we build? J-pull on the base cabinets and drawers, with SERVO-DRIVE on the lift-up wall cabinets and any pull-out pantry. You get the handleless look, you get the flex of J-pull on the bulk of the cabinetry, and you get the clever hardware exactly where it actually earns its keep.
Handleless Drawers: How the Drawer Bank Opens
Drawers are where most of a kitchen’s opening and closing happens, so they decide how a handleless kitchen feels to live with. There are three ways to do them:
- J-pull or channel on the drawer front. The simplest and the cheapest. Your fingers find the groove or the channel and pull. It works on every drawer size and has no mechanism to service.
- TIP-ON BLUMOTION. A flat front that opens when you press it and still closes softly. It suits a bank of drawers where you want no groove at all, and it’s the version to name on a quote, because plain TIP-ON has no soft-close.
- SERVO-DRIVE. A touch opens the drawer under power. Worth it on heavy pot drawers and on bins you open with full hands, less so on a cutlery drawer.
Whichever opening you choose, the runner underneath does the work. Blum tests its box and runner systems up to 100,000 opening movements, according to its New Zealand warranty statement. Our guide to soft-close kitchen drawers covers runners, loads and what to check in a showroom.
Why the Edge Finish Makes or Breaks a Handleless Kitchen
This is the section most guides skip, and it’s the one that matters most.
A kitchen cabinet is made from a sheet material, usually an 18mm or 25mm board of MDF, particleboard, or plywood, with a surface applied to the face (laminate, melamine, acrylic, thermoformed vinyl, or timber veneer) and an edge-banding strip glued around the exposed edges to seal and finish them.
On a handled kitchen, you can get away with average edge-banding. The handle draws the eye and covers imperfection. On a handleless kitchen, every edge of every door and drawer is visible from every angle. The edge-banding is the finish. And the gap between premium edge-banding and cheap edge-banding shows up fastest on handleless cabinetry of any style.
The Three Edge-Banding Methods (And Why They Look Different)
There are three ways to edge-band a cabinet panel, and they produce visibly different results:
Hot-melt glue edge-banding is the cheapest and most common worldwide. A strip of edge material is heated, pressed onto the panel edge with hot-melt glue (typically EVA-based), and trimmed. The finished edge has a thin, visible glue line between the panel and the edge-banding. From 30cm away it looks fine. From 50mm away, which is the distance your eyes are when you’re opening a base drawer, you’ll see it.
PUR (polyurethane reactive) glue edge-banding is the mid-tier option. The glue cures chemically, bonds stronger than EVA, and handles heat and moisture better over time. The glue line is thinner and less visible, and the edge is less prone to lifting when exposed to steam or boiling water.
Laser edge-banding is the top tier. Instead of using external glue, the edge-banding material itself has a functional polymer layer on its back. A laser activates that polymer at the exact moment of application, which bonds the edge to the panel with what’s effectively a zero-glue-line joint. The edge and the panel become one continuous surface — no gap, no visible seam, no hot-melt bead to eventually lift.
We run a German laser edge-bander at the Rosedale factory, and the reason we specify it on every cabinet (not just the ones customers can see) is simple: on handleless cabinetry, a zero-glue-line edge is the difference between a kitchen that still looks new at year five and one that looks tired.
💡 Design tip: When you’re comparing quotes for a handleless kitchen, ask the cabinetmaker what edge-banding method they use — specifically whether it’s hot-melt, PUR, or laser. If they say “standard” or “industry-grade”, that almost always means hot-melt. On a $40,000+ handleless kitchen, you want to know.
What Cheap Edge-Banding Looks Like at Year Five
Three things go wrong with hot-melt edge-banding over time, especially in NZ’s humid coastal climate:
Glue line yellowing. EVA hot-melt glue gradually yellows under UV light and heat. On a white handleless kitchen, the glue line darkens from invisible to a hairline amber line along every door edge. You notice it one day and then you can’t stop noticing it.
Corner lift. Heat and steam, especially from dishwashers and rangehoods, soften the hot-melt bond. Corners are the weakest point, and on a true-handleless cabinet where the top edge sits directly under a benchtop overhang, dishwasher steam rises directly into the edge joint. Over time, corners can start to lift. Once they lift, they catch on things, and the edge-banding peels further.
Heat damage from kitchen use. Kettles, steam ovens, and induction cooktop radiant heat all stress the edge-banding closest to them. A handleless drawer directly underneath a steam oven is the most exposed component in the whole kitchen. Hot-melt edges fail here first.
Laser edge-banding avoids all three. There’s no EVA glue to yellow. There’s no glue line to lift. And there’s no hot-melt bead for steam to soften. Nothing in a kitchen is permanent, but laser edging removes the joint that usually gives up first.
The Material-Finish Interaction (It’s Not Just the Edge)
Edge-banding quality matters everywhere, but it matters differently depending on what’s on the face of the door. A quick run-through of the main NZ finish options and how they behave on handleless cabinetry:
Laminate (e.g. Laminex, Melteca) is the most common face material on handleless kitchens in NZ. It’s durable, available in a huge range of colours and textures, and pairs well with matching laser-banded edges for a continuous finish. Melteca, made by Laminex in Hamilton, comes with coordinated edging, which means we can deliver a door where face and edge match and read as one surface. On handleless, this is the bread and butter.
Melteca (low-pressure melamine) is the workhorse interior and mid-tier exterior surface in NZ. For a kitchen that’s primarily budget-driven but still wants the handleless look, Melteca with a good laser-banded edge delivers a clean finish at a sharper price than high-pressure laminate.
Acrylic is the high-gloss option, the mirror-finish doors you see in Auckland apartment kitchens (our acrylic vs laminate comparison goes into the trade-offs). Acrylic looks incredible handleless but shows every fingerprint, every smudge, and every minor edge defect at 50 paces. If you’re specifying acrylic handleless, the edge-banding has to be perfect or the reflection of the groove shows the flaw.
Thermoformed doors (Dezignatek and equivalent) have a vinyl skin pressed over the face and edges of moisture-resistant HDF board, according to Dezignatek’s technical data sheet, so the edge is a continuous wrap of the same material and there’s no separate edge-band. Our thermoform door guide covers where they suit and where they don’t. Dezignatek thermoformed doors are a common NZ solution for painted-look handleless kitchens where you want a softer, matte or satin finish without the cost of two-pack paint.
Timber veneer handleless kitchens (e.g. oak, walnut, American ash) are beautiful and demanding. Veneer edge-banding has to match the grain of the face panel or the edges read as a different piece of wood. This is where laser edge-banding earns its keep most — a perfect invisible join where the grain wraps around the panel edge cleanly.
Imagine a handleless kitchen in rift-cut oak veneer with a 3.2m island. The whole kitchen lives or dies on the edge finish being continuous across the front panels, the end panels and the island sides. Grain-matched laser-banded edges let the grain run as a single visual flow around all four sides of the island. That’s the kind of thing that’s impossible with hot-melt.
“The thing we tell clients considering handleless is this: spend your money on the edge-banding, not on the handles you’re not installing. It’s the exact opposite of what most kitchen quotes are structured around, but it’s where the money actually lives.”
— Little Giant Interiors Design Team
Auckland Homes and Handleless Kitchens — What Actually Works Where
Not every handleless style suits every home. Auckland’s housing stock spans well over a century, from Ponsonby villas to Hobsonville townhouses, and a handleless kitchen that sings in one context can feel jarring in another. Here’s how it plays out across the main types of Auckland house.
Villas and Bungalows (Ponsonby, Mt Eden, Grey Lynn, Remuera, Herne Bay, Devonport)
Character homes are the trickiest context for handleless. A true shadow-gap kitchen with matte black channel work in a 1910 Mt Eden villa can be either stunning or wrong — it depends entirely on how the rest of the renovation handles the tension between period and modern.
What works: J-pull in warm colours (deep greens, dusty blues, muted charcoals, unlacquered timber veneers) on a Shaker-adjacent proportion — meaning deeper drawer fronts, fewer very narrow units, and a kitchen island with timber ends or a contrasting base colour. If you’d rather keep the full frame-and-panel look, we’ve written about shaker kitchens in villas and new builds.
What doesn’t: Ultra-modern gloss-white true-handleless that fights against the architraves and sash windows the rest of the villa is built from. We’d steer a homeowner away from dropping a Berlin-apartment-style handleless kitchen into a heritage-listed villa, because it just doesn’t land.
A bungalow gives you slightly more latitude than a villa, less ornate joinery to fight against, but the same principle applies. Warm handleless beats cold handleless in character homes, almost universally.
1970s–80s Brick-and-Tile (Howick, Pakuranga, Bucklands Beach, East Auckland)
East Auckland brick-and-tile is the easiest brief in some ways. The original kitchens are usually tired — laminate doors from the 80s, corner cabinets with dead spaces, ceiling heights around 2.4m. A clean handleless J-pull replacement transforms the space.
What works: J-pull in a mid-toned laminate (think warm stone greys, matte olive, soft walnut) with a continuous Caesarstone or laminate benchtop. The cabinetry feels quietly modern without shouting, and the shallower floor plans of 70s/80s homes mean J-pull’s more forgiving proportions suit better than a pure shadow-gap run.
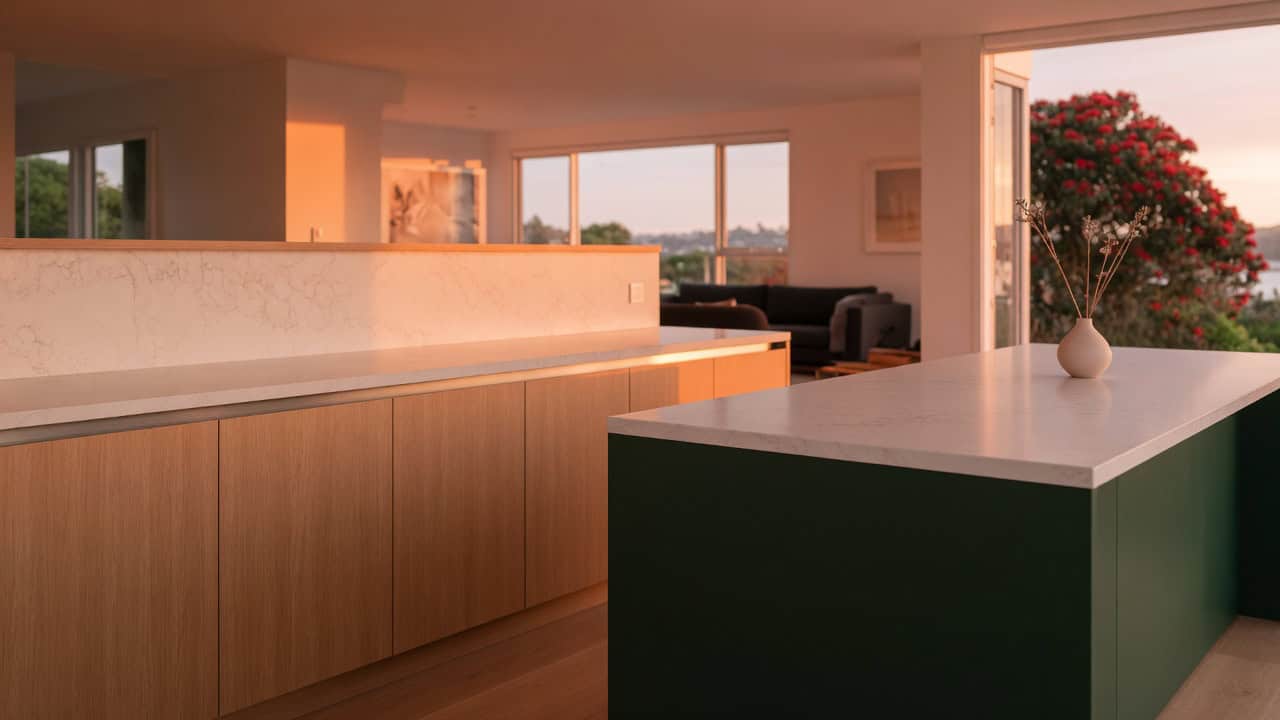
Finish worth considering: a two-tone handleless where the island carries a deeper accent colour (navy, forest green, charcoal) and the perimeter runs in a warmer neutral. It photographs well, too.
Modern Builds and New Subdivisions (Hobsonville, Flat Bush, Millwater, Long Bay)
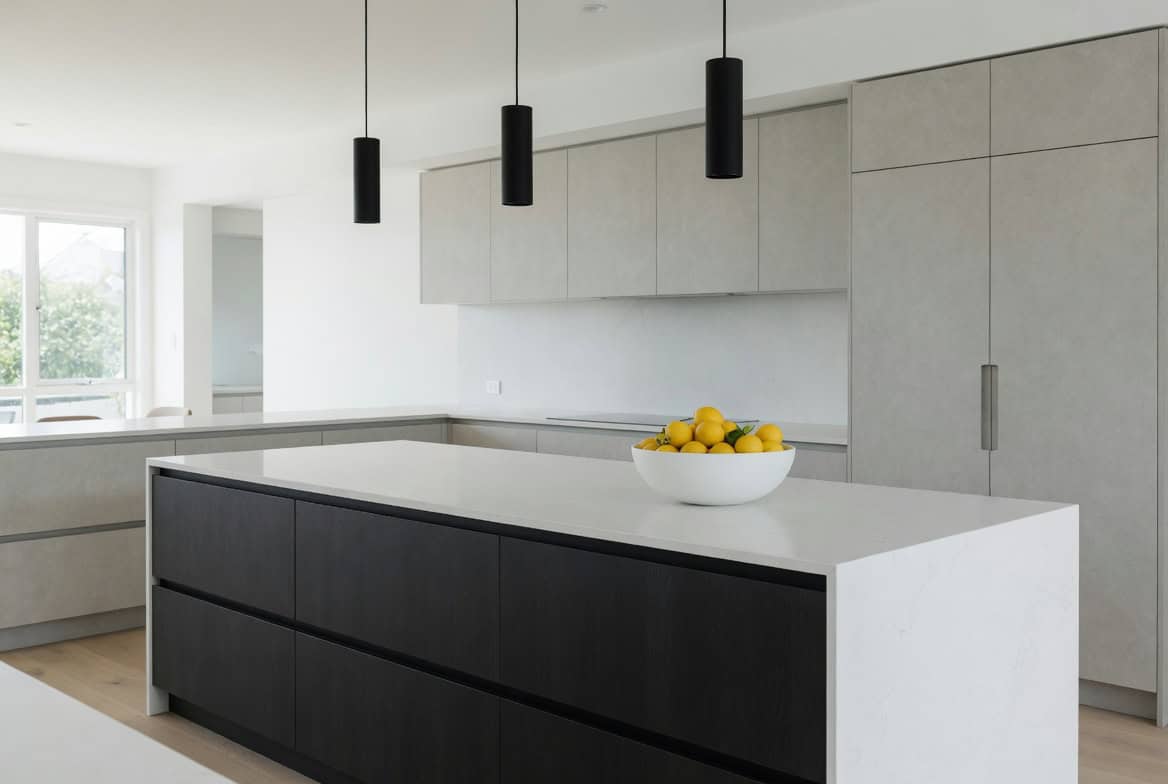
This is where true handleless comes into its own. High ceilings, open-plan living, big windows, flat drywall surrounds — the architectural context is already minimal, so a shadow-gap handleless kitchen completes the design rather than arguing with it.
Specify: true handleless with a full-height integrated pantry and scullery wall, SERVO-DRIVE on the lift-up units, and a single feature colour on the island. The handleless finish carries the look; the laser-banded edges keep it looking the same way five years in.
💡 Design tip: In open-plan modern builds, the “kitchen” often visually extends into the living area — think media units, banquette seating, or a freestanding bar. Handleless cabinetry is ideal for this because the design language runs continuously from kitchen to living without a change in hardware. Plan for that at the design stage, not after.
Apartments and Townhouses (CBD, Viaduct, Takapuna Central, Newmarket)
Apartment kitchens are where handleless earns its biggest practical win: in a compact space, every centimetre of protruding handle reduces your clear walkway between bench and island. Take the handles off and the walkway gets back the depth they used to stick out, which in a narrow galley is real.
Specify: J-pull or push-to-open (TIP-ON) on full-height integrated fridge/freezer joinery, true handleless on the main island run, acrylic or high-gloss laminate in mid-toned colours that don’t show every fingerprint the way pure white does.
Watch out for body corporate rules on any alteration that touches structural walls or plumbing — check before finalising the design. Small kitchen renovation projects in Auckland apartments also come with lift access, booking and body corporate approval to plan around. If the work touches plumbing or structure, ask a Licensed Building Practitioner or Auckland Council whether it needs consent before the design is locked.
Real NZ Costs, Hardware, and the Finger-Mark Truth
Two things nobody likes talking about in handleless kitchen marketing: what it actually costs, and how it actually handles fingerprints. Here’s both, honestly.
Handleless Cost Bands in Auckland
We don’t publish a fixed premium for going handleless, because it depends on how many fronts, which style and which hardware. What we do publish is the band it sits in: our kitchen cabinet cost guide puts handleless profiles in the high-end tier, $35,000–$55,000+ for cabinetry alone, before benchtops and appliances. Within that, this is how the options rank on cost, from least to most:
| Handleless option | Relative cost | What drives it |
|---|---|---|
| J-pull | $ | A routed profile on the door itself; no extra components |
| True handleless (shadow gap) | $$ | Channel supply and fitting, and tighter tolerances on every run |
| TIP-ON / TIP-ON BLUMOTION | +$ per unit | A mechanism per door or pull-out, added to either style |
| SERVO-DRIVE | +$$ per unit | Electric drive, power supply and wiring inside the cabinetry |
A few things worth flagging:
The premium isn’t only the hardware or the missing handles. A significant chunk of it is the precision tolerance handleless demands. On a handled kitchen, 1mm of panel misalignment hides behind the handle and nobody notices. On a true-handleless shadow-gap run, 1mm of misalignment shows up as an uneven gap along the top of every door. Getting the cabinets cut and assembled to that tolerance is where the cost really sits — which is why handleless quotes vary so wildly between cabinetmakers running older gear and those running newer CNC and laser edge-banding equipment.
If a quote for handleless comes in at the same price as a handled equivalent, be cautious. It usually means either the cabinetmaker isn’t accounting for the tolerance properly (you’ll see the result at install), or they’re using hot-melt edge-banding that’ll cost you later. Interest-free finance options are one way Auckland homeowners bridge the gap between handled and handleless pricing without compromising on finish.
The Finger-Mark Reality
Every handleless kitchen operates on touch. Your fingers make contact with the door face (on push-to-open) or the J-pull groove (on J-pull) every single time you open anything. That means fingerprints. This isn’t an opinion — it’s physics.
What matters is how visible those fingerprints are. And that depends almost entirely on the surface finish you choose:
High gloss (acrylic, gloss laminate): fingerprints are obvious. Expect to wipe down doors daily, especially around the J-pull groove or push area. In a family kitchen with kids, high-gloss handleless is a commitment.
Matte laminate and melamine: fingerprints are visible but softer — more “you can see it if you look” than “it’s the first thing you notice”. Most Auckland handleless kitchens we build land here.
Supermatt and anti-fingerprint finishes: very low-sheen surfaces show fewer marks, and some ranges, such as Dezignatek’s Supermatt thermoform colours, are sold on it. They cost more than a standard matte. Handle a sample and press a thumb on it before you commit; it’s the quickest test there is.
Timber veneer: fingerprints virtually invisible. The grain and natural variation disguises contact marks. If fingerprint anxiety is driving you away from handleless, timber veneer is the answer.
Dark colours (navy, forest green, charcoal, matte black): show fingerprints more than mid-tones. If you want a dark handleless kitchen, spec an anti-fingerprint finish. It’s not optional.
Important note: Matte black handleless kitchens look incredible in showroom photography and are genuinely hard to live with day-to-day without an anti-fingerprint surface specification. Don’t specify matte black on price alone — match the finish spec to the colour.
Cleaning and Care
Two cleaning considerations that are specific to handleless:
The channel or groove collects dust. On true handleless, the stainless channel is a horizontal shelf that catches crumbs and dust. On J-pull, the groove is at an angle and collects less, but still catches. Both need a weekly wipe — not a deep clean, just a damp microfibre run along the channel. It takes under a minute.
The face of the door is the grip point. Unlike handled kitchens where the handle takes the wear, handleless door faces collect skin oils and food splatter exactly where you touch them. The fix is a matte or anti-fingerprint surface (see above). The other fix is designing lift-up wall units with SERVO-DRIVE so they open on touch — no grip needed, no face contact.
Overall cleaning overhead compared to handled kitchens? A little more than a handled kitchen. Manageable, but real.
How to Specify a Handleless Kitchen That Actually Lasts
If you’re at quote stage, or about to be, here’s what separates a handleless kitchen that still looks right at year seven from one that starts showing its age at year three. Most of this comes down to questions you should be asking the cabinetmaker.
Questions to Ask Before You Sign
Seven questions that get you most of the way to a quality handleless kitchen:
- What edge-banding method do you use? You want the answer to be “laser” or “PUR”. “Standard”, “industry grade”, or “hot-melt” is a polite red flag on a handleless spec.
- Is the cabinetry manufactured in-house or outsourced? In-house tends to mean tighter tolerance control. Outsourced can be excellent, but ask where, and ask whether you can visit the factory.
- What board material are you using for the carcass, and at what thickness? 18mm is standard; 25mm on visible panels is a genuine upgrade. Low-density particleboard is a warning sign. MR-rated (moisture resistant) is worth specifying in wet zones.
- What warranty is on the edge-banding specifically, not just the cabinetry overall? Edge lift is one of the first faults to show on handleless, so you want it covered. Ours is on our guarantee page: 10 years on Melteca and Laminex laminates and on Dezignatek doors, lifetime on Blum and Hettich hardware, 5 years on installation.
- Which hardware are you specifying: BLUM, Hettich, Häfele, something else? You want a named system you can look up. “Soft-close” with no brand on a handleless kitchen needs scrutiny.
- Can I see a completed handleless project from you that’s at least three years old? Anyone can show you install-day photos. Year-three photos tell you whether the edges are still tight and the finish has held up.
- Is the quote fixed-price or estimate? On a tight-tolerance handleless spec, you want fixed-price. Variation on install day is where budgets spiral.
Red Flags at Quote Stage
The quote document tells you more than the showroom does. Things we’d flag:
Vague material specifications. “Premium laminate” or “designer finish” isn’t a material spec. A proper handleless quote should name the manufacturer, the product range, and often the specific colour reference. Laminex Chalk. Melteca Snowdrift. A Dezignatek thermoform colour such as Dezigna White. If the cabinetmaker isn’t naming the product, they’re leaving themselves room to substitute down.
Hardware bundled as “quality” or “soft-close” without brand names. On handleless, where hardware is doing real work, you want BLUM, Hettich or Häfele specified line by line, not a generic reference.
No manufacturing timeline. “We’ll schedule install when it’s ready” means no accountability. A proper quote includes a manufacturing window and an install date range.
Massive price variance from the market. If three quotes come in at $42k, $44k, and $28k for the same spec, the $28k is not a bargain. It’s either using cheaper materials, cheaper hardware, cheaper edge-banding, or all three. Our guide to comparing kitchen quotes sets out how to line them up.
The LGI Process for a Handleless Kitchen
For context on how we approach this (worth comparing against what others offer), our design and build process on a handleless project runs roughly like this:
An in-home consultation (free, no obligation) to scope the kitchen, talk through the handleless style that suits the home, and discuss material preferences. Followed by an estimate based on that scope. Then a preliminary 3D design so you can see how the handleless runs actually land in your space, critical on shadow-gap jobs where long continuous lines are the point. Materials and hardware get finalised at this stage. Manufacturing happens in the Rosedale factory, the German laser edge-bander handles every cabinet, not just the visible ones. Installation takes 1–2 days for most residential handleless jobs. Handover with the warranty pack closes out the project.
The bit that matters most on handleless specifically: the design and materials decisions made at stage 3 are what locks in whether the finish will still look right at year five. Get those decisions right and the rest falls into place.
Bringing It All Together
Done right, a handleless kitchen is modern, clean and quietly premium, and it suits more Auckland homes than people expect. It’s also unforgiving. There’s nowhere for a rushed edge, a cheap hinge, or a mediocre finish to hide. So the spec you sign off on matters more than it would on a handled kitchen at the same price point.
Three things worth remembering if you take nothing else from this:
One — J-pull is the default for most Auckland homes, true handleless earns its place in modern builds and architectural contexts, and push-to-open hardware (TIP-ON or SERVO-DRIVE) is usually an add-on, not a whole solution.
Two — the edge-banding method is the single biggest predictor of how your handleless kitchen ages. Ask about it. Insist on laser or at minimum PUR. Don’t accept “standard” as an answer.
Three — match your finish spec to your colour. Anti-fingerprint matte for dark colours. Timber veneer for forgiveness. Gloss only if you’re committed to the daily wipe-down.
If you’re at the stage of getting quotes or trying to work out which style suits your home, we’d happily walk you through it properly — at your place, with a tape measure and a cup of coffee, no obligation. That’s where good handleless kitchens start.
➡ Book your free in-home design consultation with Little Giant Interiors
➡ See how our design and build process works
➡ Learn more about our custom kitchen design Auckland
Frequently Asked Questions About Handleless Kitchens in NZ
What is a handleless kitchen?
A handleless kitchen is custom cabinetry designed with no visible handles or knobs. Access is achieved through one of three methods — a recessed channel built into the cabinet carcass (true handleless or shadow gap), a J-shaped groove cut into the door panel itself (J-pull), or push-to-open hardware like BLUM TIP-ON or SERVO-DRIVE. The result is a minimalist, flat-fronted kitchen with clean visual lines throughout.
How much more does a handleless kitchen cost in NZ?
On our published bands, cabinetry with handleless profiles sits in the high-end tier, about $35,000 to $55,000+ for the cabinetry alone, before benchtops and appliances. J-pull is the least expensive way to go handleless, a shadow-gap channel costs more, and push-to-open hardware is added per door or drawer, with SERVO-DRIVE the dearest. The number of fronts and the finish move the total most.
What is the difference between J-pull and true handleless?
J-pull has a groove cut directly into the top or bottom edge of the cabinet door — your fingers hook into the groove to pull it open. True handleless uses a separate recessed channel (usually stainless steel or aluminium) built into the cabinet carcass, creating a gap between the door and the benchtop. J-pull costs less and suits more home types. True handleless is more architectural and works best on long continuous runs in modern builds.
Do handleless kitchens date quickly?
A well-designed handleless kitchen ages better than most kitchen styles, because it has no trend-specific hardware to date. What dates a handleless kitchen is the finish and colour choice — a gloss-white 2010s spec looks dated now, whereas a matte timber or muted J-pull from the same period still reads as current. Style choice matters more than the handleless format itself.
What is the best material for a handleless kitchen in NZ?
Matte laminate or melamine, such as Melteca in a low-sheen finish, is the most common best-balance choice — durable, fingerprint-tolerant, huge colour range, and the edge-banding can be precisely matched. Timber veneer (oak, walnut, ash) suits premium projects and hides fingerprints best. Thermoformed Dezignatek doors suit painted-look handleless without two-pack pricing. High-gloss acrylic looks incredible but shows every mark and requires daily cleaning.
How do you clean a handleless kitchen?
Weekly: wipe the channel or J-pull groove with a damp microfibre cloth to clear dust and crumbs. Daily: wipe door fronts in the grip area (where your fingers make contact) with a soft cloth to remove oils and food residue. Use pH-neutral cleaners — avoid alcohol-based sprays on acrylic and ammonia on laminate. It takes a little more time than a handled kitchen, noticeable but manageable.
Do you need special hardware for a handleless kitchen?
Yes, on door cabinets in particular. Push-to-open mechanisms like BLUM TIP-ON (mechanical, no soft-close), TIP-ON BLUMOTION (mechanical with soft-close, for pull-outs) or SERVO-DRIVE (electric) are used where a gripping edge isn't practical, such as on top wall units or deep pantries. Drawer runners and hinges are still named systems; we use Blum as standard and Hettich where its range suits. If the cabinetmaker isn't specifying brand-name hardware on a handleless kitchen, that's a warning sign, the hardware is doing more work than on a handled spec.
What is a shadow gap in a handleless kitchen?
The shadow gap is the recessed channel built into a true handleless cabinet that creates space for your fingers to grip the top edge of the door or drawer. It's usually lined with stainless steel, matte aluminium, or a colour-matched finish. The gap creates a subtle shadow effect, hence the name, which is part of what gives true handleless its architectural, layered look.
Can you put a handleless kitchen in a villa or bungalow?
Yes, but style choice matters. Pure shadow-gap handleless in gloss white often fights against period detailing in Mt Eden, Ponsonby, and Remuera villas. J-pull in warm colours, deep greens, dusty blues, muted charcoals, unlacquered timber veneers, works much better in character homes. The handleless finish modernises without arguing with the architecture. Villas and bungalows also suit a mixed approach: J-pull on the perimeter, with a handled or timber-fronted island for contrast.
Why does the edge-banding matter so much on a handleless kitchen?
On a handled kitchen, the handle draws the eye and can hide a rough edge. On a handleless kitchen, every cabinet edge is visible from every angle — the edge-banding is the finish itself. Cheap hot-melt edge-banding can develop visible glue lines, yellowing and corner lift over time. Laser edge-banding (or PUR as a step below) creates an effectively invisible join that holds up long-term. On a $40,000+ handleless kitchen, asking what edge-banding method is used is one of the most important questions at quote stage.
What are handleless drawers?
Handleless drawers open without a handle, in one of three ways: a J-pull groove or channel you hook your fingers into, a push-to-open mechanism such as BLUM TIP-ON BLUMOTION that opens at a touch and still closes softly, or an electric SERVO-DRIVE unit that opens the drawer under power. J-pull is the simplest and cheapest. On push-to-open drawers, ask for TIP-ON BLUMOTION by name, because plain TIP-ON has no soft-close.
Have you been putting off your kitchen renovation?
We offer flexible finance options to help you get your dream kitchen sooner. Learn more about our interest-free finance options.