

Last updated:
Quick answer: A media wall is a full-height, built-in unit that houses your TV, cabling, storage and often an electric fireplace behind one continuous joinery face. In New Zealand a well-designed custom media wall runs from a few thousand dollars for a floating unit up to $15,000–$20,000+ for a full-wall build with an integrated fire and lighting, priced on the same drivers as any custom cabinetry.
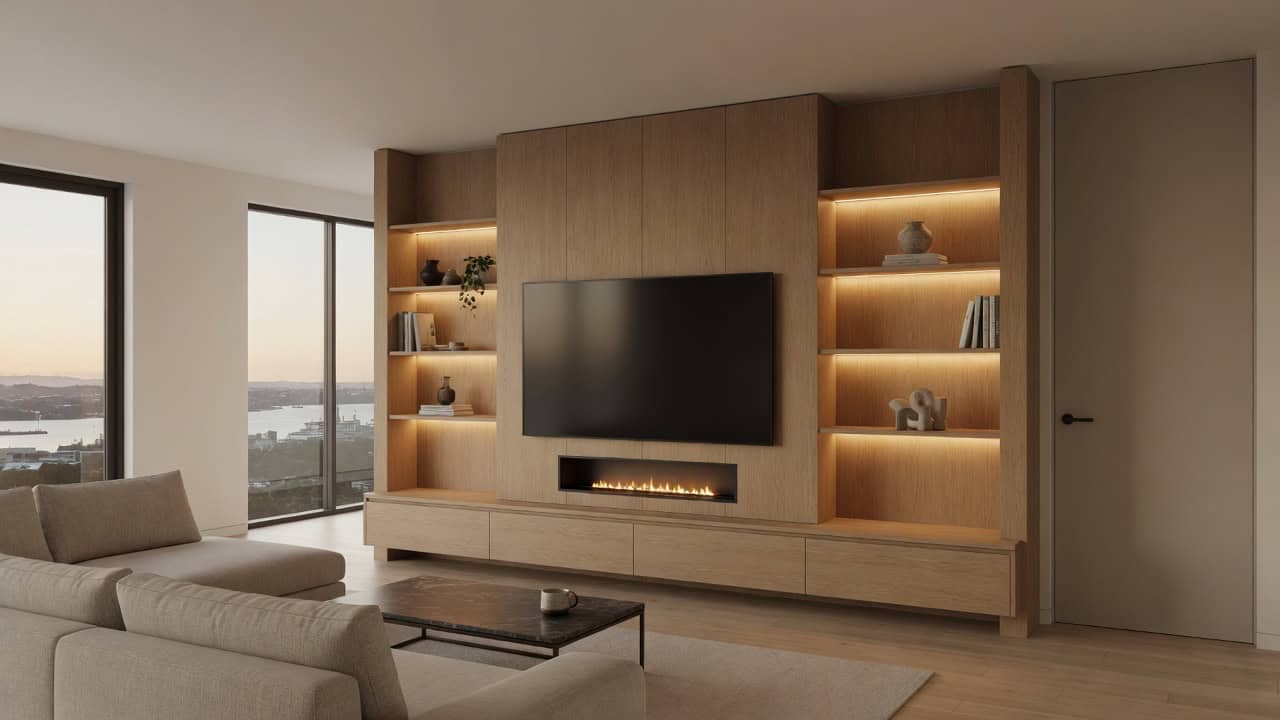
Scroll through Houzz or Pinterest and the media wall is everywhere — a clean run of joinery with the television floating dead-centre, a low ribbon of flame beneath it, and warm timber shelving flanking both sides. It looks effortless. Then you try to work out how to actually build one into a real Auckland living room, and the gap between the picture and the wiring opens up fast.
Media wall design in NZ has moved quickly from a British trend into a genuine local staple, and most of the demand is landing in three places: new builds in Hobsonville and Flat Bush where the living room is a blank canvas, open-plan renovations in Grey Lynn and Mt Eden villas, and apartments in Takapuna and the city fringe where every centimetre of wall has to earn its keep. The look sells itself. The build is where it gets real.
Here’s what most guides skip: a media wall isn’t a piece of furniture you buy and push against the wall. It’s fitted joinery, wired and ventilated and fixed into the structure, and the quality of the result comes down to decisions made before a single panel is cut — where the power sits, how the cables run, how much heat the fireplace throws, and whether the finish carries cleanly across every face. Get those right and you get the magazine result. Get them wrong and you get a beautiful cabinet with an extension lead trailing out the side.
We design, manufacture and install custom cabinetry from our own Auckland factory, and living-room joinery like this is squarely what we do. This guide walks through what a media wall actually is, the design directions that work in Kiwi homes, the build details nobody warns you about, the materials and hardware worth specifying, and how the cost is really put together — so you can brief it properly, whether you build with us or not.
What a Media Wall Actually Is (and Why It Took Over Kiwi Living Rooms)
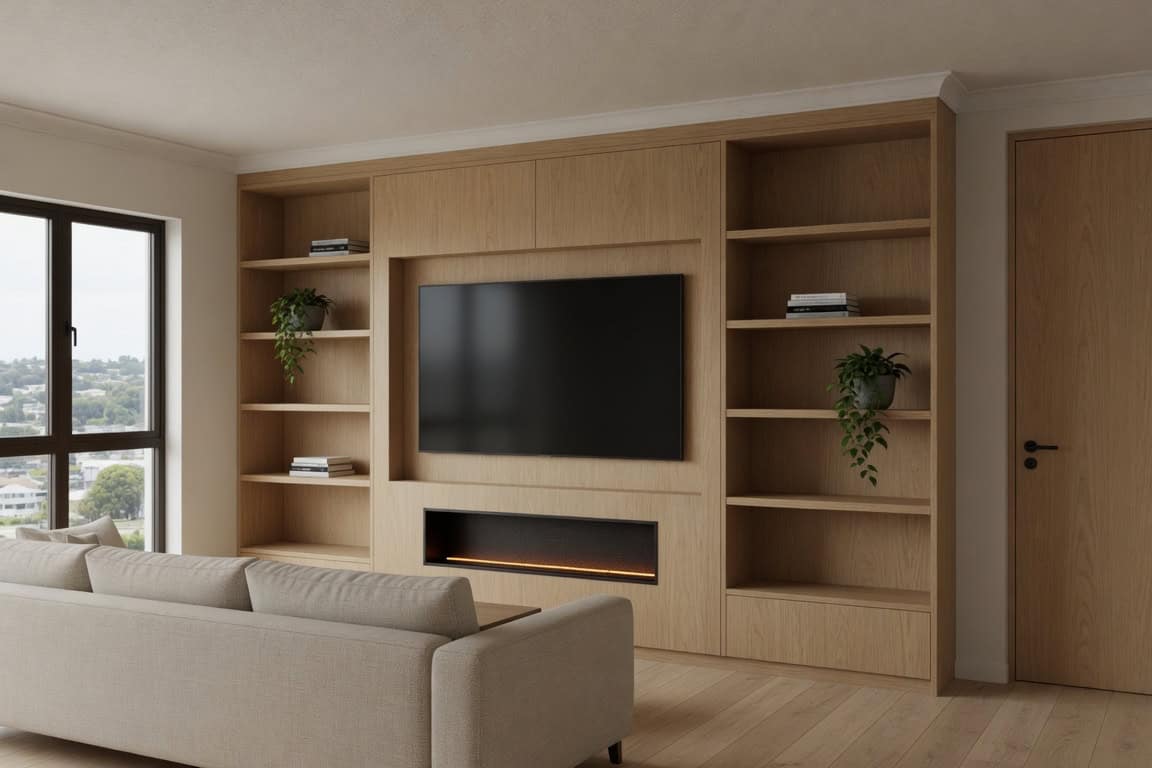
A media wall is a purpose-built run of cabinetry, usually full height, that turns the wall your TV lives on into a single designed feature. Instead of a freestanding entertainment unit sitting in front of the wall, the wall becomes the unit: the television is mounted or recessed into the joinery, the AV gear and cables are hidden inside it, and storage, display shelving and often an electric fireplace are built into the same face.
That’s the core difference worth understanding before you spend a dollar. A media wall is fixed joinery — designed for your room, fixed to your structure, wired as part of the build. An entertainment unit is furniture. The media wall look only works because everything disruptive (the cables, the boxes, the wall-wart plugs, the aerial lead) disappears inside the cabinetry. Take that away and you’ve just bought an expensive shelf.
Why the trend landed so hard in New Zealand
Two things drove it. The first is the flat, thin television. Screens got large, light and wall-mountable, which made the old lowboy-plus-tower setup look clumsy. The second, and the bigger one, is the electric fireplace. Modern electric fires run off a standard power point, throw no real flue heat, and need no chimney, gas line or solid-fuel consent, so for the first time you could put a convincing “fireplace” anywhere, including in the middle of a stud wall under a TV. That single combination of big flat screen plus fuss-free electric flame is what turned a British joinery fashion into a mainstream NZ living-room brief.
It suits our housing stock, too. So many Auckland living rooms are awkward: the chimney breast in a villa, the long blank gib wall in a townhouse, the single sensible TV wall in an apartment. A media wall takes the one wall that has to hold the television anyway and makes it the room’s anchor rather than its eyesore.
💡 Design tip: Before you fall in love with a design, mark the TV’s real height on the wall with painter’s tape and sit down. Media walls push the screen higher than people expect, especially above a fireplace. Eye level from the sofa should land near the lower third of the screen, not the middle.
Media wall vs feature wall vs entertainment unit
These get used interchangeably and they aren’t the same thing. A feature wall is a surface treatment (paint, panelling, tile, stone or wallpaper) with no built-in storage or services. A media wall is joinery with services running through it. An entertainment unit is freestanding furniture. Plenty of the best living rooms combine them: a media wall built as joinery, faced with a panelled or fluted treatment so it reads as a feature wall, doing the job of an entertainment unit but far cleaner.
The practical takeaway is that a real media wall is a manufacturing job, not a shopping one. Which is exactly why the interesting decisions happen at the design table, and why the cheap versions tend to disappoint. If you’ve read our guide to how our custom cabinets are made, the same precision that gives a kitchen a clean, consistent finish is what makes a media wall face run cleanly from one end of the room to the other.
Media Wall Design Ideas That Work in Auckland Homes
The best media wall design is the one that fits your room and your gear — not the one with the most shelves. After that, it’s about the look. These are the directions we see working in real NZ living rooms, from compact apartments to full open-plan renovations.
The full-height built-in with an integrated fireplace
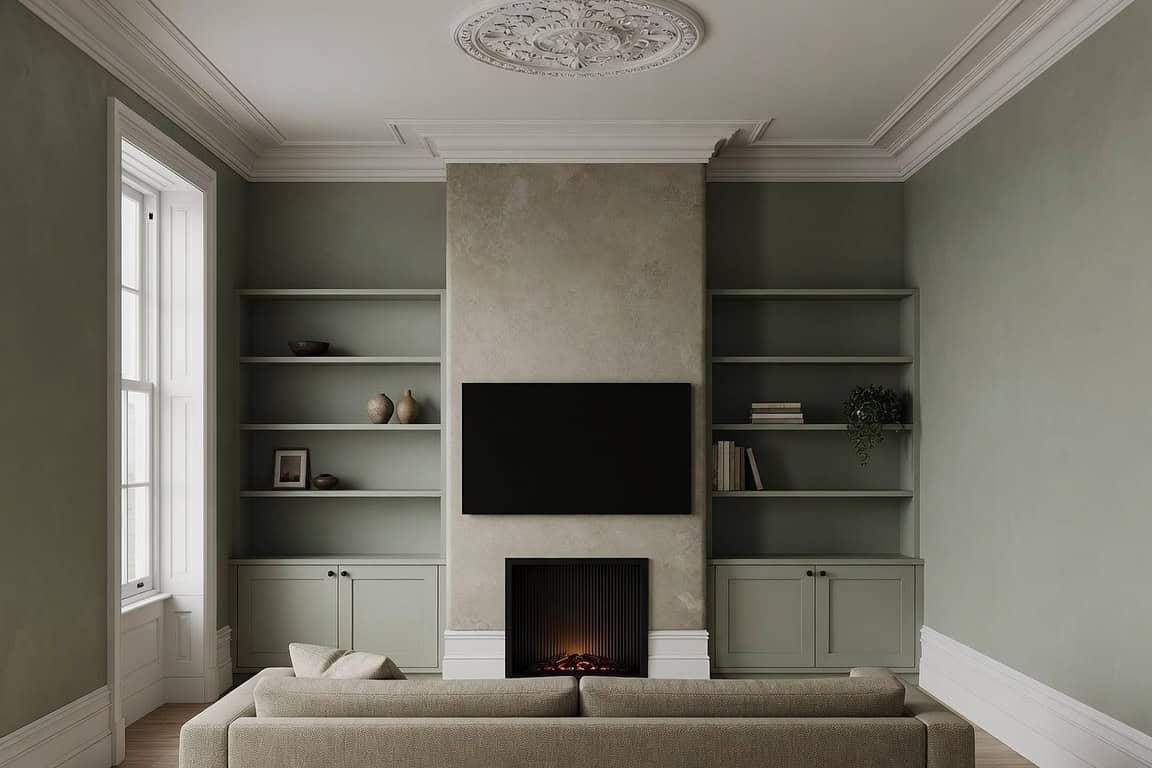
This is the signature look: floor-to-ceiling joinery, the TV centred, an electric fire recessed below it, and cabinetry running out to both sides. It reads as architecture rather than furniture, and in a room with high stud, like a renovated villa in Ponsonby or a double-height new build, it’s genuinely impressive. The trade-off is commitment. A full-height build is the most involved to design and fit, because it interacts with the ceiling line, any cornice, and the wall structure behind it. Worth it when the room can carry it.
The floating console with flanking shelving
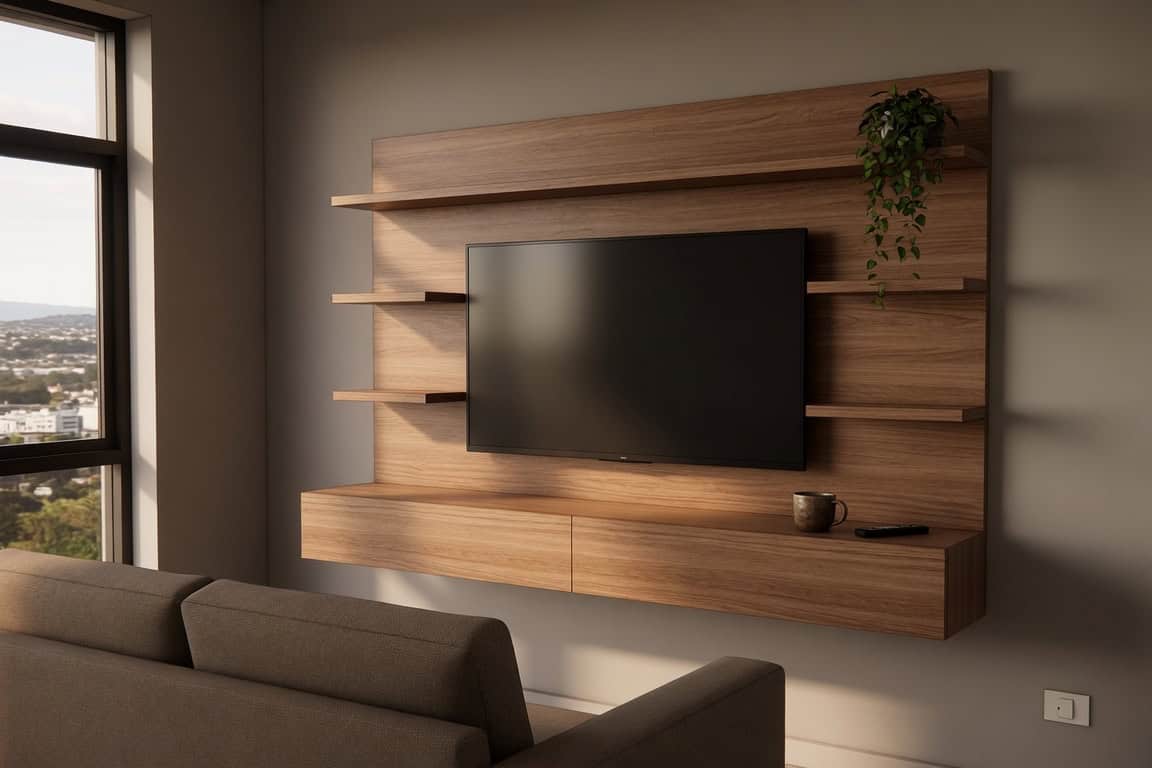
Lighter, cheaper, and often the smarter choice. A wall-mounted cabinet appears to float below the TV, with open shelving stepped up either side of the screen to balance it. Because the base cabinet is off the floor, the room feels bigger and the floor is easy to clean under. This works beautifully in apartments and in smaller Kiwi living rooms where a full-height wall would feel heavy. Keep the shelving symmetrical around the screen — mirrored bays either side create the calm, balanced look people are actually chasing.
The concealed, handleless full-wall
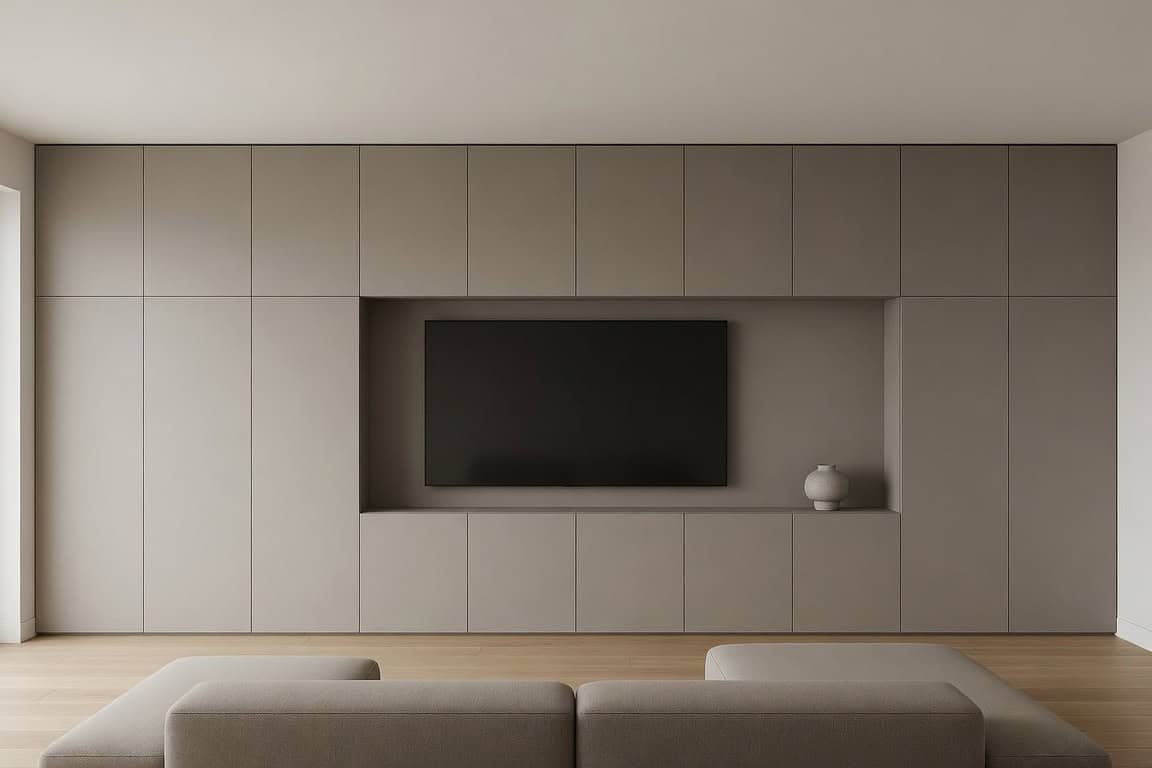
For people who want the television to be the only thing you notice, everything else vanishes. A run of handleless push-to-open cabinetry, the same colour and grain across the whole wall, hides all the storage. No handles, no visible joins doing anything loud, just one quiet plane with a screen on it. This is where custom manufacturing earns its keep — the finish has to be continuous and the door gaps dead even, or the whole illusion falls apart. A handleless approach lifts a media wall the same way it lifts a kitchen.
Fluted, panelled and timber-veneer feature fronts
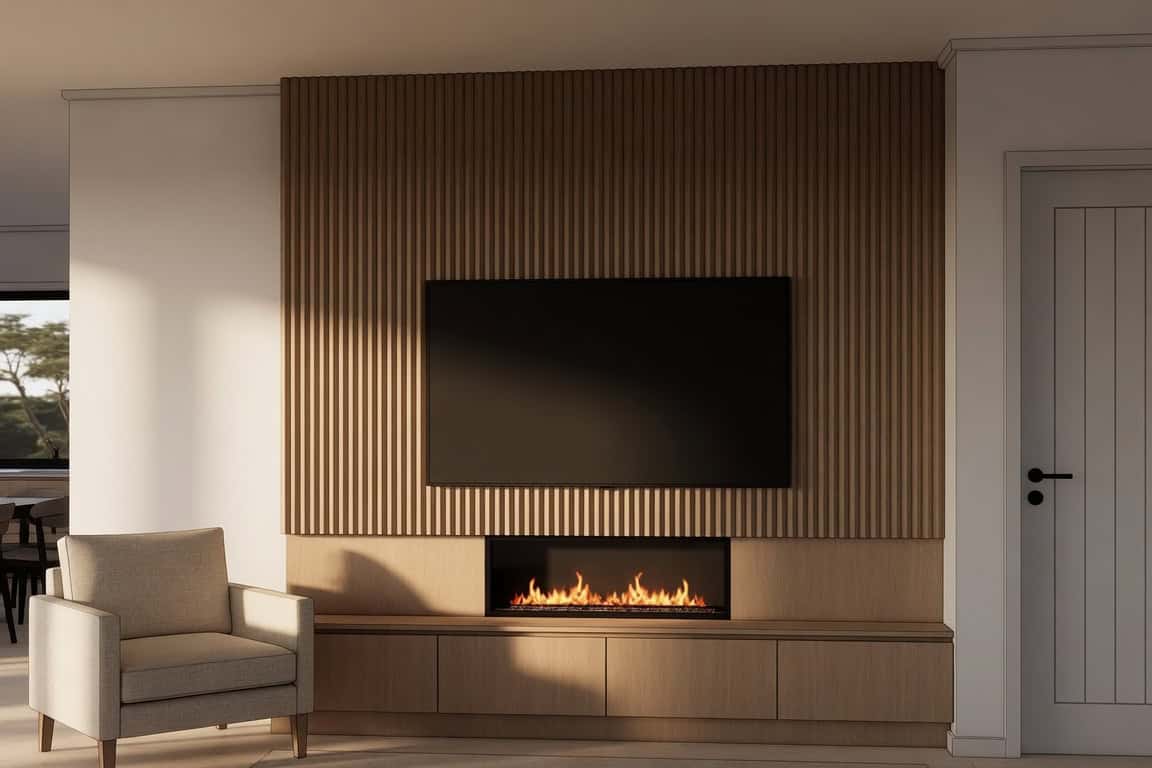
The fastest-growing direction we’re seeing. Instead of flat doors, the cabinetry face is broken up with vertical fluting, shadow-line panelling or a book-matched timber veneer. It adds texture and warmth and stops a large wall of joinery feeling like a slab. Fluted oak-look fronts flanking a screen have become a genuine 2026 look in NZ homes, and they photograph as well as they live. Pair a textured feature front with plainer cabinetry below so the wall has a focal point rather than competing textures everywhere.
“The mistake we see most often is treating a media wall like a bookshelf that happens to hold a TV. It works the other way around. Start with the screen size and viewing height, then the fireplace clearance, then the AV gear — get those three fixed and the shelving and storage almost design themselves around what’s left.”
— Little Giant Interiors Design Team
Matching the media wall to the rest of the home
One quiet advantage of building custom: the living-room joinery can carry the same door profile, colour and handle detail as your kitchen or your floating shelves elsewhere in the house. In open-plan Auckland homes where the kitchen, dining and living all read as one space, that continuity is what makes a renovation feel designed rather than assembled from separate purchases. It’s the sort of detail that’s almost impossible to fake with off-the-shelf furniture bought from three different places.
💡 Design tip: In an open-plan room, give the media wall a slightly different tone from the kitchen, like the same grain in a deeper colour, so it reads as a deliberate boundary between zones rather than looking like the kitchen wandered into the lounge.
Media Wall Ideas for Different Auckland Homes
The same media wall idea that looks perfect in a new-build show home can be completely wrong for a 1920s villa. Auckland’s housing stock is unusually mixed, and the living room you’re working with shapes the whole approach far more than any trend does. Here’s how the brief changes across the homes we work in most.
Villas and bungalows in the character suburbs
Ponsonby, Grey Lynn, Mt Eden, Devonport — the pre-1940s character belt comes with high studs, decorative ceilings, and often an original chimney breast on the main living wall. That chimney breast is either your best friend or your biggest headache. Built into a media wall, it becomes a natural central recess for a fireplace and screen, with the flanking walls made for symmetrical shelving. The catch is that these walls are rarely square and rarely plumb, so a boxed flat-pack unit leaves gaps you could post a letter through. Scribing custom joinery to the actual wall is the only way to get a tidy result in a character home. Keep the detailing calm here; a busy media wall fights the villa’s existing ceiling roses and skirtings.
1970s and 80s brick-and-tile
Across the North Shore, Pakuranga, Howick and much of South Auckland, the brick-and-tile era gave us solid homes with lower ceilings and often a dated feature wall or a tired old fireplace surround. A media wall is one of the highest-impact updates you can make to one of these rooms. Because the ceilings are lower, the trick is to keep the unit visually light — a floating console rather than a heavy floor-to-ceiling wall, so the room doesn’t feel boxed in. Horizontal lines and a mid-tone woodgrain modernise a brick-and-tile lounge fast without a full renovation.
New builds and open-plan renovations
In Hobsonville, Flat Bush, Millwater and the newer townhouse developments, the living room is usually a clean, square, open-plan space — the easiest canvas of the lot. This is where the full-height built-in with an integrated fireplace really sings, because the walls are true and the ceiling line is predictable. The main thing to get right in an open-plan home is how the media wall relates to the kitchen and dining zones sharing the same room. Continuity of material with a shift in tone is what makes the whole space read as one considered scheme rather than three separate fit-outs.
Apartments and city-fringe living
In Takapuna, the Viaduct and central-city apartments, space is tight, walls may be concrete or blockwork, and body corporate rules can limit what you’re allowed to alter. A slim floating unit with mirrored shelving does a lot of work in a small footprint, and because it’s off the floor the room keeps its sense of space. Two things to check early in an apartment: whether the wall is masonry (which changes the fixings entirely) and whether your body corporate has any rules about built-in alterations. Sort both before you design, not after.
💡 Design tip: Whatever the home, take a photo of the wall square-on and drop a scaled TV rectangle onto it before you decide anything. Seeing the screen at true size against the real wall kills more bad proportions than any amount of imagination.
The Build Reality Most Media Wall Guides Skip
This is the part that separates a media wall that looks incredible on day one from one that still looks incredible three years in. Almost every problem with a media wall is a services problem, decided before the joinery is even built. Sort these and the design looks after itself.
Cables, power and getting the sockets in the right place
The whole point of a media wall is that you don’t see a single cable. That only happens if the power and data are planned into the wall before it’s lined and built. You want power points positioned behind the TV and inside the cabinets, an HDMI or conduit path from the screen down to wherever the AV gear sits, and, ideally, a length of empty conduit spare for whatever gets added later. Retro-fitting a socket behind a finished media wall means opening the joinery back up — expensive and avoidable. Moving or adding power points is electrical work, so a registered electrician does that part; we design the wall around where it needs to land.
Plan the cable runs first, the shelves second. A soundbar needs power and a signal cable. A subwoofer needs somewhere discreet with a little airflow. A gaming console needs ventilation and easy reach. None of that is hard — it’s just invisible if it’s planned and ugly if it isn’t.
Heat clearance for the electric fireplace
Electric fires are low-drama compared with gas or solid fuel, but they still throw warm air, and that air rises straight up the wall toward the television and any joinery above the unit. Every electric fireplace comes with a manufacturer’s minimum clearance to combustible materials and to a TV mounted above it, and those clearances drive the whole vertical layout of the wall. Ignore them and you risk warping a timber-veneer panel or cooking the electronics behind your screen over time.
This is exactly why the fireplace has to be locked in early. Its heat-vent position, its required gap to the screen, and its recess depth all set the geometry the cabinetry is built around. We design to the specific fire’s spec sheet rather than a generic gap, and any question about combustible clearances or wall construction is one for the fireplace manufacturer’s documentation and, where structural work is involved, a Licensed Building Practitioner.
Important note: Recessing a fireplace or building into a load-bearing or bracing wall can cross into work that needs a building consent or a Licensed Building Practitioner. Check any structural change with Auckland Council or an LBP before you commit — it’s cheaper to ask first than to unpick a finished wall.
Sound: soundbar, in-wall speakers and airflow
Big screens have thin, ordinary speakers, so most media walls need help with sound. The two clean options are a soundbar sitting on a ledge directly under the screen, or in-wall speakers built into the joinery face. A soundbar is simpler and easier to upgrade; in-wall speakers are tidier but need to be planned into the cabinetry from the start. Either way, leave the AV components some breathing room — amplifiers and receivers run hot, and a sealed cupboard with no airflow shortens their life. A discreet vent or a slightly open-backed cabinet solves it.
Wall type, fixing and the weight of a modern TV
A large television and a run of loaded joinery is real weight, and it has to fix to something solid. Most Auckland homes are timber-framed and lined with gib, which means the mount and the cabinetry need to hit the studs or dedicated blocking, not just plasterboard. In older villas and bungalows you sometimes find lath, uneven framing or a chimney breast that has to be worked around. In apartments you may be fixing to a concrete or blockwork wall, which needs the right anchors entirely. None of this is exotic — it’s just the difference between a wall that’s engineered to hold the load and one that’s hoping to. Custom fitting means we scribe the joinery to your actual wall, out-of-square corners and all, rather than forcing a flat-pack box against a wall that isn’t flat.
Screen size, viewing distance and getting the proportions right
A media wall is built around the television, so the screen size has to be settled before the joinery is drawn, not chosen afterward to fit a gap. Two things guide it: how far away you sit, and how wide the wall is. A common rule of thumb for a 4K screen is a viewing distance of roughly one-and-a-half to two-and-a-half times the screen’s diagonal, so a three-metre gap between sofa and wall comfortably carries a large screen, while a tight apartment lounge does not. Bigger isn’t automatically better; a screen that swamps the wall looks as awkward as one that’s lost in it.
The wall width matters just as much. The screen wants breathing space around it so the flanking shelving or cabinetry reads as a deliberate frame rather than a squeeze. Sketch the screen, the fireplace and the shelving to scale on the wall before anything is ordered. It’s a five-minute job that saves the most common proportion mistakes, and it’s the sort of thing a designer will do with you at the consultation as a matter of course.
Here’s the honest summary: the visible design is maybe half the job. The other half is power, heat, sound and structure, and it’s the half that decides whether you love the wall in year three. It’s also the half that’s genuinely hard to do well without designing and building the unit as one considered piece.
Materials, Finishes and Hardware Worth Specifying
A media wall is a large, flat, well-lit surface that people stare at every evening, so the finish matters more here than almost anywhere in the house. Every flaw shows. This is where material choice and hardware quality separate a wall that reads as premium from one that reads as flat-pack.
Melamine, veneer and painted finishes
Most NZ media walls are built from one of three faces. Melamine board is the workhorse — durable, consistent, cost-effective, and now available in convincing woodgrains. Timber veneer gives you real wood grain for a warmer, higher-end result, ideal for a feature front. Painted (2-pac or lacquered) MDF gives a smooth, even flat colour and is the go-to for a crisp handleless look.
For woodgrain melamine we most often specify Melteca, which is manufactured here in New Zealand. The Melteca Organic range in particular gives a matte, textured, genuinely timber-like finish — decors like Danish Walnut and Urban Ash bring the warmth of a veneer at a more sensible price, which is exactly what a large living-room wall wants. Laminex backs its premium surfaces with warranties of up to 10 years on selected ranges, which matters on a surface you’ll live with for a decade or more.
💡 Design tip: On a big wall, a matte finish almost always beats a high gloss. Gloss shows every fingerprint and bounces the TV’s own glare back at you in the evening. A soft matte woodgrain hides marks and keeps the focus on the screen and the flame.
Stone, tile and mixed-material accents
The fireplace surround is where a lot of media walls add a hero material — a slab of engineered or natural stone, large-format porcelain tile, or a run of vertical timber battens framing the fire. A little goes a long way. One considered material moment around the fire, with quieter cabinetry either side, looks far more resolved than three or four textures fighting for attention across the whole wall.
Hardware: hinges, runners and push-to-open
The parts you touch are the parts you notice, and cheap hardware is the fastest way to make expensive-looking joinery feel cheap. For a handleless media wall, push-to-open latches and quality soft-close hinges do the quiet, satisfying work every time a door moves. For drawers, we specify BLUM runner and soft-close systems, and BLUM warrants its mechanical hardware for the lifetime of the furniture, which tells you how much they trust it. For the broader hardware kit (hinges, lift-up flap fittings, cable grommets, integrated lighting and specialty mechanisms), Häfele covers the range. The right runner on a media drawer is the difference between a component bay that glides shut and one that rattles.
Integrated lighting
LED strip lighting tucked under shelves, behind the screen as a bias light, or grazing down a fluted front is one of the cheapest ways to make a media wall look properly designed. Warm-white LED (around 2700–3000K) suits a living room; a subtle glow behind the TV also reduces eye strain in a dark room. Plan the LED driver and its switching into the build, the same as any other service — an LED strip stuck on afterward with a visible transformer never looks as good as one wired in.
Media Wall Mistakes Worth Avoiding
We’ve been asked to fix enough of these to know where they go wrong. Almost none of the mistakes are about taste. They’re about decisions made too late or skipped entirely.
Mounting the TV too high
The single most common regret. A fireplace beneath the screen pushes the TV up, and a wall that looks balanced in a photo gives you a sore neck every evening. Always check viewing height seated, from your actual sofa position, before the design is signed off.
Sealing the AV gear in an airless box
Amplifiers, receivers and consoles run hot. Shut them in a cupboard with no airflow and you shorten their life or trip their thermal cut-outs mid-movie. Every component bay needs a vent, a cable gap or an open back. It costs nothing to plan and it’s miserable to retro-fit.
Forgetting the cables until the joinery is built
By the time the unit is installed, it’s too late to add a power point or a conduit run without pulling the joinery apart. Cable and power planning has to happen at the design stage, alongside the electrician, not once the wall is up. Leave a spare conduit while you’re at it.
Buying on price and regretting the hardware
Cheap hinges, rattly runners and a face that doesn’t quite line up are what you get when a media wall is bought on the lowest number. It’s the part you touch and look at every day. This is where spending a bit more on quality hardware and a proper finish pays you back for years, not months.
Important note: If your media wall involves recessing a fireplace, relocating power, or any structural change, get the electrician and, where needed, a Licensed Building Practitioner or Auckland Council involved at the planning stage. Retro-fixing compliance into a finished wall is the most expensive mistake on this list.
What a Media Wall Costs in NZ — and Why Custom Is Priced the Way It Is
Cost is the question everyone actually wants answered, so here’s the honest version. A media wall isn’t a fixed product with a sticker price — it’s custom joinery, and it’s priced on the same handful of drivers as any other custom cabinetry. As a rough guide, a simple wall-mounted floating unit starts in the low thousands, a mid-sized feature wall with mixed storage and display sits in the mid-to-high single-figure thousands, and a full-wall build with an integrated fireplace, feature veneer and lighting runs to around $15,000–$20,000 or more. Where your project lands depends entirely on the drivers below.
| Cost driver | Effect on price | Why |
|---|---|---|
| Size (lineal and height) | Largest single factor | More cabinetry, more board, more labour to build and install |
| Material and finish | Moderate to high | Timber veneer and 2-pac cost more than woodgrain melamine |
| Integrated fireplace | Adds the fire cost plus build complexity | Heat clearances and recessing change the joinery around it |
| Storage vs open shelving | Moderate | Doors, drawers and hardware cost more than open bays |
| Lighting and AV integration | Low to moderate | LED, in-wall speakers and cable routing add parts and planning |
| Site and wall condition | Variable | Out-of-square villa walls or concrete apartment walls change the fix |
💡 Design tip: Ask for an itemised quote that separates the cabinetry, the fireplace, the hardware and the install. It makes it easy to see where the money’s going and to adjust the spec — dropping to woodgrain melamine over veneer, say — without gutting the whole design.
Custom vs off-the-shelf: where the money actually goes
We’ll be upfront: a flat-pack entertainment unit from a big-box store costs a few hundred to a couple of thousand dollars, and a custom media wall costs several times that. So what are you paying for? Three things. A fit that’s exact to your room, wall to wall and floor to ceiling, with no dead gaps and no compromise on where the fireplace or screen sits. A finish that runs continuously across the whole face rather than butting mismatched box units together. And a build that hides its services — the wiring, heat and sound handled properly rather than hidden badly. A modular unit gives you a place to put the TV. A custom media wall makes the wall the best thing in the room.
Whether that maths works for you depends on how much the room matters and how long you’ll live with it. For a rental or a short-term fit-out, flat-pack is fair enough. For the main living space of a home you’re staying in, the custom version is usually the one people wish they’d done from the start. If you want to see how we work through a design, quote and build, our team designs living-room joinery the same considered way we design a kitchen — you can explore the custom-built living-room joinery we design and make in our Auckland factory and go from there.
➡ Book your free in-home design consultation with Little Giant Interiors
➡ See how our design and build process works
➡ Learn more about our custom residential cabinetry in Auckland
What is a media wall?
A media wall is a purpose-built, usually full-height run of cabinetry that turns your TV wall into a single designed feature. The television is mounted or recessed into the joinery, all cables and AV gear are hidden inside, and storage, display shelving and often an electric fireplace are built into the same face. Unlike a freestanding entertainment unit, a media wall is fixed joinery, wired and fitted as part of the build so nothing disruptive is on show.
How much does a media wall cost in NZ?
A custom media wall is priced like any custom cabinetry, on size, materials, storage and integration. As a rough guide, a simple floating unit starts in the low thousands, a mid-sized feature wall sits in the mid-to-high single-figure thousands, and a full-wall build with an integrated fireplace, feature veneer and lighting runs to around $15,000–$20,000 or more. A quote to your exact room is the only way to get a real figure. All prices are in NZD.
Do you need building consent for a media wall?
A basic media wall built as cabinetry against an existing wall usually doesn't need consent. It can change if you recess a fireplace into the wall, alter a load-bearing or bracing wall, or do structural work. Electrical changes must be done by a registered electrician. Any structural question should go to Auckland Council or a Licensed Building Practitioner before you start — it's far cheaper to confirm first than to unpick a finished wall.
Can you put an electric fireplace in a media wall?
Yes, and it's the most popular version of the look. Electric fires run off a standard power point, need no flue, chimney or gas line, and suit a stud wall well. The key is heat clearance — every electric fireplace has a manufacturer's minimum gap to combustible materials and to a TV mounted above it, and those clearances set the vertical layout of the whole wall. We design to the specific fire's spec sheet, not a generic gap.
How do you hide the cables in a media wall?
Cable management is planned before the wall is built. Power points are positioned behind the TV and inside the cabinets, conduit or HDMI paths run from the screen down to the AV gear, and a spare empty conduit is left for future additions. Done this way, nothing is visible. Retro-fitting cable routing into a finished media wall means opening the joinery back up, so it's designed in from the start.
What materials are best for a media wall?
Woodgrain melamine such as NZ-made Melteca is the durable, cost-effective workhorse, and its Organic matte range gives a convincing timber look. Timber veneer suits a higher-end feature front, and 2-pac painted MDF gives a smooth, even flat colour for a handleless look. A matte finish beats gloss on a large wall because it hides marks and cuts TV glare. Stone or tile is best kept as a single accent around the fireplace.
How high should the TV be on a media wall?
Sit on your sofa and aim for eye level to land near the lower third of the screen, not the middle. Media walls, especially those with a fireplace beneath the TV, tend to push the screen higher than is comfortable. Mark the height on the wall with tape and check it seated before the design is finalised. Getting viewing height right matters more to daily comfort than any other single decision.
Is a custom media wall worth it over a flat-pack unit?
For the main living space of a home you're staying in, usually yes. A flat-pack unit gives you somewhere to put the TV. A custom media wall fits your room exactly, runs one continuous finish across the whole face, and hides the wiring, heat and sound properly. You pay several times the flat-pack price for a fit, finish and services integration a modular box can't match. For a rental or short-term space, flat-pack is a fair call.
How long does it take to design and build a media wall?
Timeframes depend on the design's complexity and the material lead times, but a custom media wall follows the same path as our other cabinetry: a free in-home consultation, a 3D design, manufacture in our Auckland factory, then installation. Building in our own factory keeps lead times shorter than outsourced joinery. Your designer will give you a realistic timeline for your specific project at the consultation stage.
Can a media wall match my kitchen cabinetry?
Yes, and it's one of the best reasons to build custom. Because we manufacture your living-room joinery ourselves, it can carry the same door profile, colour, grain and handle detail as your kitchen. In open-plan Auckland homes where kitchen, dining and living read as one space, that continuity is what makes the result feel designed rather than assembled from separate purchases. It's very hard to achieve with off-the-shelf furniture.
WRITTEN BY LITTLE GIANT INTERIORS
Little Giant Interiors is an Auckland-based custom kitchen design, manufacture, and installation company. We design, build, and install custom kitchens, laundries, wardrobes, and cabinetry from our 700m² Auckland factory — using German laser technology for precision manufacturing. Every project starts with a free in-home consultation and a complimentary 3D design render.
Book Your Free In-Home Consultation
Have you been putting off your kitchen renovation?
We offer flexible finance options to help you get your dream kitchen sooner. Learn more about our interest-free finance options.