


Last updated:
Floating shelves do two jobs at once: they store your stuff and they make a wall look considered rather than cluttered. They suit almost every Auckland home, whether you’re in a sleek Britomart apartment or a character villa in Remuera. Want a clean, minimalist display in a Ponsonby living room, or a floating corner shelf tucked into a small Takapuna bathroom? This guide walks you through the lot — picking the right material, choosing brackets that won’t let you down, and dodging the installation mistakes that end with a shelf on the floor mid-dinner party. We’ve pulled in real products from local suppliers like FIT NZ, Visual Hardware and Mitre 10 so you can plan a floating shelves NZ project that’s both good-looking and built to last.
Best Floating Shelves for Auckland Homes in 2026
Quick answer: For most Auckland homes, the strongest all-round setup is a concealed-bracket MDF or pre-finished laminate shelf — high weight capacity when fixed into studs, a sealed surface that copes with humidity, and invisible brackets for the cleanest look in small rooms.
- Why it wins: Best cost-to-performance ratio ($65–$145 for a 1200 mm shelf if you DIY), a factory-sealed finish that resists warping in humid spaces like Ponsonby and Grey Lynn apartments, a wipe-clean surface for kitchen and bathroom splash zones, and concealed brackets that give you that true floating look.
- Runner-up: Solid timber (rimu or oak) on fixed prong brackets — the warmer option, and a natural fit for heritage villas in Mt Eden and Remuera where timber suits the bones of the house.
- For light-starved rooms: Tempered glass or mirrored shelves on adjustable brackets — they bounce light around small Britomart apartments and Viaduct lofts, though they’re for lighter loads only.
💡 Design tip: Sealed finishes earn their keep in Auckland’s humidity. In a kitchen or bathroom, a pre-finished laminate or properly sealed timber shelf will outlast a raw one every time.
Why Floating Shelves Work So Well in Auckland Homes
Floating shelves are a genuinely smart, space-saving fix for Auckland’s mix of housing stock. From new-build apartments to do-up villas, they add storage without the visual bulk of a freestanding unit or a bracket-heavy shelf. Display your books in a Grey Lynn bungalow, line up spice jars in a Mt Eden kitchen, or stage a few pieces in a hallway — they earn their place in almost any room. The best part is they’re easier to install than most people expect. Let’s get into how to choose the right one for your space.
Custom vs Off-the-Shelf Floating Shelves
Most floating shelves are an off-the-shelf buy you install yourself, and for a single display shelf that is exactly the right call. But there is a point where custom makes more sense: a run of shelving that has to line up with existing cabinetry, an alcove that is not a standard width, a kitchen or scullery where you want the shelves in the same Melteca or timber finish as the joinery, or a load-bearing shelf that needs concealed steel fixed into the framing. That is where we come in. We build custom floating shelves and open shelving as part of the cabinetry in our 700m² Auckland factory, colour-matched and scribed to the wall. If your project is a one-off shelf, the DIY steps below have you covered; if it is part of a wider kitchen or living fit-out, it is worth pricing the custom shelving and cabinetry we build in our Auckland factory alongside it.

What Exactly Is a Floating Shelf?
A floating shelf appears to sit on the wall with no visible support. The trick is the bracket — either hidden inside the shelf or mounted flush to the wall, so all you see is the shelf itself. Take FIT NZ’s Triade Concealed Shelf Support: the rod anchors to the wall and slides into the back of the shelf, giving you that clean, airy look. It works as well in a character Parnell villa as it does in a minimalist home office in Grey Lynn.
Choosing the Right Material
Each material has its strengths. Here’s how the common options stack up for an Auckland home.
Timber Floating Shelves
Timber is the timeless option — oak, pine or ply, it brings warmth and character to a room. Cliff Hanger makes its timber floating shelves and aluminium brackets in Auckland and sells them nationwide, cut to size. Good for heavy books or pottery in a Devonport bungalow, and easy to stain or paint to suit the house.
Why you’ll like them:
- Strong: Handles heavy loads, especially on concealed brackets like FIT NZ’s Triade.
- Customisable: Stain or paint to match — natural for a beachy Takapuna look, dark for a Ponsonby pad.
- Flexible sizing: Cut to fit anywhere from 200 mm to 2400 mm long.

Glass Floating Shelves
Glass is the sleek, modern option — at home in bathrooms or pared-back living rooms in Auckland’s CBD apartments. It reflects light, so it makes a small space feel bigger, and it suits lighter items such as candles or glassware. Specify toughened glass and keep the load well inside whatever the bracket is rated for.
Why you’ll like them:
- Elegant: Adds a refined edge to any room.
- Space-saving: The transparency keeps things feeling open.
- Easy care: Wipes clean, which matters in a steamy bathroom.
💡 Design tip: Always specify tempered glass in high-traffic spots like kitchens — it’s the safe choice if anything ever knocks it.
MDF Floating Shelves
MDF is the budget-friendly workhorse. It is smooth, takes paint well and is the cheapest route to a crisp painted finish. Its weakness is creep: under sustained load MDF bows slowly, so keep spans short. You’ll find it at Mitre 10 — a solid pick for DIYers in Mt Roskill or Avondale.
Why you’ll like them:
- Affordable: Cheaper than solid timber but still sturdy.
- Paintable: Finish or laminate it to match your decor.
- Strong on the right brackets: Handles heavy items when paired with quality hardware.

Metal and Acrylic Floating Shelves
For something different, metal or acrylic adds a distinct look. Metal brings an industrial edge that suits loft-style apartments in Viaduct Harbour; acrylic gives you a glass-like clarity that’s tougher than the real thing. Nova Interior’s LED floating shelf is worth a look if you want built-in lighting.
Why you’ll like them:
- Modern: Metal and acrylic suit contemporary and industrial spaces.
- Durable: Metal is sturdy and acrylic won’t shatter like glass.
- Extra features: LED lighting adds a real lift to a display wall.
Which Timber for a Floating Shelf: Oak, Rimu, Macrocarpa or Pine
“Timber” covers a lot of ground, and the species you pick changes the look, the price and how the shelf behaves over a long span.
- Oak: the default for a reason. Dense, stable, and the open grain takes a natural oil or a white-wash equally well. It is the most forgiving species over a longer span, and the most expensive of the four.
- Rimu: the heritage choice, and the one that ties a shelf into an older Auckland villa or bungalow where the joinery is already rimu. Most of what is available now is recycled or salvaged, so supply is patchy and boards vary.
- Macrocarpa: a genuinely local option with a warm, knotty character. It is softer than oak, so it marks more easily, which suits a relaxed bar shelf better than a display shelf that has to stay pristine.
- Pine: the cheapest way to a real timber shelf, and the one that most needs finishing. Raw pine will move with Auckland’s humidity swings, so seal all six faces, including the two you cannot see once it is up.
Whichever species you land on, seal the underside and the ends as well as the top. Moisture gets into timber through the faces nobody finishes.
Which Material Is Right for You?
A quick comparison to help you decide:
| Material | Load behaviour | Look | Best For | Cost |
|---|---|---|---|---|
| Timber | Stiffest over long spans | Warm, characterful | Living rooms, bedrooms | Moderate to High |
| Glass | Stiff but brittle; specify toughened | Modern, sleek | Bathrooms, small spaces | Moderate |
| MDF | Smooth, but creeps under sustained load | Versatile, smooth | Kitchens, laundries | Low to Moderate |
| Metal | Thin and stiff; chosen for the look | Industrial, modern | Offices, garages | High |
| Acrylic | Lighter and tougher than glass | Clean, transparent | Display areas | High |
Styles to Suit Every Auckland Home
It’s not just about material — style matters too:
- Floating corner shelves: Ideal for tight spaces in Auckland apartments. Mitre 10’s MURAL Floating Corner Shelf is a good starting point.
- LED-lit shelves: Nova Interior’s LED floating shelf throws a soft glow on art or collectibles — a natural fit for Ponsonby’s creative streak.
- Curved-edge shelves: Softer lines for a gentler look.

How to Choose the Right Shelf for Your Space
Three things to weigh up:
- Space: In small apartments, a floating corner shelf or a shallow ledge shelf saves room without crowding the wall.
- Style: Match the material to the house — timber for villas, glass or metal for modern lofts.
- Purpose: Make sure the shelf can carry what you plan to put on it, especially for heavier items.
Whatever you’re after, there’s a floating shelf for it. Whether you love the warmth of timber or the clean look of glass, the right material is the one that suits your room and the weight it’ll carry.
Floating Shelf Brackets: The Bit That Does the Work
Floating shelves look like they defy gravity, but it’s all down to the brackets working out of sight. Choosing the right floating shelf brackets is the difference between a shelf that lasts and one that sags. Whether you’re fitting a floating corner shelf in a Grey Lynn apartment or a heavy timber shelf in an Epsom villa, the hardware decides the outcome. Here’s how the bracket types compare, and how to match them to your wall — with picks from FIT NZ and Visual Hardware.

What Are Floating Shelf Brackets?
Floating shelf brackets are what create that seamless, support-free look. They’re either hidden inside the shelf or mounted internally to the wall, so the shelf appears to float. For Auckland’s mix of older and newer homes, picking the right bracket for your wall type is the single most important decision in the whole project.
Types of Floating Shelf Brackets
A few main types, each with its strengths. Here are the popular options in New Zealand.
Concealed Brackets
Concealed brackets are the go-to for a true floating look. FIT NZ’s Triade Concealed Shelf Support slides into the shelf and anchors to the wall. FIT NZ publishes it as supporting up to 30kg per pair, for shelves 25-40mm thick and 160-300mm deep. Works with timber or MDF in any Auckland home.
Features:
- Invisible support: The bracket disappears inside the shelf.
- Rated: up to 30kg per pair, per FIT NZ, and only when the fixing behind it is sound.
- Versatile: Suits shelves 150 mm–300 mm deep.


Fixed Prong Brackets
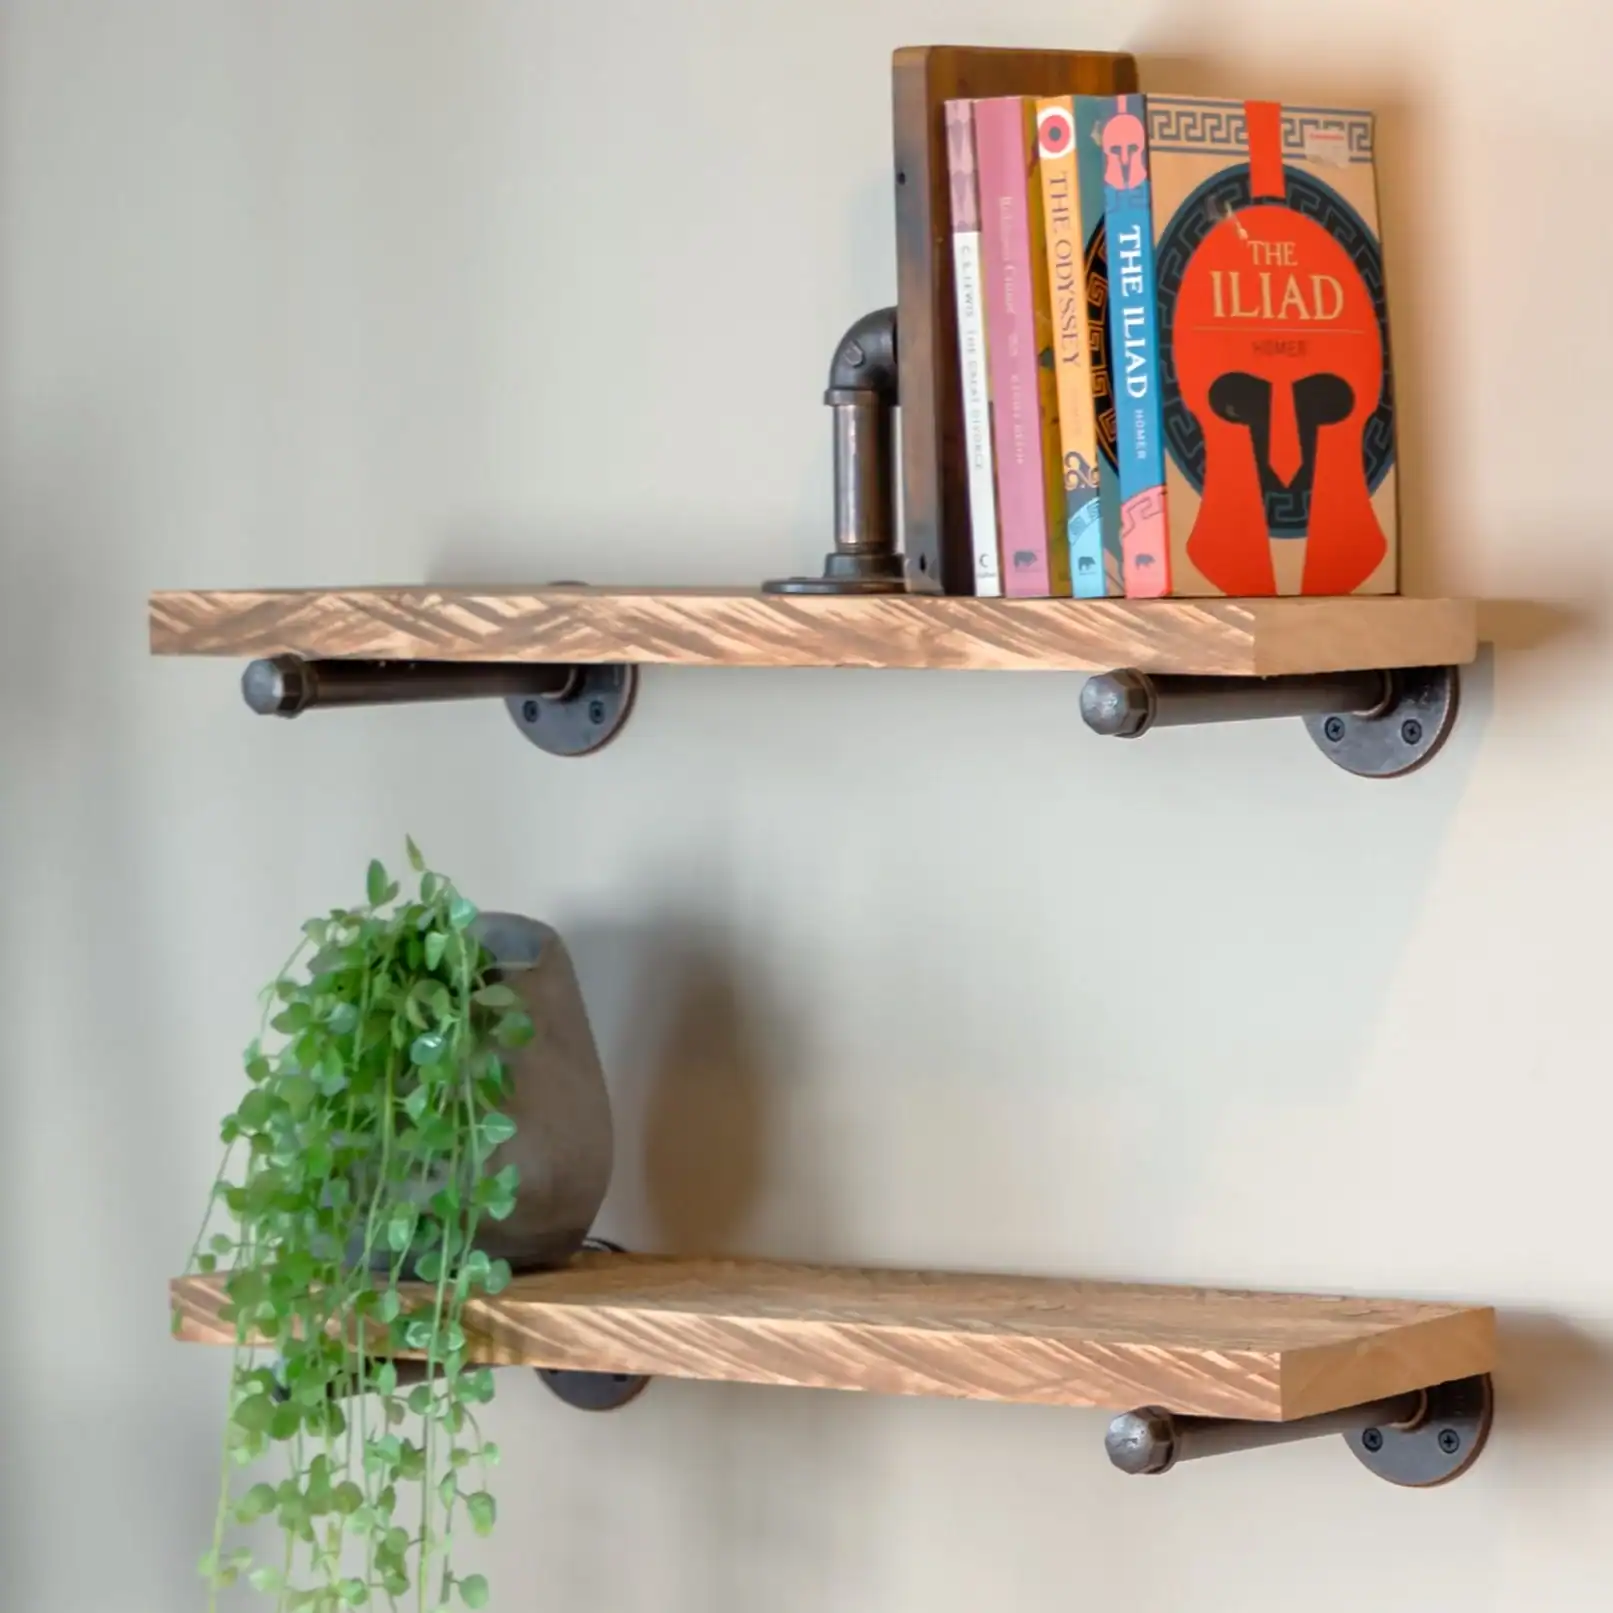
Fixed prong brackets, like Visual Hardware’s Fixed Prong Floating Shelf Bracket, are another solid choice. A metal prong slides into the shelf while a base plate screws to the wall — good for heavier loads in busy homes or commercial spaces.
Features:
- Rated: 25kg for the 500mm two-prong, 30kg for the 800mm three-prong, 35kg for the 1115mm four-prong.
- Straightforward to fit: Drill accurately and you’re away.
- Size options: 150 mm, 200 mm and 250 mm.
Adjustable Brackets
Adjustable brackets are less common but handy if you like to reconfigure. Bunnings NZ stocks systems that let you tweak height or angle — good for creative spaces or retail displays, and for renters who want minimal wall damage.
Features:
- Flexible: Reposition without reinstalling.
- Rating: varies by product, so read the packaging rather than assuming a category figure.
- Clean look: Pairs well with sleek shelves.
Picking Brackets for Your Wall Type
Auckland homes run the gamut, from weatherboard villas to concrete apartments. Here’s how to match brackets to walls:
| Wall Type | Best Bracket | Installation Notes | Recommended Products |
|---|---|---|---|
| Timber Stud (GIB Board) | Concealed or Fixed Prong | Fix into studs for max strength; use anchors for lighter loads. | FIT NZ Triade |
| Concrete/Masonry | Fixed Prong | Use masonry anchors for a secure hold. | Visual Hardware Fixed Prong |
| Plaster (Heritage Homes) | Concealed with Anchors | Drill carefully to avoid cracks; get help if unsure. | FIT NZ Triade |
Other Hardware You’ll Need
Brackets aren’t the whole story. You’ll also want:
- Wall anchors: Essential for GIB or masonry when studs aren’t where you need them. Bunnings NZ has a good range.
- Screws and fixings: Quality screws come with the FIT NZ Triade system.
- Level and stud finder: A laser level and stud finder from Mitre 10 are must-haves.

Specialty Hardware: LED and Corner Supports
For a bit extra:
- LED shelf supports: Nova Interior’s LED floating shelf adds ambient light — good for showing off art in a Ponsonby living room.
- Corner shelf brackets: Mitre 10’s MURAL Corner Shelf comes with brackets sized for corner installs.
Balancing Looks and Function
When choosing brackets, weigh both:
- Style: Concealed brackets for a minimalist finish, fixed prong for an industrial edge.
- Function: Confirm the bracket carries your shelf’s load. The FIT NZ Triade handles heavy-duty use.
- Wall type: Check your wall before you buy anything.
Where to Buy Brackets in Auckland
- FIT NZ: Concealed brackets like the Triade.
- Visual Hardware: Fixed prong brackets in several sizes.
- Bunnings NZ and Mitre 10: A broad range of brackets and hardware.
With the right brackets, your floating shelf will be secure and good-looking. For more on getting the most out of a small space, have a read of Little Giant Interiors’ guide to kitchen storage solutions.
How Much Can a Floating Shelf Hold?
A floating shelf is a stylish addition to any Auckland home, but nobody wants theirs coming down under the weight of a book collection. Knowing the weight limit matters for both safety and how you use the shelf. Whether you’re in a compact CBD apartment or a roomy Remuera villa, here’s what actually drives capacity — material, brackets, wall type, and the quality of the install.
What Affects Weight Capacity?
Four things decide how much your shelf can carry: the material, the brackets, your wall type, and how well it’s installed. Get the combination right and you’ve got a shelf you can trust.
💡 Design tip: Check the weight ratings for both the shelf and the brackets before you start — the lower of the two is your real limit.
1. What the bracket is fixed into
This is the real limit, and it is the one most guides skip. A bracket screwed into a timber stud behaves completely differently from the same bracket screwed into 10mm GIB on a plasterboard anchor, and neither behaves like a fixing into concrete block. Whatever the bracket is rated to carry, it can only deliver that rating if the fixing behind it can take the load. Fixing into structure is also where a job stops being purely decorative: if you are cutting into a lining to reach framing, or fixing to anything that carries load, talk to a Licensed Building Practitioner or your council before you drill.
2. The bracket’s published rating
Every reputable bracket is sold with a load figure from the company that made it, and that published figure is the number to design to. Two you can check for yourself in about thirty seconds:
- FIT NZ Triade concealed support: FIT NZ publishes “supports up to 30kg per pair”. It suits shelves 25-40mm thick, with a minimum shelf depth of 160mm and a maximum of 300mm. An optional support wall bracket is sold separately for extra stability, and a bar accessory lets multiple Triade units be installed onto drywall or gib.
- Visual Hardware fixed prong brackets: rated by size rather than as one number. The 500mm two-prong is rated to 25kg, the 800mm three-prong to 30kg and the 1115mm four-prong to 35kg. Visual Hardware states plainly that “to achieve the weight limit, brackets must be attached to a solid fixing point/s”, and recommends the prongs go into the shelf to at least half its width.
Those figures are a good deal lower than many of the numbers quoted online, including on pages that look authoritative. Design to the manufacturer’s number, not to the internet’s.
💡 Design tip: If a bracket is sold without a published load rating, treat that as the answer rather than an invitation to guess.
3. Span and depth
A floating shelf is a cantilever, so the further the load sits from the wall and the further apart the supports are, the harder every fixing works. Doubling the depth of a shelf does far more to the leverage on the bracket than doubling the thickness of the board does to its strength. That is why the Triade specifies a depth window at all: past 300mm the geometry stops working regardless of how good the fixing is. Bringing supports closer together is almost always the cheapest way to make a shelf stiffer.
4. What the shelf is made from
If you are weighing up boards for cabinetry rather than shelving, our comparison of acrylic and laminate cabinet fronts covers the same trade-off in more depth. Material matters least of the four, and it mostly governs sag and how a shelf fails rather than how much it holds. Solid timber and quality ply stay stiff over a longer span. MDF is smooth, cheap and takes paint beautifully, but it creeps under sustained load, so a heavily loaded MDF shelf that looks fine on day one can develop a visible bow within a year. Glass is stiff but brittle, and should be toughened anywhere people move around it. Metal is thin and stiff, so it tends to be chosen for the look.
💡 Design tip: Sealed finishes earn their keep in Auckland humidity. In a kitchen or bathroom, a pre-finished or properly sealed shelf will outlast a raw one every time.
Wall Type: What You Are Actually Fixing Into
Auckland housing stock covers roughly a century of construction, and what sits behind the lining changes what is possible.
- Timber framing behind GIB: the common case in most homes built since the 1960s. Fixing into the stud itself is far stronger than fixing into the sheet, so find the framing before you decide where the shelf goes rather than after.
- Plasterboard between studs: only as strong as the anchor you choose, and every anchor is sold with its own rated load. Read that rating and stay under it.
- Concrete or concrete block: common in apartments. Needs a masonry bit and an anchor rated for the substrate. The anchor manufacturer publishes both the hole size and the load.
- Lath and plaster in older villas and bungalows: the least predictable of the lot. The plaster carries almost nothing, the laths are thin, and the framing is often not where you expect. Treat a heavy shelf on lath and plaster as a job worth getting eyes on rather than a weekend guess.
Installation Quality
Even a well specified shelf fails if it is fitted badly. Fix into structure or use an anchor rated for the job, keep the shelf level, and spread the weight along it rather than loading one end. A poor install does not just reduce capacity, it damages the wall on the way out.
What the Bracket Makers Actually Publish
Rather than a table of numbers we have made up, here is what the two hardware suppliers linked above put in writing, so you can check every figure at the source before you buy.
| Bracket | Published rating | Stated conditions | Source |
|---|---|---|---|
| FIT NZ Triade concealed support | Up to 30kg per pair | Shelves 25-40mm thick; shelf depth 160-300mm; optional wall bracket for added stability | FIT NZ |
| Visual Hardware fixed prong, 500mm (2 prong) | 25kg | Must be fixed to a solid fixing point; prongs into at least half the shelf width | Visual Hardware |
| Visual Hardware fixed prong, 800mm (3 prong) | 30kg | As above | Visual Hardware |
| Visual Hardware fixed prong, 1115mm (4 prong) | 35kg | As above | Visual Hardware |
Two things stand out. The published numbers are per pair or per bracket, not per metre, and they assume the fixing behind them is sound. If your shelf needs to carry more than this, the answer is more supports or a different system, not optimism about the one you already have.

Where to Use Floating Shelves Around the Home
- Kitchen: timber or MDF on concealed supports, fixed into framing. Cookware is heavy and gets handled daily, so this is the room to over-support rather than under-support.
- Bathroom: toughened glass or a sealed board suits the humidity. Loads here are light, which is what makes glass workable.
- Living room: display weight is usually modest, so this is where a slim profile and an LED detail earn their place.
- Home office: if the shelving is going into a study, our guide to home office cabinetry covers the built-in alternative. Books are the heaviest thing most people ever put on a shelf, by a wide margin. Work out what a full run of books actually weighs before you choose the bracket, not after.
Getting the Most From Your Shelf
- Use quality brackets: FIT NZ’s Triade or Visual Hardware’s Fixed Prong for heavy loads.
- Fix into studs: Timber studs give the best support.
- Distribute weight: Heavier items closest to the brackets.
- Add brackets: Shelves over 1 m need a third bracket to share the load.
Three Weight-Capacity Myths
- Myth: every floating shelf holds heavy items. Not so — it depends on material and brackets. Glass isn’t for heavy loads.
- Myth: wall anchors are as good as studs. Anchors are less secure and carry less weight.
- Myth: thicker shelves always hold more. Thickness helps, but brackets and install quality matter more.
Knowing your shelf’s capacity is the key to a safe, lasting setup. With the right materials and brackets, you’re sorted.
DIY Floating Shelves: Build Your Own in Auckland
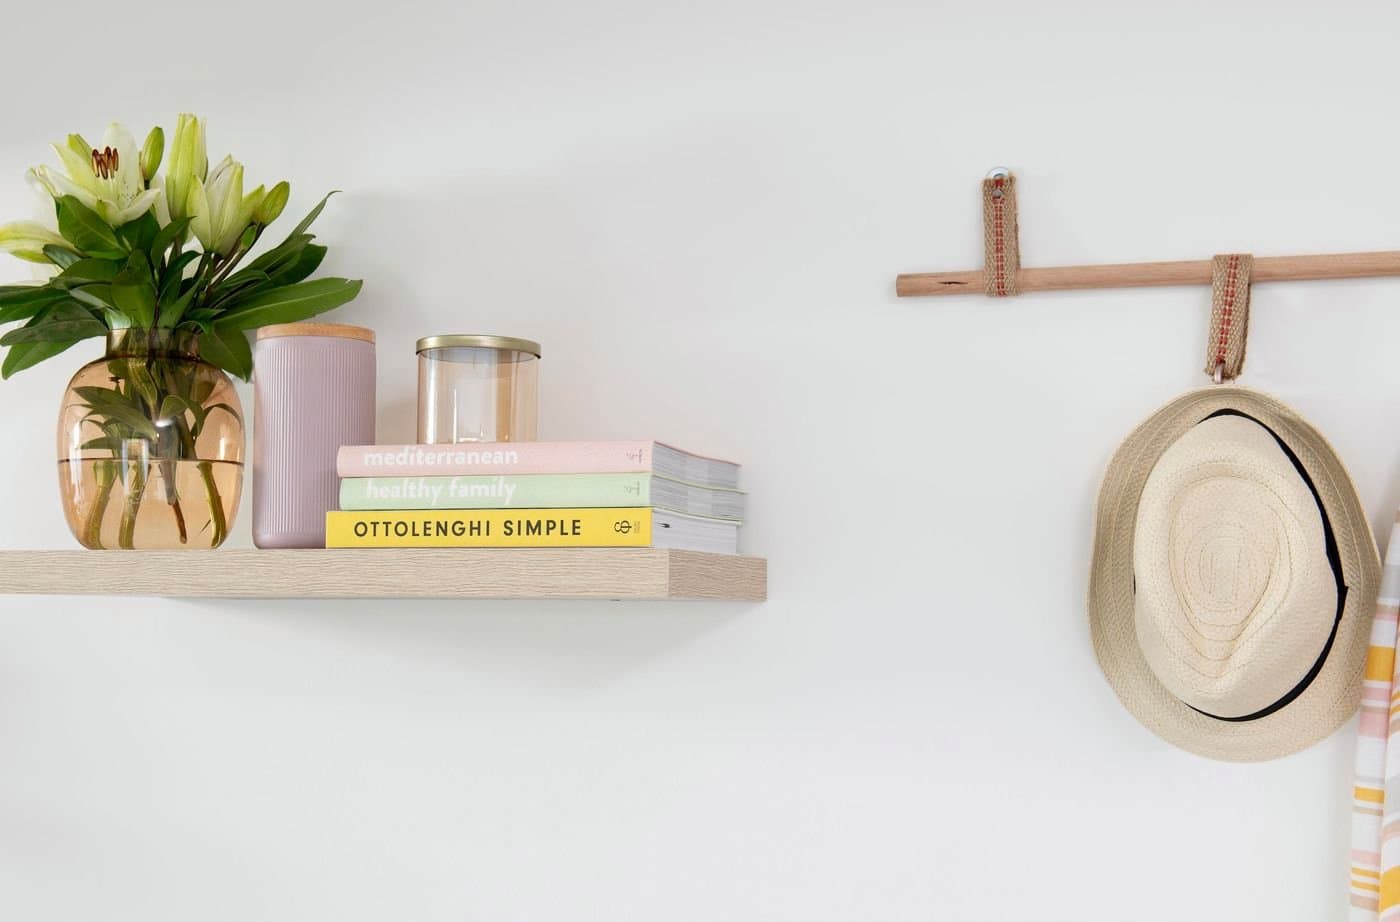
Want a more personal touch? Building your own floating shelf is a satisfying weekend job — a floating corner shelf for a Takapuna apartment, or a sleek timber run for a Remuera villa. You get exactly the size and finish you want, and you’ll save a fair bit too. Here’s how to source the parts locally, pick your materials, and build something that suits your space.
Why Build Your Own?
Building your own means tailoring it to the exact spot — a minimalist Mt Eden kitchen, a reading nook in Devonport. Source your materials from Auckland retailers and you’ll get a quality shelf without the pre-made price tag.
Where to Find Materials
Shelf Material
- Timber: Pine or oak from Bunnings NZ — durable and natural. Cut to size in store, which is more accurate than a freehand cut at home. Stiff over a long span, so it sags least.
- MDF: affordable and the easiest surface to paint well. Keep spans short, because MDF creeps under sustained load.
- Plywood: Light and modern, available pre-finished from Cliff Hanger.
- Glass: toughened glass for a sleek look, and a sensible pick in bathrooms where loads are light.
Brackets and Hardware
- Concealed brackets: FIT NZ’s Triade, published at up to 30kg per pair, for shelves 25-40mm thick and 160-300mm deep.
- Fixed prong brackets: Visual Hardware’s, published at 25kg (500mm), 30kg (800mm) and 35kg (1115mm), and good for deeper shelves.
- Wall anchors and screws: Matched to your wall type, from Bunnings NZ.
💡 Design tip: If your load is heavier than a single pair of supports is rated for, add another pair rather than hoping the first will cope.
Tools You’ll Need
Grab these from Mitre 10 or Bunnings NZ:
- Stud finder — to locate studs.
- Laser level — for a dead-straight shelf.
- Drill and bits — including masonry bits for concrete.
- Saw — for cutting timber or MDF.
- Sandpaper and paint or sealer — to finish.
How to Build Your Floating Shelf
Step 1: Plan the Design
Settle on size and purpose. A 1200 mm × 250 mm timber shelf suits a living room; a floating corner shelf works in a bathroom. Sketch it and check it against your brackets.
Step 2: Get Your Materials
Head to Mitre 10 or Bunnings NZ for the board and brackets. For a more finished option, Nova Interior’s LED floating shelf is worth a look.
Step 3: Cut and Prep
Measure, mark and cut. Sand the edges, then paint or stain to match the room.
Step 4: Drill the Bracket Slots
For concealed brackets like the Triade, drill slots into the back edge of the shelf, lined up precisely with the wall brackets.
Step 5: Test and Finish
Test-fit the shelf on the brackets before final mounting. Adjust as needed, then add a final protective coat against Auckland’s humidity.
Installation in Auckland Homes — What Actually Happens
The real-world version, step by step:
- Locate the studs. Use an electronic stud finder. In older villas around Grey Lynn and Mt Eden, plaster walls often have irregular stud spacing — double-check with a small pilot hole.
- Drill and fix. Concrete block needs a masonry bit and an anchor rated for masonry; plasterboard needs an anchor whose published rating covers your load. Both figures come off the anchor packet.
- Level and secure. A laser level is essential for runs over 1 m. Tighten set screws to the FIT NZ instructions.
- Test the load. Load it to roughly 20% above what it will normally carry, leave it 24 hours, then re-check the level. Any sag or movement now is far cheaper to fix than later.
Cost Breakdown
DIY beats buying pre-made. Estimate for a 1200 mm × 250 mm timber shelf:
| Item | Cost (NZD) | Supplier |
|---|---|---|
| Timber or MDF board | $20–$50 | Bunnings NZ |
| Concealed brackets (2–3) | $30–$60 | FIT NZ |
| Wall anchors/screws | $5–$15 | Mitre 10 |
| Paint/sealer | $10–$20 | Bunnings NZ |
| Total | $65–$145 |
Make It Your Own
- Curved edges: A jigsaw gives you a softer, organic line.
- LED lighting: Add an LED strip for a modern glow, like Nova Interior’s design.
- Paint or stain: White for minimalism, oak for a heritage home.
Common DIY Challenges and Fixes
- Cutting precisely: Use a straightedge guide, or have the store cut it.
- Drilling accurate slots: Use a drill guide or a template from your brackets.
- Matching your home’s style: Test the finish on an offcut first.
With good materials and a bit of planning, a DIY floating shelf becomes a standout feature in any Auckland home.
How to Install a Floating Shelf Like a Pro
Installing a floating shelf is one of those jobs that instantly lifts a room — a floating corner shelf in a Takapuna bathroom, a clean timber run in a Ponsonby living room. Get the prep right and the rest is straightforward, even for a first-timer. Here’s the full process, tailored to Auckland’s range of homes.
Tools and Materials
From Mitre 10 or Bunnings NZ:
- Floating shelf: Timber, MDF or glass, cut to size (e.g. 1200 mm × 250 mm). Try Cliff Hanger or Mitre 10.
- Brackets: Concealed like FIT NZ’s Triade, or fixed prong from Visual Hardware.
- Wall anchors and screws matched to your wall.
- Stud finder, laser level, drill and bits (masonry bits for concrete).
- Tape measure, pencil, screwdriver or drill driver.
- Safety gear — glasses and gloves.
Step-by-Step Installation
Step 1: Plan the Spot
Decide placement based on purpose and the room layout. Measure, and check for wiring or plumbing. For living rooms, aim for 1.2–1.5 m off the floor.
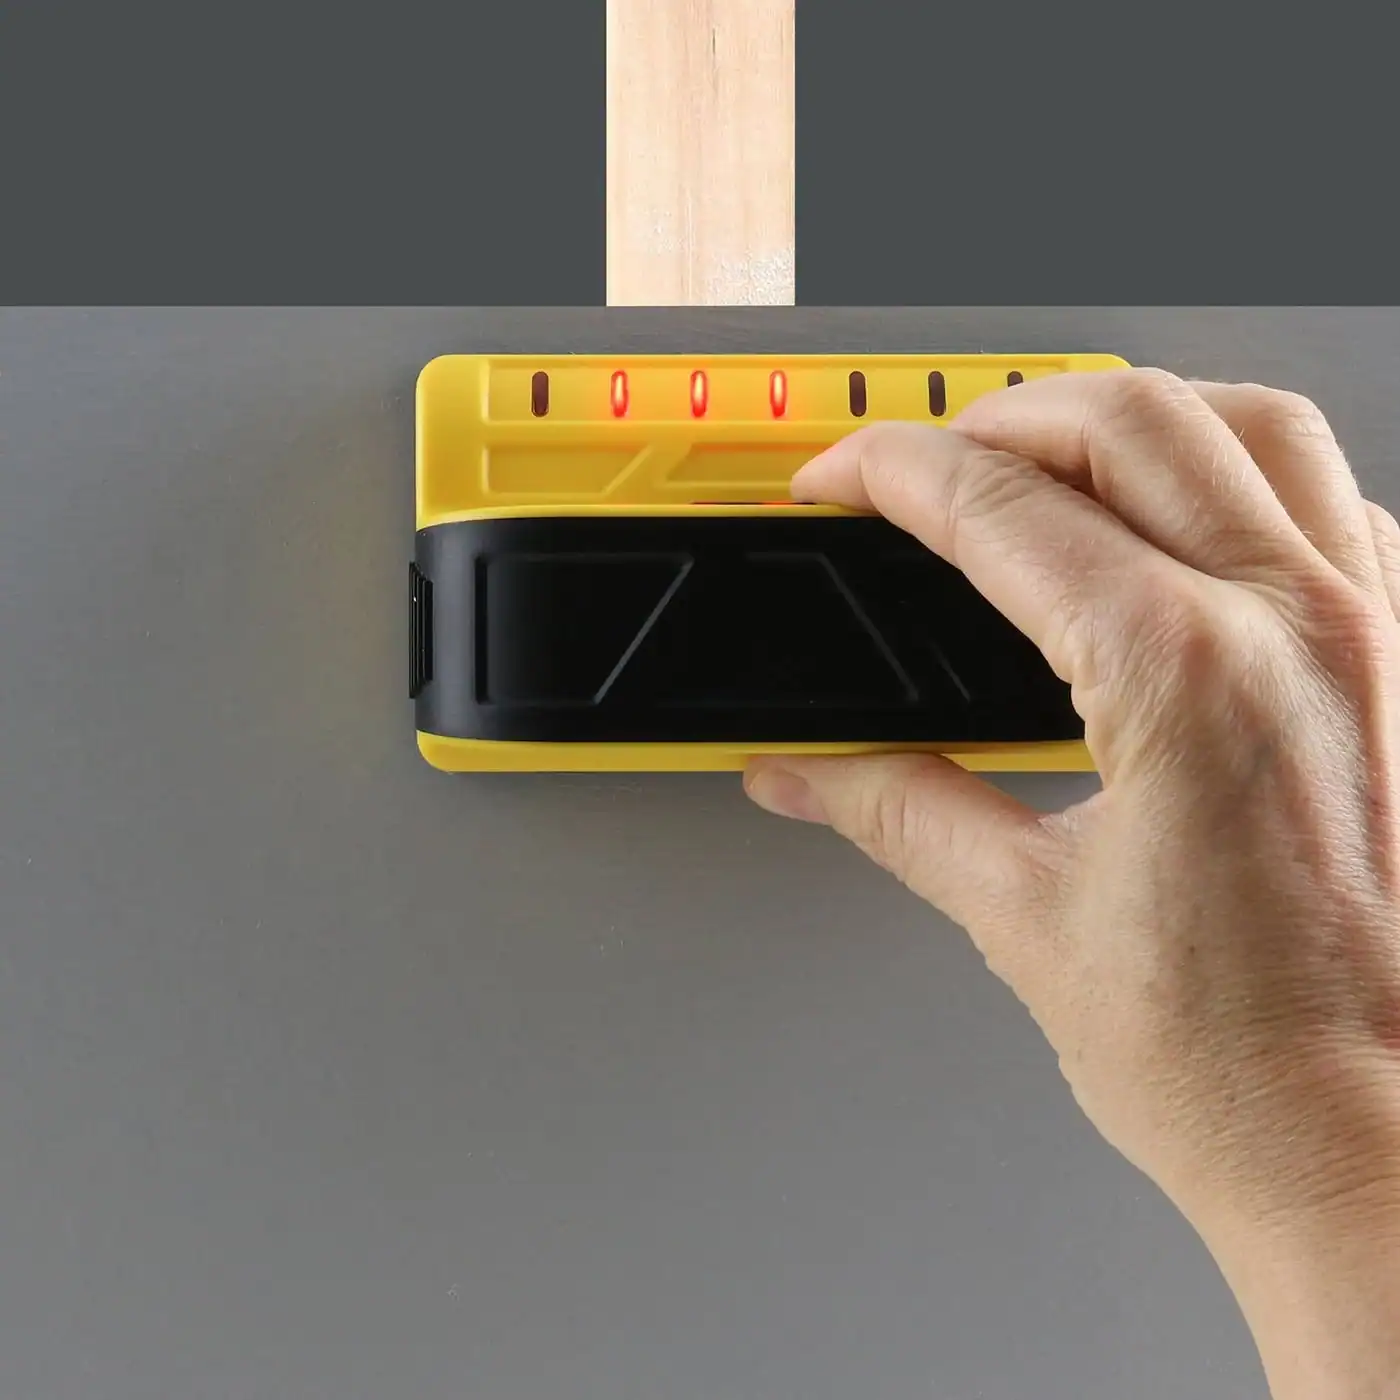
Step 2: Find Studs or Prep the Wall
Use a stud finder on GIB board — studs are your strongest anchor. For concrete or plaster, use the right anchors, and go gently on heritage plaster.
Step 3: Mark Bracket Positions
Draw a level horizontal line with a laser level. Mark bracket points along it, 400–600 mm apart for a 1200 mm shelf, aligned with studs or anchors.
Step 4: Install the Brackets
For concealed brackets like the Triade:
- Drill pilot holes at your marks.
- Insert anchors if needed, then screw in the bracket base.
- Check the rods are level.
For fixed prong brackets, secure the base plate and keep the prong level.
Step 5: Attach the Shelf
Slide the shelf onto the brackets for a tight fit — concealed brackets need pre-drilled slots. Tap gently with a mallet if needed, and check the level again.
Step 6: Secure and Finish
Some brackets, like the Triade, have set screws to lock the shelf in place. Tighten carefully, then clean up and touch up any paint.
Installing a Floating Corner Shelf
Open shelving pairs well with joinery that has been measured to the room, which is the same thinking behind a built-in media wall. A corner shelf is the one shape people get wrong most often, because it looks like a simpler job than it is. Two walls means two sets of framing that do not necessarily line up, and an internal corner is often where a stud sits doubled or where a nogging runs through at an unhelpful height. Work out where the framing is on both walls before you commit to a height, not after you have marked one side.
Three things worth knowing before you start:
- The corner is rarely square. Very few Auckland walls meet at a true 90 degrees, and older homes are worse. Scribe the back edges to the walls rather than cutting to a drawing, or you will get a gap on one side that no amount of levelling fixes.
- Both walls have to carry. A corner shelf loaded in the middle puts a twisting force on both sets of supports. Fixing well on one wall and improvising on the other is the usual failure.
- Level it against itself, not the ceiling. Ceilings and skirtings in older homes are often out. Set the shelf level with a spirit or laser level and accept the small gap you get against a wonky line, because the eye reads a sloping shelf far more readily than an uneven shadow line.
L-shaped corner shelves in one piece look best but are harder to fit, because they have to go in at an angle and then settle. Two shelves butted in the corner are far more forgiving, and with a tight joint most people never notice the difference.
For a corner, use corner-specific brackets like Mitre 10’s MURAL Corner Shelf. Measure the corner, mark positions on both walls, and install as above.
Wall-Specific Tips
| Wall Type | Best Brackets | Tips | Recommended Products |
|---|---|---|---|
| Timber Stud (GIB Board) | Concealed or Fixed Prong | Fix into framing wherever you can; use a rated anchor between studs. | FIT NZ Triade |
| Concrete/Masonry | Fixed Prong | Use masonry anchors. The anchor rating is the limit. | Visual Hardware Fixed Prong |
| Plaster (Heritage Homes) | Concealed with Anchors | Drill slowly to avoid cracks. Least predictable of the wall types. | FIT NZ Triade |
Avoid These Common Mistakes
- Misaligned brackets: Use a laser level and measure twice.
- Weak wall support: Fix into studs or use strong anchors.
- Shelf doesn’t fit: Make sure concealed-bracket slots are drilled accurately.
Follow this and you’ll have a shelf that’s both secure and good-looking.
Common Mistakes to Avoid When Installing Floating Shelves
Floating shelves can transform a room, but even confident DIYers slip up. A poorly installed shelf sags, marks the wall, or in the worst case comes down entirely. Here are the mistakes we see most often, and how to steer clear of them so your floating shelf stays safe and stylish.
1. Wrong Brackets for the Wall
Mistake: The wrong brackets or anchors for your wall type means weak support — a real risk given Auckland’s mix of wall constructions.
Fix: Know your wall. GIB board: FIT NZ’s Triade into studs. Concrete: Visual Hardware’s Fixed Prong with masonry anchors. Plaster: lightweight brackets and anchors.
2. Overloading the Shelf
Mistake: Too much weight makes a shelf sag or fall. Glass, in particular, won’t take heavy loads.
Fix: Check the capacity. Use timber or MDF on the Triade for heavy items, and spread the weight evenly.
3. Incorrect Bracket Spacing
Mistake: Brackets too far apart let the shelf sag, especially on longer runs.
Fix: Space them 400–600 mm apart for timber or MDF, and use three brackets for anything over 1 m.
4. Skipping the Level
Mistake: No level means a slanted shelf — it looks off and sits unstable.
Fix: Use a laser level from Bunnings NZ at every step, and re-check after the shelf is on.
5. Poor Wall Prep
Mistake: Ignoring uneven surfaces or hidden wiring causes problems down the line.
Fix: Inspect the wall first, use a stud finder to dodge wiring, and drill slowly on plaster.
6. Incorrect Slot Drilling
Mistake: Slots drilled wrong for concealed brackets leave the shelf unstable.
Fix: Measure precisely, use a drill guide, and test-fit before mounting.
7. Clashing With the Home’s Style
Mistake: A shelf that fights the room’s aesthetic looks out of place.
Fix: Choose materials and finishes that complement your decor, and test samples first.
💡 Design tip: Little Giant Interiors’ guide to kitchen storage solutions has more ideas for tying a space together.
Mistakes by Wall Type
| Wall Type | Common Mistake | Fix | Recommended Products |
|---|---|---|---|
| Timber Stud (GIB Board) | Missing the studs | Use a stud finder; fix with long screws. | FIT NZ Triade |
| Concrete/Masonry | Wrong anchors or drill bit | Use masonry anchors and the correct bit. | Visual Hardware Fixed Prong |
| Plaster (Heritage Homes) | Drilling too hard, cracking the surface | Drill slowly; use lightweight anchors. | FIT NZ Triade |
A Few More Tips for a Clean Result
- Measure twice: Always, before you drill.
- Test gradually: Add weight slowly to check stability.
- Use quality hardware: FIT NZ’s Triade or Visual Hardware’s Fixed Prong.
- Plan for humidity: Waterproof finishes for bathrooms and kitchens.
💡 Design tip: An LED strip lifts a display wall — Nova Interior’s LED floating shelf shows the effect well.
Where to Buy in Auckland
- Mitre 10: Shelves, brackets and tools.
- Bunnings NZ: Affordable hardware.
- FIT NZ: Concealed brackets.
- Visual Hardware: Fixed prong brackets.
Dodge these common mistakes and you’ll end up with a floating shelf that’s both safe and stylish.
Wrapping Up
Floating shelves add real style and storage to an Auckland home, whether that’s a character Grey Lynn villa or a sleek CBD apartment. Get the three fundamentals right, the fixing, the bracket rating, and the install method for your wall type, and you’ve got a shelf that’s secure and looks the part. Building your own opens up full customisation, and steering clear of the common mistakes keeps it safe for the long haul. With quality materials from FIT NZ, Visual Hardware, Bunnings NZ and Mitre 10, your floating shelf project can lift any space. Keen to get started? For more small-space thinking, take a look at our guides to garage storage ideas and butler’s pantry shelving — then pick your wall and get into it.
What’s the best floating shelf bracket for Auckland homes?
It depends on your wall type. For GIB board, use concealed brackets such as the FIT NZ Triade, fixed into framing, and stay within its published 30kg-per-pair rating. For concrete, fixed prong brackets from Visual Hardware suit, rated 25-35kg depending on size, with a masonry-rated anchor. For plaster walls, lightweight concealed brackets with anchors are best.
How much weight can a floating shelf hold?
There is no single figure. Capacity is set by what the bracket is fixed into first, then the bracket's own published rating, then the span and depth of the shelf, and last of all the material. As published examples, the FIT NZ Triade concealed support is rated to 30kg per pair and Visual Hardware fixed prong brackets to 25-35kg depending on size. Check the manufacturer specs and distribute weight evenly.
Can I install a floating shelf on plaster walls?
Yes, but take care. Use an anchor rated for plaster, keep the load light, drill slowly to avoid cracking the surface, and get advice before hanging anything heavy on lath and plaster.
How do I install a floating corner shelf?
Use corner-specific brackets like Mitre 10’s MURAL Corner Shelf. Measure the corner, mark positions on both walls, and secure with anchors. Great for small spaces like bathrooms.
Where can I buy floating shelf materials in Auckland?
Try Mitre 10, Bunnings NZ, FIT NZ or Nova Interior for shelves, brackets and tools.
How do I stop my floating shelf from sagging?
Use enough brackets (three for shelves over 1m), fix into studs or use strong anchors, and don’t overload it. Place heavier items near the brackets.
Are floating shelves good for renters?
Yes. Use adjustable or lightweight brackets with GIB anchors for minimal wall damage, and check with your landlord first.
How do you fix a floating shelf to the wall?
Find out what is behind the lining first, because that sets everything else. Fixing into timber framing is far stronger than fixing into plasterboard alone. Mark the bracket positions off a level line, drill to the size the bracket or anchor specifies, fit the supports, then check the level again before the shelf goes on. Load it gradually rather than all at once.
How do you install a floating shelf on GIB without hitting a stud?
Use an anchor rated for plasterboard and stay inside its published load, which is always lower than a fixing into framing. For anything heavier than light decor, it is worth moving the shelf a few centimetres so at least one support lands on a stud. A stud finder costs less than repairing a torn-out sheet.
How far apart should floating shelf brackets be?
Close enough that the span between them does not sag, and always within whatever the bracket maker specifies. As a rule the ends of a shelf should overhang the outer supports by only a small amount, and a long shelf wants a third support rather than two working harder. Adding a support is cheaper than replacing a bowed shelf.
How do you install a floating corner shelf?
Locate the framing on both walls before you settle on a height, because an internal corner often has doubled studs or a nogging in an awkward place. Scribe the back edges rather than cutting to a drawing, since very few walls meet at a true 90 degrees. Support both walls equally, and level the shelf against itself rather than against the ceiling or skirting. Two shelves butted into the corner are far easier to fit than a single L-shaped piece.
What timber is best for a floating shelf in New Zealand?
Oak is the most stable and the most forgiving over a long span. Rimu suits older villas where the existing joinery is already rimu, though most available stock is recycled. Macrocarpa gives a warm local character but marks more easily. Pine is the cheapest and needs sealing on all six faces to cope with Auckland humidity.
References
- FIT NZ — Triade Concealed ‘Floating’ Support: published load rating, shelf thickness and shelf depth range.
- Visual Hardware — Fixed Prong Floating Shelf Bracket: per-size weight limits and the stated fixing requirement.
- Cliff Hanger Shelving: New Zealand made timber floating shelves and aluminium brackets, cut to size.
- MBIE Building Performance: guidance on building work, restricted building work and when a Licensed Building Practitioner is required.
- Auckland Council — Building and consents: when work in an Auckland home needs consent.
Have you been putting off your kitchen renovation?
We offer flexible finance options to help you get your dream kitchen sooner. Learn more about our interest-free finance options.