

Quick answer: A home wine cellar in New Zealand rarely means a dug-out basement anymore. For most Auckland homes it’s a custom wine wall, a conditioned built-in cabinet, or an under-stair conversion, designed to hold wine at a steady 12 to 15°C with 60 to 70% humidity, away from heat, light and vibration.
Very few Auckland houses have a basement. The villas in Ponsonby and Grey Lynn sit on piles, the 1970s brick-and-tile homes across Pakuranga and Howick are slab-on-ground, and the new builds in Hobsonville and Flat Bush were never designed with a cool underground room in mind. So the old picture of a wine cellar, a dark stone room down a flight of stairs, was never really a Kiwi thing. What has taken its place is far more interesting to design: a custom wine cellar built into the living space itself. A backlit wine wall between the kitchen and dining room. A conditioned cabinet tucked into a bank of joinery. A clever under-stair conversion that turns dead space into a talking point.
This guide walks through the four practical ways to store wine at home in an Auckland house, the conditions your wine actually needs (and the ones it doesn’t), and the build details that separate a wine feature that works from one that just looks good in photos. We design, manufacture and install this kind of joinery from our factory in Rosedale, so the focus here is on the real decisions: where the wine goes, how the cabinetry holds it, and what drives the cost. No dusty stone rooms required.
If you collect anything more than a case at a time, or you’ve started buying wine to lay down rather than drink this weekend, a proper storage solution earns its place fast. Good wine that’s been cooked in a warm cupboard next to the oven is money poured down the sink. Here’s how to do it properly.
The Four Ways to Store Wine at Home in an Auckland House
Before you talk finishes and lighting, you need to pick the right storage type for your house, your collection, and how you actually use your wine. There are four that make sense for Auckland homes, and they suit very different situations. The single biggest mistake we see is people choosing the look first and the function second, then discovering their beautiful open wine wall sits on the sunniest wall in the house.

Option One: The Passive Cellar (And Why Auckland Makes It Hard)
A passive cellar relies on the building itself to hold a stable, cool temperature with no active cooling. It’s the classic approach, and in the right house it’s brilliant because it costs nothing to run. The catch is that Auckland’s climate works against it. Our summers push into the mid-20s and the humidity swings around, so an above-ground room with no cooling will track the temperature of the house, not the steady 12 to 15°C wine wants.
Passive only works here if you’ve got genuinely insulated, north-shielded space: a concrete-block section of a basement garage on a sloping Titirangi or West Harbour section, an interior room with no external walls, or a well-insulated void under a suspended floor. Even then, it’s worth measuring the actual temperature across a full summer before you commit. If the space drifts above 18°C for weeks at a time, your wine is ageing faster than it should, and you’re better off with active cooling.
💡 Design tip: Before you build a passive cellar, drop a cheap wireless temperature and humidity logger into the space and leave it for a full Auckland summer. If it holds under 18°C and doesn’t swing more than a few degrees week to week, passive is on the table. If it doesn’t, plan for a cooling unit from the start.
Option Two: The Conditioned Built-In Cabinet
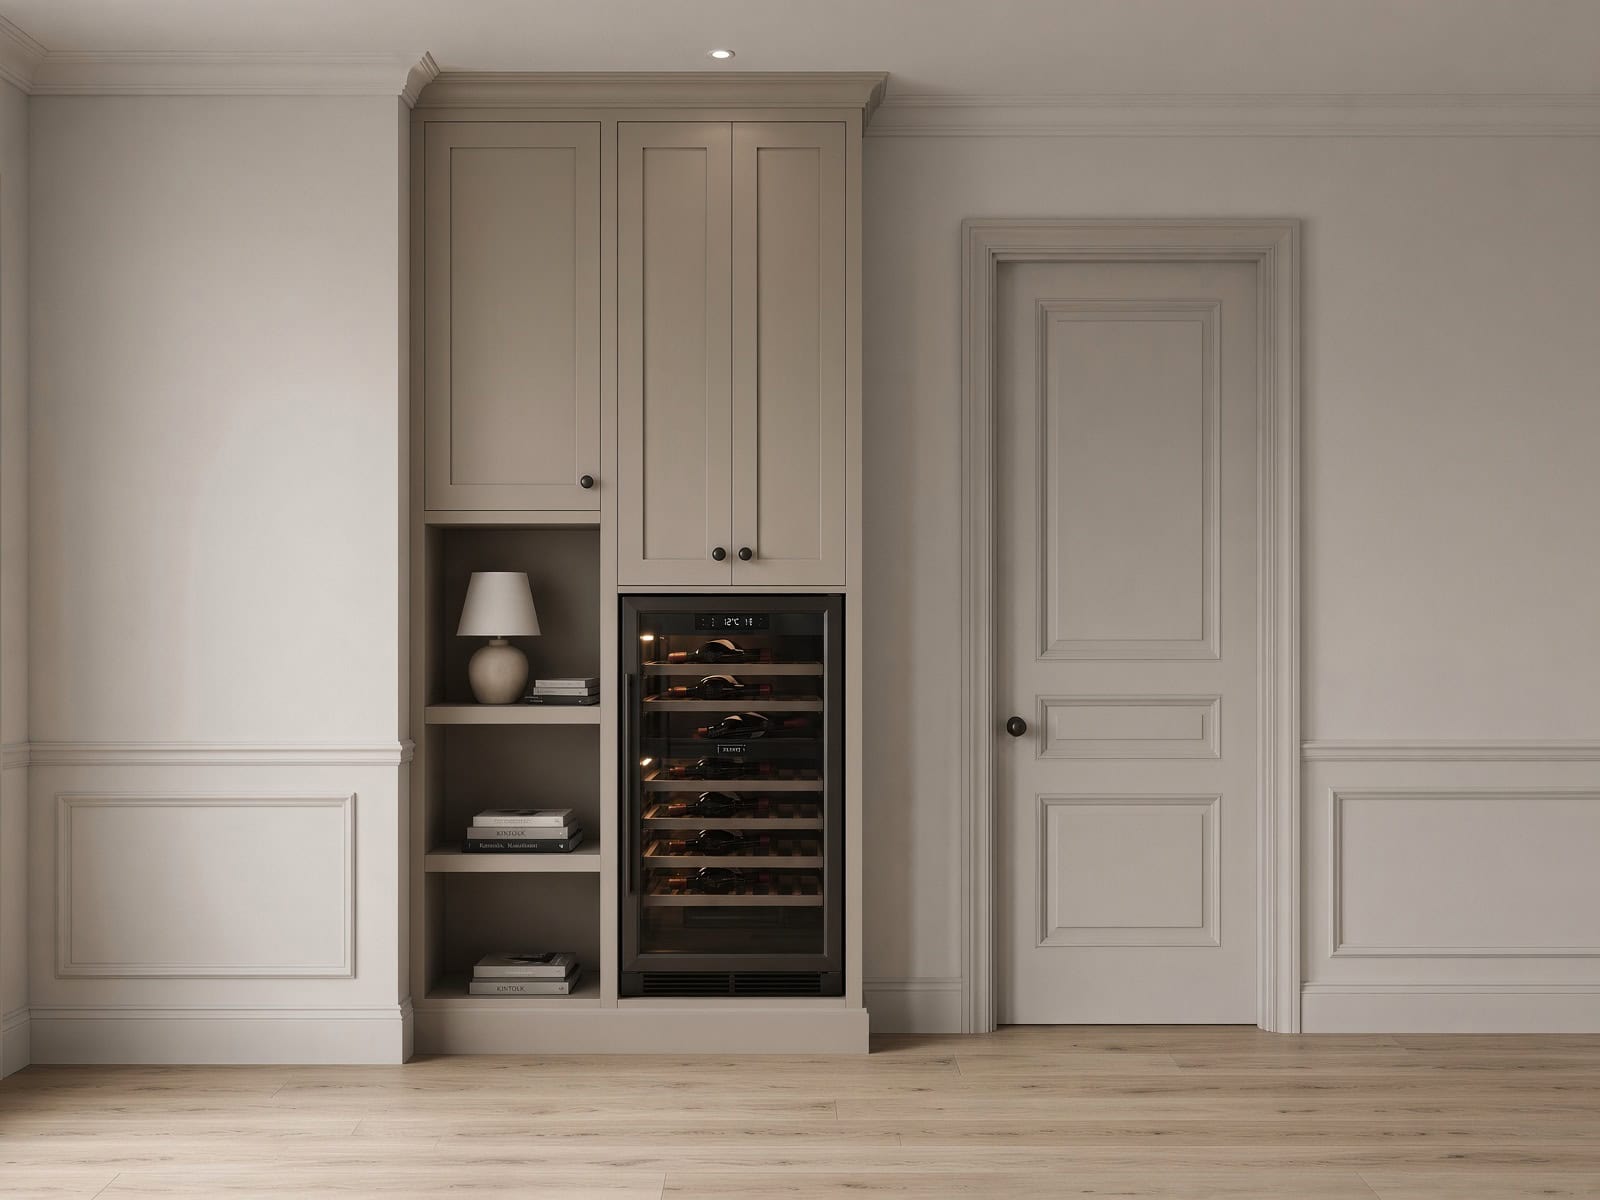
This is the most common solution we build, and for good reason. A conditioned wine cabinet is a purpose-made wine fridge, from a brand like Vintec or EuroCave, built cleanly into a run of custom cabinetry so it reads as joinery rather than an appliance. You get precise temperature control, often dual zones for serving whites cold and holding reds at cellaring temperature, and it lives right where you use it: off the kitchen, in the dining room, or as part of a butler’s pantry.
The joinery is what makes it. A freestanding wine fridge shoved into a gap looks like exactly that. Built into cabinetry with the right ventilation, a cabinetry-matched surround and integrated lighting, the same unit becomes a designed feature. The build detail that matters most here is ventilation, and it’s the one retailers almost never mention. More on that further down.
Option Three: The Wine Wall
A wine wall is the showpiece. Think a floor-to-ceiling run of racking, often behind glass, backlit so the labels glow, positioned as a divider or a focal point in an open-plan living area. Done well it’s genuinely striking, and it’s become one of the most requested features in higher-end Auckland renovations, particularly in Remuera, Epsom and the newer architectural builds on the North Shore.
The design question with a wine wall is always conditioning. An open, unconditioned wine wall on an interior shaded wall is fine for wine you’re drinking within a year or so. If you want to lay bottles down for the long haul, the wall needs to be enclosed behind glass and actively cooled, which changes the cabinetry entirely: sealed joinery, a glass door system, and a cooling unit sized to the volume. Both are valid. You just need to be honest at the design stage about which one you’re building.
Option Four: The Under-Stair Cellar Conversion
Under a staircase is the most underused space in a lot of Auckland homes, especially two-storey townhouses and the newer builds around Hobsonville and Millwater. That triangular void is often just holding a vacuum cleaner and some old paint tins. It’s also naturally shaded, usually against an interior wall, and out of direct sun, which makes it a smart candidate for a compact conditioned cellar.
Turning it into wine storage is a joinery job with a conditioning layer: custom racking cut to follow the rake of the stairs, a small cooling unit, and either a glass door to show it off or a flush cabinetry door to hide it. Because the space is unique to your stairs, there’s no off-the-shelf product that fits. This is exactly the kind of problem custom cabinetry solves, and it’s a big part of the feature cabinetry and custom wine storage we build in our Rosedale factory. If the conversion needs any structural change, that’s a different conversation, and we’ll come back to it in the Auckland home-types section.
Getting the Conditions Right: Temperature, Humidity, Light and Vibration
Wine is a living thing in the bottle, and four conditions decide whether it ages gracefully or turns before its time. Get these right and a decent bottle of Central Otago pinot will reward you in five years. Get them wrong and you’re drinking disappointment. The good news is the targets are simple and well established.
The Numbers That Actually Matter
For long-term storage, the widely agreed target is a steady temperature between 12 and 15°C, with relative humidity somewhere between 60 and 70%. According to wine-storage guidance from resources like Wine Folly and Wine Guardian, around 12 to 13°C is the sweet spot for cellaring, while warmer temperatures speed ageing up and colder ones slow it almost to a stop. Humidity in that 60 to 70% band keeps corks from drying out and shrinking, which is what lets air creep in and oxidise the wine.
Serving temperature is a separate thing. You store at 12 to 15°C, but you serve most whites cooler and reds a touch warmer, which is exactly why dual-zone conditioned cabinets are popular: one zone holds the collection, the other brings a few bottles to drinking temperature. If you only build one zone, build it for storage and chill on the day.

Why Stability Beats a Perfect Number
Here’s the part most people miss. A cellar that sits rock-steady at 16°C is better for your wine than one that averages a perfect 13°C but swings between 8 and 20°C through the day. Every temperature swing makes the wine expand and contract slightly, which fatigues the cork seal over time. Stability is the real goal.
This is the single strongest argument against storing wine in a normal kitchen cupboard or a garage in an Auckland home. A west-facing kitchen can swing ten degrees between a winter morning and a summer afternoon. A garage bakes in February and chills in July. Consistency is what a conditioned cabinet or a properly enclosed cellar buys you, and it’s why we design wine storage as a sealed, temperature-managed environment rather than just a nice-looking rack.
“People obsess over hitting exactly 13 degrees, but the wine doesn’t care about the number nearly as much as it cares about the number not moving. We’d take a steady 16 over a bouncing 13 every time. Design the cabinetry to hold a stable environment and the rest looks after itself.”
— Little Giant Interiors Design Team
Light, Vibration, and Where Not to Put Your Wine
UV light degrades wine, which is why serious storage uses solid or UV-filtered glass doors and LED lighting rather than halogen, since LEDs run cool and emit no meaningful UV. It’s also why a wine wall on a sun-drenched northern wall is a design trap: it looks incredible at 4pm and quietly cooks your collection.
Vibration is the quieter enemy. Constant low-level vibration disturbs the sediment in ageing wine and, over time, is thought to tire it out. In practical terms, that means don’t build wine storage sharing a wall or a cabinet run with the dishwasher, the washing machine, the fridge compressor or the rangehood ducting. We plan wine joinery away from those, and where a conditioned cabinet has its own compressor, we isolate it in the cabinetry so the vibration doesn’t carry into the racking.
Important note: Bottles with natural corks should be stored on their side so the wine stays in contact with the cork and keeps it moist. That’s a racking design decision, not an afterthought, so it needs to be built into the layout from the start rather than retrofitted.
Designing a Wine Wall or Conditioned Cabinet That Actually Works
This is where custom cabinetry earns its keep. A wine feature is deceptively technical: capacity planning, ventilation, materials, lighting and hardware all have to work together, and getting any one of them wrong shows. Here’s what goes into a build that performs as well as it photographs.
Racking and Capacity Planning
The first question is always: how many bottles, and how do you want to see them? Label-forward racking, where bottles sit horizontally with the label facing out, is the look behind most of those striking backlit wine walls. It’s display-led, and it’s what systems like VintageView, imported into New Zealand through Wine on the Side, are built for. Bin-style or diamond racking packs more bottles into the same space but shows you cork ends rather than labels, so it’s more about storage volume than showing off.
Capacity planning matters because bottles are heavier than people expect. A full case is around 15kg, and a floor-to-ceiling wall can hold well over a hundred bottles, so the joinery and its fixings have to be engineered for real load, not just styled. We size the racking to your collection with room to grow, then design the structure and wall fixing to carry it safely. A wine wall is as much a structural problem as a styling one, and that’s easy to underestimate from a Pinterest image.
Integrating a Wine Fridge Into Cabinetry: The Ventilation Detail Nobody Mentions
Here’s the build detail that trips up more wine cabinets than any other. A conditioned wine cabinet is a refrigeration unit, and a refrigeration unit throws off heat. That heat has to go somewhere. Box the unit tightly into sealed joinery with no airflow and the compressor works harder, runs hotter, uses more power and fails sooner, or simply never holds temperature on a hot Auckland day.
Every wine fridge has a manufacturer’s ventilation clearance, whether it vents from the front, the rear or the base, and the cabinetry has to be built around that spec, not the other way round. We read the appliance data sheet from Vintec, EuroCave or whichever unit you’ve chosen, then design the surround with the exact clearances and vent paths it needs so it disappears into the joinery and still breathes. It’s an invisible detail that decides whether the cabinet lasts fifteen years or fails in three.
Materials, Finishes and Lighting
For the cabinetry itself, we work with the same trusted surfaces we use across our kitchens and wardrobes: Laminex and Melteca boards for durable, moisture-tolerant carcasses and doors, timber and veneer where you want warmth, and glass for display fronts. For an enclosed, actively cooled cellar, the joinery is sealed and the door is glazed with an insulated, UV-filtered unit so you keep the view without cooking the wine.
Lighting is what makes a wine wall sing. LED strip lighting runs cool, sips power and comes in warm tones that make labels and timber glow without adding heat or UV. We integrate it into the racking edges and shelf undersides so the source is hidden and only the effect shows. On dimmers, the same wall shifts from a functional daytime store to a mood-lit feature for dinner. Little Giant Interiors builds this lighting into the joinery at manufacture rather than bolting it on afterwards, which is why it looks built-in rather than added.
Hardware That Carries the Detail
The mechanisms are where quality shows in daily use. We use BLUM soft-close hinges and runners so doors and any pull-out racking or serving drawers close silently and sit dead flush. For serving stations and drinks drawers built alongside the wine storage, BLUM drawer systems carry the load smoothly, and Häfele hardware covers the broader range of handles, sliding-door gear and specialty fittings. These aren’t the parts you notice in a photo, but they’re the parts you touch every day, and cheap versions announce themselves within a year.
Where Wine Storage Goes in Different Auckland Homes
The right solution depends heavily on the house. Auckland’s housing stock is a real mix, and each type has its own logic for where wine storage fits, what’s possible, and where the building rules come into play.
Villas and Bungalows (Ponsonby, Grey Lynn, Mt Eden)
Character homes on piles have no basement, but they often have generous interior hallways and rooms with high studs, which suit a built-in conditioned cabinet or a feature wine wall on an interior wall away from the sun. The trick with a villa is matching the joinery to the era: shadow-lined doors, painted timber and proportions that respect the original rooms, so the wine feature reads as if it belongs rather than looking bolted into a heritage house.
1970s and 80s Brick-and-Tile (Pakuranga, Howick, East Auckland)
These slab-on-ground homes are usually single level and open-plan-friendly, which makes them ideal for a conditioned cabinet built into the kitchen or dining zone. There’s rarely a cool void to exploit, so active cooling is the norm here. The upside is straightforward joinery runs and easy access for the cabinetry install, which keeps the build efficient.
New Builds and Townhouses (Hobsonville, Flat Bush, Millwater)
New builds are where under-stair conversions and integrated wine walls shine, because the spaces are regular and the walls are square and true. Two-storey townhouses almost always have that under-stair void begging for a compact cellar. If you’re still at the design stage of a new build, planning the wine storage in early means we can coordinate power, ventilation and structure before the linings go on, which is far cheaper than retrofitting later.
Apartments (CBD, Takapuna, Viaduct)
Apartment living rewards compact, high-performing solutions: a single well-integrated conditioned cabinet in a bank of joinery, sized to the space and the body-corporate rules. In an apartment, check your body-corporate requirements before any work that touches shared services or structure, and keep the cabinet’s ventilation and power within your own footprint.
Important note: Fitting cabinetry and a wine cabinet is generally straightforward, but an under-stair conversion or wine wall that involves removing or altering structure, or new plumbing and significant electrical work, can require building consent and a Licensed Building Practitioner. Check the current thresholds on the Auckland Council and Building Performance (building.govt.nz) sites, or ask us and we’ll point you to the right people.
Where a wine feature is part of a larger structural change, an under-stair space opened up, a wall removed, a full living-area reconfiguration, that structural side sits with a renovation builder. Our sister company Superior Renovations handles the building work while we design and manufacture the cabinetry inside it, so you get one coordinated result rather than two trades pointing at each other.
Questions to Answer Before You Design Your Wine Storage
The best wine features start with a handful of honest answers, not a picture. Nail these down before you talk cabinetry and you’ll end up with storage that fits how you actually live, rather than a beautiful wall that’s the wrong size or in the wrong spot. We work through these at the free in-home consultation, but it helps to have thought about them first.
How Big Is Your Collection, and Where’s It Heading?
Count what you’ve got, then be honest about where it’s going. Someone who buys a case at a time for drinking needs a very different setup from a collector laying down mixed dozens to age for a decade. Size the racking for the collection you’re growing into, not just the one you have today, because retrofitting more capacity later almost always costs more than building it in now. The most common regret with wine storage is building too small and outgrowing it within a couple of years.
Are You Storing to Age, or Chilling to Drink?
This one decides your whole approach. If most of your wine gets drunk within a year, you may not need active cooling at all, just smart, shaded racking in the right spot. If you’re cellaring wine to mature, you need a stable, conditioned environment, and the cabinetry changes to match. Plenty of Auckland homes want a bit of both: a conditioned cabinet for the good bottles and an open display rack for everyday drinking. Knowing the split up front means the design serves both jobs instead of half-doing one.
Who Uses It, and How Often?
A wine wall that’s a nightly part of family dinners wants easy reach, good lighting and serving space nearby. A collector’s cellar that gets opened for special bottles can be tucked away and locked. Think about the drinks-station side too: is there room for glassware, a bench to pour on, a bar fridge for mixers? Wine storage rarely lives alone, and planning the surrounding joinery around how you entertain turns a rack into a proper drinks zone.
💡 Design tip: Photograph the space and the bottles you already store, and note the warmest and coolest spots in the room across a day. Bring that to your consultation. It tells a designer far more about the right solution than a saved image of someone else’s wine wall ever will.
The Wine Storage Mistakes We See Most Often
After years of building wine features across Auckland, the same handful of avoidable mistakes come up again and again. None of them are obvious until the wine’s already suffering, so they’re worth knowing before you design.

Choosing the Spot for the View, Not the Wine
The most common one by far: picking the most visible wall for a wine feature without checking what that wall does across a day. A north or west-facing wall that looks stunning in afternoon light is often the worst place for wine, because the sun and the heat swing hardest there. The wine’s needs have to win the location argument, then good design makes that location look great, not the other way round.
Skipping the Ventilation on a Built-In Fridge
We covered this earlier because it matters so much. Boxing a wine fridge into airtight joinery to make it look tidy is the fastest way to kill the unit. The heat has nowhere to go, the compressor overworks, and a unit rated for years fails in a fraction of that. Every integrated wine cabinet has to be built to the appliance’s ventilation spec, full stop.
Undersizing the Cooling
A cooling unit sized for a small cabinet won’t hold temperature in a full wine wall on a hot Auckland day. If the volume of the enclosure and the number of bottles grows, the cooling capacity has to grow with it. This is why we size conditioning to the actual sealed volume rather than guessing, and why an enclosed feature wall is a genuinely different build from a single cabinet.
Buying the Racking Before Planning the Load
People sometimes buy a racking system they’ve fallen for, then discover the wall or the joinery can’t safely carry a hundred-plus full bottles. Load planning comes first: the structure and fixings get designed for the weight, then the racking style fits inside that. It’s a lot cheaper to plan the load once than to rebuild a sagging wall later.
Building One Zone When You Needed Two
A single-zone cabinet holds the whole collection at one steady cellaring temperature, which is right for storage but leaves you with no chilled whites ready to pour. Households that entertain often regret not building a serving zone alongside the storage. Decide early whether you want to store, serve, or both, because adding a second temperature zone or a small serving cabinet is a design choice made at the drawing stage, not a tweak you bolt on afterwards. Thinking about how you actually pour a glass on a Friday night saves that regret.
What Custom Wine Storage Costs in Auckland
Cost is the question everyone wants answered first and it’s the hardest to pin to a single number, because a wine feature can be almost anything. A modest built-in cabinet surround is a very different job from a floor-to-ceiling glazed, cooled wine wall holding two hundred bottles. Rather than quote a figure that won’t match your project, here’s the honest way to think about what drives the price.
What Custom Wine Storage Actually Costs in Auckland
Indicative pricing, by type:
| Solution | Indicative Auckland cost |
|---|---|
| Freestanding wine fridge (small collection, no cabinetry) | $500–$4,000 depending on capacity and brand |
| Integrated wine cabinet built into existing joinery run | $3,000–$8,000+ (appliance + surround) |
| Under-stair cellar conversion (racking + small cooling unit) | $8,000–$18,000 |
| Full custom wine wall, actively cooled, glazed | $20,000–$50,000+ |
| Large-format wine wall (200+ bottles, premium finish) | Can exceed $50,000 |
The Cost Drivers, Ranked
In rough order of impact on the final number:
- Conditioning — by far the biggest lever. An open, unconditioned display rack might only add a few thousand dollars to a cabinetry run. Sealing it, glazing it, and adding a cooling unit sized to the enclosed volume is what pushes a project from “a nice shelf” into five-figure territory.
- The appliance itself — if you’re integrating a wine fridge rather than building a fully custom cooled room, the unit is a distinct line item. A Vintec or EuroCave dual-zone unit typically runs from around $1,500–$2,500 for compact 30–50 bottle capacity, up to $5,000–$10,000+ for larger multi-zone units — and that’s before the surrounding cabinetry.
- Scale/capacity — more bottles means more racking, more structural fixing (a full case is ~15kg, so a 100+ bottle wall carries real load), and a bigger cooling unit to match.
- Materials and finish — Melteca/laminate carcasses are the efficient option; timber veneer, glass fronts and integrated LED lighting add cost but are what make a wine wall look like a wine wall rather than a fridge in a box.
- Site/structure — an open wall is a straightforward joinery install. An under-stair conversion or any structural change adds labour and, depending on scope, may need consent.
Custom Cabinetry companies like ours, quote by what’s actually built (linear metres, drawer/rack complexity, board, hardware), not by a flat per-square-metre rate, so any number here is a steer for budgeting, not a quote. The genuinely accurate figure only comes from a proper look at the space, the collection size, and the conditioning required — which is exactly what the free in-home consultation is for.
As a broad steer, a simple integrated cabinet surround starts in the low thousands, while a large, glazed, actively cooled feature wine wall sits at the higher end of custom joinery. The most useful next step is a real number for your space, not a guess, which is what our free in-home consultation and quote is for. We’ll look at the space, the collection and the conditioning you actually need, and give you a fixed-price contract rather than a moving target.
Custom Versus an Off-the-Shelf Wine Cabinet
You can absolutely buy a freestanding wine fridge and stand it in a corner, and for a small collection that’s a perfectly sensible start. Custom cabinetry earns its money when you want the storage to fit the space exactly, to disappear into the architecture, to hold a specific capacity, or to become a feature rather than an appliance. The same logic runs through everything we build, from wine walls to a well-planned butler’s pantry: off-the-shelf fits the average space, custom fits yours. If you’ve seen the sort of custom display joinery in our guide to floating shelves for Auckland homes, a wine wall is the same idea applied to storing and showing a collection.
Bringing It Together
A home wine cellar in Auckland is really a design decision dressed up as a wine question. Pick the storage type that suits your house and your collection, get the temperature, humidity, light and vibration right, and build the cabinetry so it holds a stable environment and carries real load. Do that, and you end up with something that protects good wine for years and looks like it was always meant to be there. Skip the conditioning or ignore the ventilation, and you’ve built an expensive way to spoil your favourite bottles.
Whether it’s a discreet conditioned cabinet, a backlit wine wall, or a clever under-stair conversion, this is exactly the kind of custom joinery we design, manufacture and install across Auckland from our Rosedale factory. Come to us with the space and the collection, and we’ll design the rest.
➡ Book your free in-home design consultation with Little Giant Interiors
➡ See our 6-step design and build process
➡ Learn more about our custom kitchen and cabinetry work in Auckland
How much does a home wine cellar cost in NZ?
It depends entirely on the type. A simple integrated wine cabinet surround starts in the low thousands, while a large, glazed, actively cooled feature wine wall holding a couple of hundred bottles sits at the higher end of custom joinery. The biggest cost driver is conditioning: an open display rack is far cheaper than a sealed, cooled enclosure. The appliance, scale, materials and any structural work all add to it. For a real figure, a free in-home consultation and fixed-price quote is the only accurate way.
What temperature and humidity should wine be stored at?
For long-term storage, aim for a steady 12 to 15 degrees Celsius, with around 12 to 13 degrees ideal for cellaring, and relative humidity between 60 and 70 percent. Stability matters more than hitting an exact number: a cellar holding a rock-steady 16 degrees is better than one averaging a perfect 13 but swinging widely through the day. The humidity band keeps corks from drying out and letting air in. Serving temperatures are separate, which is why many people choose dual-zone conditioned cabinets.
Can you have a wine cellar without a basement?
Yes, and most Auckland wine storage is built without one. Very few Auckland homes have a basement, so the practical options are a conditioned built-in cabinet, a wine wall, or an under-stair cellar conversion, all built into the living space with active cooling. A dug-out basement cellar is rarely needed or possible here. The key is a sealed, temperature-managed environment, which custom cabinetry with a cooling unit delivers regardless of whether you have a basement.
What is a wine wall?
A wine wall is a floor-to-ceiling run of wine racking, often behind glass and backlit so the labels glow, positioned as a focal point or room divider in an open-plan living area. It has become one of the most requested features in higher-end Auckland renovations. If it is open and unconditioned it suits wine you will drink within a year or so; for long-term storage it needs to be enclosed behind insulated glass and actively cooled, which changes the cabinetry to a sealed, refrigerated design.
Can you turn the space under the stairs into a wine cellar?
Under-stair space is one of the best-value spots for a compact cellar, especially in two-storey Auckland townhouses and newer builds. The void is naturally shaded and usually against an interior wall. Turning it into wine storage involves custom racking cut to follow the rake of the stairs, a small cooling unit, and either a glass or flush cabinetry door. Because it is made to fit your stairs, no off-the-shelf product fits. If the conversion alters structure, it may need building consent and a Licensed Building Practitioner.
Do wine bottles need to be stored on their side?
Bottles sealed with natural cork should be stored on their side so the wine stays in contact with the cork and keeps it moist. A dry cork shrinks and lets air in, which oxidises the wine. Bottles with screwcaps, common on many New Zealand wines, do not strictly need to lie down, but horizontal racking is still the most space-efficient and best-looking way to store a collection. Good racking design builds this in from the start rather than treating it as an afterthought.
How many bottles can a wine wall hold?
It depends on the size and racking style. A full floor-to-ceiling wine wall can hold well over a hundred bottles, and larger features carry two hundred or more. Label-forward racking, where bottles lie horizontally with labels facing out, uses more space per bottle but looks striking; bin or diamond racking packs more bottles in but shows cork ends. Because a full case weighs around 15 kilograms, capacity planning is also a structural question: the joinery and wall fixings have to be engineered for the real load.
Do you need to ventilate a built-in wine fridge?
Yes, and it is the detail most often missed. A conditioned wine cabinet is a refrigeration unit that throws off heat, and that heat needs somewhere to go. Every unit has a manufacturer ventilation clearance, whether it vents from the front, rear or base, and the surrounding cabinetry must be built to that specification. Box it in tightly with no airflow and the compressor overheats, uses more power, fails to hold temperature and wears out early. We design the joinery around the appliance data sheet so the unit is hidden but still breathes.
Where should you not store wine in the house?
Avoid anywhere hot, sunny or vibrating. That rules out a normal kitchen cupboard next to the oven, a west-facing wall in direct afternoon sun, and the garage, which bakes in summer and chills in winter. Keep wine away from the dishwasher, washing machine, fridge compressor and rangehood ducting, because constant vibration disturbs sediment and tires ageing wine. The ideal spot is a shaded interior location with stable temperature, which is why a conditioned cabinet or enclosed cellar outperforms any general cupboard.
Is a custom wine cellar worth it compared to a freestanding wine fridge?
A freestanding wine fridge is a sensible start for a small collection. Custom cabinetry earns its cost when you want the storage to fit the space exactly, hold a specific capacity, disappear into the architecture, or become a feature rather than an appliance. Custom lets you integrate a wine fridge properly with correct ventilation, build a display wall, or convert awkward under-stair space that no off-the-shelf product fits. Off-the-shelf fits the average space; custom fits yours, and it is built and installed to last.
Have you been putting off your kitchen renovation?
We offer flexible finance options to help you get your dream kitchen sooner. Learn more about our interest-free finance options.
References
- Wine Folly — Wine Storage Temperature: Best Practices
- Wine Guardian — Wine Cellar Temperature 101: Ideal Temperature & Control
- Vintec New Zealand — Wine Cabinets
- Wine on the Side — VintageView wine racks (NZ importer)
- Building Performance (MBIE) — Check if you need consents
- Auckland Council — Building and consents