

Quick answer: Laminate benchtops last when the spec is right: high-pressure laminate on a moisture-resistant core, every cut edge sealed, joins kept away from the sink and hob, and supports where the bench spans an appliance.
Most laminate benchtops don’t fail on the surface. They fail underneath it, at a join beside the sink or along the edge of a cut-out, where water finds raw particleboard and the core swells until the laminate lifts. By then there’s no repair. The whole length comes out.
The makers write down exactly how to stop that happening. Laminex New Zealand publishes a technical data sheet for its laminate, a separate sheet for the edge tape, installation instructions for its pre-made tops, and warranties that spell out what they won’t cover. Read together, they amount to a specification. Hardly anyone reads them before choosing a colour.
That’s what this guide does. We build made-to-measure kitchens in our Rosedale factory, and the benchtop is the last thing to go on and the first thing anyone touches, so we care about how it’s built. Below you’ll find what a laminate top is made of, which core to ask for, the edge choices and how each one looks, where the joins and cut-outs should sit, how to live with one, and how pre-made tops differ from a fabricated bench. Price has its own guide, linked further down.
Laminate benchtops: what you’re actually buying
A laminate benchtop is two materials doing two jobs. On top sits a thin decorative sheet that takes the wear. Underneath is a board, usually particleboard, that gives the bench its thickness and strength. Glue joins them. Everything that goes wrong with a laminate bench comes back to one of those three layers, so it pays to know which one you’re choosing at each step.
High-pressure laminate, the sheet on top
Most fabricated laminate benches here are surfaced in high-pressure laminate, or HPL. Laminex describes its Formica Classic range as layers of kraft paper finished with a decorative layer, fused together with phenolic resins under extremely high pressure and heat. The finished sheet is thin. The Laminex laminate technical data sheet lists it at 0.7mm nominal.
That’s the whole wear layer. It’s tough for its thickness, but it relies completely on the board underneath staying flat and dry.
The same data sheet lists the finishes: Natural, Velour, Gloss Plus, Matte, Legno, Metallic and Satin. Finish isn’t only about looks. It changes how a bench can be shaped, which matters once you get to the edge, and it changes how marks show. A gloss sheet shows scratches and wipe marks that a textured finish hides, and Laminex’s own warranty lists wipe marks on darker colour surfaces among the things it doesn’t cover.
Continuous-pressed laminate on pre-made tops
Walk into a hardware store and the cut-to-length tops on the rack may not be HPL at all. Laminex’s information sheet for its Formica Handitops, a pre-made benchtop range, says they come in two grades: high-pressure laminate in Handitops Select, and continually pressed laminate in Handitops Standard. Continually pressed laminate, or CPL, is made on a running press rather than in sheets under a static one. The installation guide for the same range says the Standard range should not be used for high wear or where high impact resistance is required.
That’s a useful line to have in your back pocket. If a top is sold as “laminate” with no grade named, ask which one it is. A busy family kitchen is a high-wear surface by any definition.
Why melamine board isn’t a benchtop
Melamine is the third surface people mix up with laminate, because it looks similar in a showroom. Melteca, which we use for cabinet carcasses and doors, is a melamine surface pressed straight onto particleboard or MDF. It’s excellent cabinet material. It’s the wrong thing for a bench, and Laminex says so in plain words in the Melteca technical data sheet: “Do not use Melteca in constant wear situations such as sink bench tops, high use shop counters, bar tops or restaurant tables.”
So when a quote says “Melteca benchtop”, ask what it means. It may be fine for a desk in a home office or a shelf in a laundry cupboard. On the bench where you chop, rinse and stack dishes, the maker has already ruled it out.
💡 Design tip: Ask for the laminate grade and the product name on the quote line, not just the colour. “Laminex HPL, Natural finish, on moisture-resistant particleboard” tells you far more than “laminate benchtop, white”.
The antimicrobial surface, and what it means
Many Laminex decors carry a surface treatment called Protec+. Laminex says it has been independently tested to ISO 22196:2011, JIS Z 2801 and ASTM G21, standards that measure antibacterial activity and fungal resistance, and that it is food contact safe provided good hygiene practices are followed. Not every decor has it, so if it matters to you, check the colour against Laminex’s availability guide. It doesn’t replace cleaning. It means the surface itself isn’t feeding what you leave on it.
The core decides how long a laminate bench lasts
If you only change one thing on a laminate quote, change the board. The sheet on top is waterproof. The particleboard under it isn’t, and it’s the part that fails.
Standard particleboard against moisture-resistant
Laminex makes Superfine particleboard in a standard grade and a moisture-resistant grade, Superfine MR. Its Superfine technical manual publishes how much each one swells after 24 hours of testing, and the gap is the strongest argument for the upgrade you’ll find anywhere. At 13 to 19mm, standard board swells 8% and the MR board 4%. At 30 to 33mm, the thickness of a typical benchtop core, standard board swells 6% and MR swells 3%. At bench thickness, the moisture-resistant board swells half as much.
The same manual lists Superfine MR as designed for kitchen cabinetry and benchtop substrates. It’s also clear about the limit: MR “is not waterproof and therefore must not be allowed to come in direct contact with water.” Moisture-resistant buys you time when water gets in. It doesn’t stop water getting in. That’s still the job of the seal.
| Board thickness | Superfine, 24-hour thickness swell | Superfine MR, 24-hour thickness swell |
|---|---|---|
| 12mm | 9% | 4% |
| 13-19mm | 8% | 4% |
| 20-29mm | 6% | 3% |
| 30-33mm | 6% | 3% |
Source: Laminex New Zealand, Trade Essentials Superfine and Superfine MR Particleboard technical manual, tables 1 and 2 (typical results tested to AS/NZS 4266).
Seal every edge you cut
A fabricated bench arrives with its faces covered. Every cut you make afterwards opens raw board. That means the sink hole, the hob hole, the end you trim to fit the wall, and the underside of a join. Laminex’s installation guide for its pre-made tops says all edges must be sealed with silicone sealer, paint or polyurethane, and that all exposed edges of the substrate around a sink or appliance should be sealed with silicone, with sealant also run under the edge of the sink or appliance as it goes in.
That seal is the cheapest part of the whole job and the one most often skipped, because nobody sees it once the sink is in. You can check it before the sink drops in, though. Ask your installer to show you the sealed cut-out. A good one won’t mind.
The dishwasher underneath
Few people think about the steam a dishwasher lets out, yet it rises straight into the bench above it. The same guide recommends painting or sealing the underside of the benchtop with polyurethane wherever a dishwasher is installed, so steam doesn’t damage it, and fitting the dishwasher’s own steam deflector where one is supplied.
If you’re replacing a bench over an existing dishwasher, ask whether the underside will be sealed. It’s ten minutes of work before the top goes on and close to impossible afterwards.
💡 Design tip: After a hot cycle, wait a few minutes before opening the dishwasher wide, then open it fully so the steam goes out into the room.
Heat from below: wall ovens and under-bench ovens
Heat matters to the board as much as to the surface. The Superfine manual says the board’s structural life may be impaired if surface temperatures exceed 50°C for extended periods, and that short-term exposure should not exceed ambient plus 65°C. It asks you to check the heating appliance maker’s clearances so 50°C isn’t exceeded. For a bench sitting over an under-bench oven, that’s a question for the oven’s installation manual, and it’s worth reading before the cabinetry is drawn rather than after.
Postformed or square edge: the profile you’ll look at every day
The edge is where a laminate bench shows its age or hides it. It’s also where most of the visible design choice sits, so it’s worth slowing down here.
How a postformed edge is made
A postformed edge is one continuous sheet of laminate heated and bent around a rounded front edge on the board, so there’s no seam on the front at all. Laminex’s data sheet describes this in detail: the laminate is heated until it can be bent, then formed around a shaped profile routed into the particleboard. The sheet has limits. Solid colours need a gentler bend than patterned and woodgrain decors, and the data sheet says flatly that Paper Finish can not be postformed.
The upside of postforming is that there’s no join for water to find along the front edge. The downside is the look. A rounded front, often called bullnose or roll edge, reads as a laminate bench from across the room. Some people like that honesty. Plenty don’t.
Square edges and edge tape
A square edge is cut straight and then covered with an edge strip. Laminex makes an ABS edge tape for this, matched to its laminates. The ABS edge tape data sheet gives the size as 53mm wide and 1mm thick, available pre-glued or unglued, and says it can be applied with hot melt adhesives such as EVA, PA and PUR.
The same sheet has one sentence that matters more than the rest: where the edge tape will be subject to moisture, as in front of a sink, the join must be waterproof, either by sealing the substrate or by using a waterproof adhesive. The front edge in front of your sink is the single wettest edge in the kitchen, and it’s where a square-edged laminate bench usually fails first if the glue line isn’t waterproof. Ask what adhesive is used and whether the board edge is sealed under the tape.
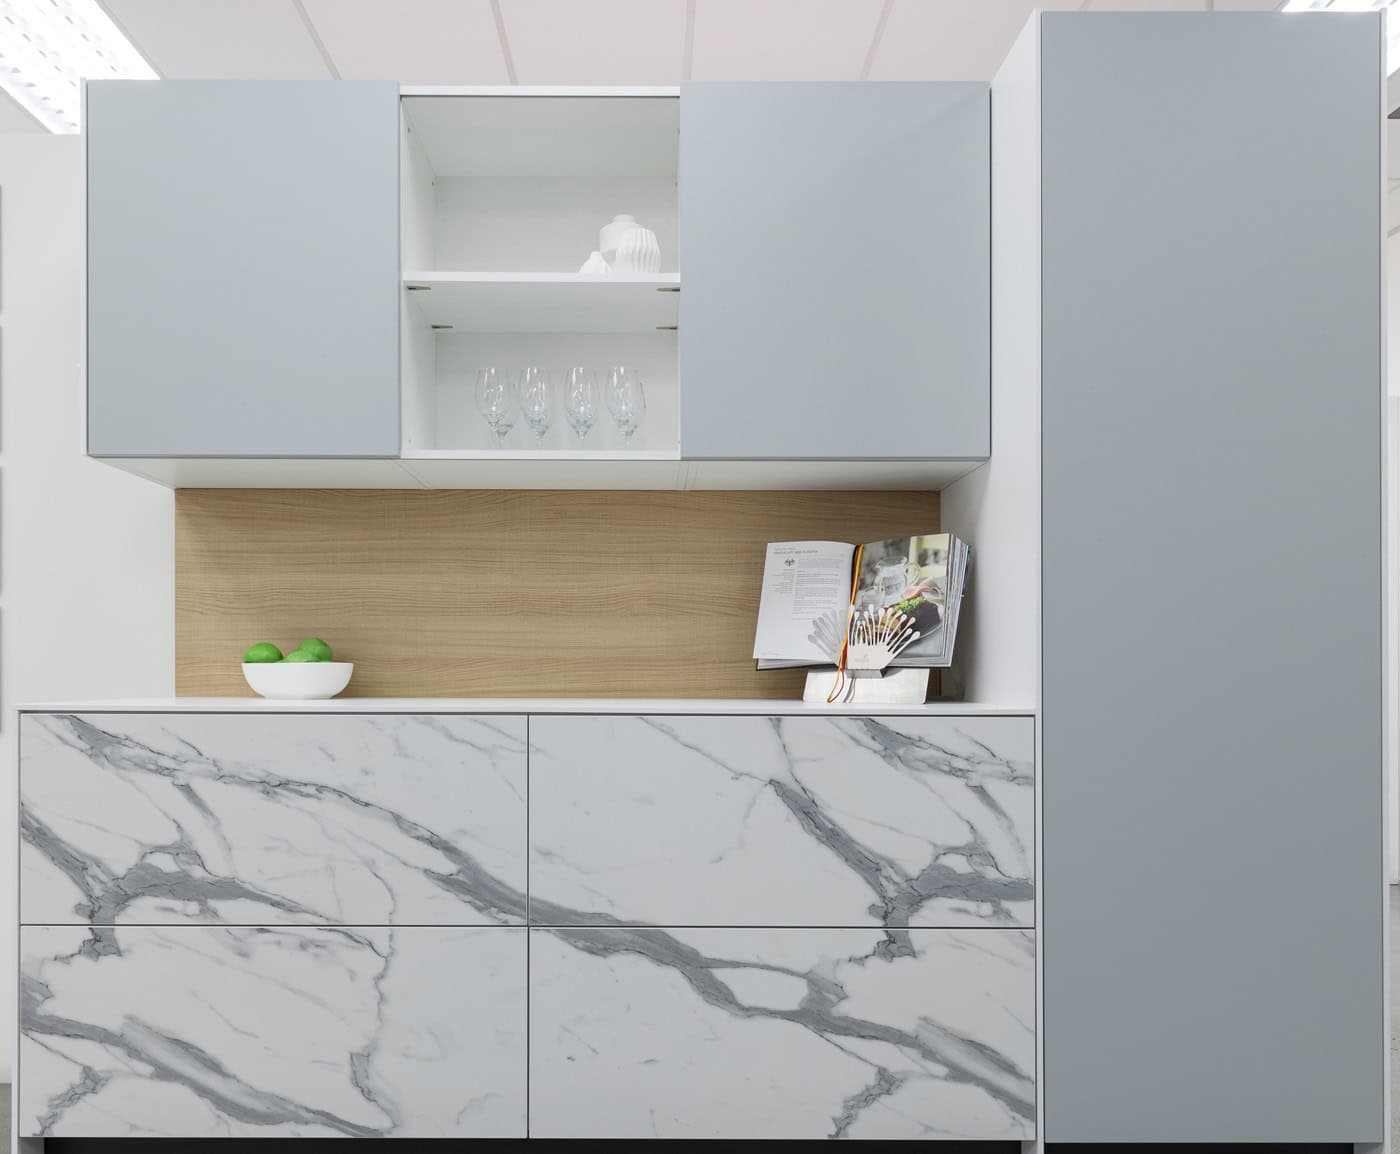
This catches people out. You can fall for a colour and then find it only comes square-edged. Prime Panels, one of the panel makers we work with, says on its Prime Laminate page that the majority of its benchtop range is post-formable and that edging is available for the non-formable Soft-Matt colours. Soft-Matt is the anti-fingerprint, soft-to-the-touch finish a lot of people are drawn to now. Pick one of those and you’ve picked a square edge with it.
Fine, as long as you choose it knowingly, because the edge changes the look more than the colour does.
Coved splashbacks and drop fronts
The back edge has options too. Laminex’s data sheet describes forming a cove splashback, or up-stand, as part of the same top: the laminate is bonded across the bench and a separate splashback strip, then heated and bent around a coving rod so it runs from the bench up the wall in one piece. Its worked example is a 600mm-wide bench with a splashback rising 100mm above the benchtop. Because the sheet is continuous, there’s no join along the back corner, which is where crumbs and water collect on a bench with a separate upstand.
The front can go further as well. The same section covers extended drop fronts, front edges formed down between 200mm and 250mm deep, which it says are usually used on vanity units and reception counters (our guide to designing a custom bathroom vanity covers the rest of the vanity). On a home bar or the end of a laundry bench, a deep drop front gives laminate the solid, monolithic look people usually go to stone for. Both details take a fabricator with forming equipment, so ask early if you want either.
How the edge reads in the room
Think about where you’ll see the bench from. In an open-plan room the front edge of the island is the first thing you see coming in the door, and a square edge in a matt decor reads clean and current. A rounded postformed edge suits a softer, more traditional kitchen, a villa scullery or a laundry, where the curve sits comfortably with older joinery. On a long galley run you mostly see the bench from above, so the surface decor matters more than the edge.
Thickness changes the read too. Laminex lists its pre-made Handitops Standard tops at 30mm and the HPL Handitops at 36mm. A fabricated bench can be built thicker by doubling the edge, which gives a heavier, more solid-looking front without the weight of stone. If you’re pairing laminate with stone elsewhere in the house, match the edge thickness so the two read as one design.
💡 Design tip: Ask to see a sample with the edge already applied, not a flat chip. A colour that looks right flat can look very different once a 1mm edge strip or a rounded bend catches the light.
Joins, cut-outs and supports: where laminate benches fail
If the core is where a laminate bench fails, the joins and cut-outs are how the water gets there. Every rule in this section comes from Laminex’s own documents, and every one is cheap to get right at fabrication and expensive to fix afterwards.
Where the joins go
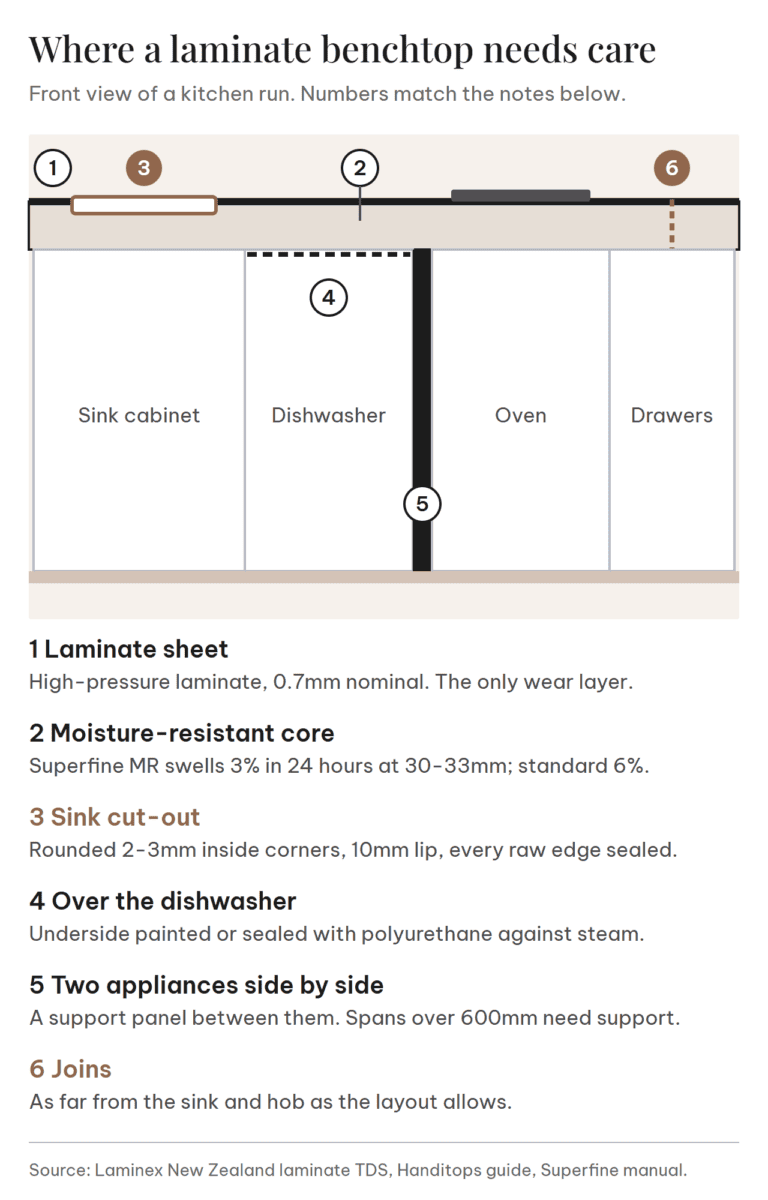
An L-shaped or U-shaped bench needs a join where the runs meet, and long runs can need one too. The data sheet says to avoid placing joins close to sink areas, to minimise the risk of water getting in. The pre-made top installation guide puts it the same way: joins should be placed as far from sinks and hob cut-outs as possible.
The type of join matters. The guide recommends either a straight mitre or a mason’s mitre, and prefers the mason’s mitre for strength and appearance. A mason’s mitre carries the front edge around the corner as one continuous profile, which looks far better on a postformed bench and gives a longer glue line. It needs a benchtop jig to cut, which is why it’s usually done by a fabricator rather than on site.
The data sheet also says sufficient glue and pressure must be used on both sides of any join, or a hard-setting glue such as urea or epoxy. Ask how your joins will be bolted and glued. A good fabricator will tell you without hesitating.
Cut-outs for the sink and hob
Cut-outs are the most common place for a laminate bench to crack. Laminex’s data sheet traces cracking at cut-outs and internal L-shaped corners to sharp internal corners, and says internal corners must have a small 2 to 3mm chip-free radius, with the machined edges of the cut-out sanded smooth and the top edge of the laminate arrised, meaning lightly bevelled, to remove the stress point.
The installation guide adds the practical steps: follow the sink or appliance maker’s template, mark a line 10mm inside it so the appliance has a lip to sit on, drill a 10mm starting hole close to that inside line and cut with rounded corners to avoid splits. Then seal the exposed board, as above.
If you’re replacing an existing sink, the cut-out size comes from the new sink’s template, not the old hole. Choose the sink before the bench is made.
Supports, spans and appliances side by side
A laminate bench sits on its cabinets and is screwed down through brackets or the cabinet rails, so the cabinetry under it sets the starting line. Ours is made on German laser machinery for a precise finish in our Auckland factory, and a square, level run of carcasses gives the joins a fair start. Where the bench spans an opening, it needs help. The installation guide says benchtops spanning more than 600mm that aren’t resting on cabinets should be supported, with battens fixed to the wall, metal brackets, or vertical supports such as flat panels or benchtop legs. It also says that where two appliances sit side by side under the top, a supporting panel must be positioned between them.
That last rule comes up more than you’d think: a dishwasher next to an under-bench oven, or a fridge space next to a dishwasher. If two appliances sit side by side, plan a panel between them at the design stage, because adding one later means moving an appliance.
The guide also gives the overhang: plan for the bench to overhang the front of the cabinet carcass by a consistent 20 to 30mm, so the doors fit and the bench still sits a few millimetres proud of them.
Let it settle before it goes in
Laminate and particleboard both move a little with temperature and humidity, and they move at different rates. Laminex’s data sheet traces join gaps to that movement and says laminate and substrate should be allowed to equilibrate for up to 72 hours before fabrication. If the room will be air-conditioned, the air conditioning should be running before the laminate is installed. In an Auckland kitchen, where a humid summer and a damp winter can be months apart, that settling time is worth respecting.
💡 Design tip: Mark the join positions on the kitchen drawing before you sign off. A join you’ve seen on paper beside the sink is much easier to move than one you notice on installation day.
Important note: Changing a benchtop usually means lifting the sink and hob. Under the Plumbers, Gasfitters and Drainlayers Board’s advice for consumers, unfixing or refixing a plumbing fixture, trap or waste pipe is work for an authorised plumber, so book one to disconnect and reconnect the sink. If your cooktop or oven is hard-wired, have a registered electrician disconnect and reconnect it. Moving a sink to a new position may also involve drainage and Building Code requirements: ask your plumber, and Auckland Council if the work needs a consent.
Living with a laminate bench: heat, steam, knives and sun
A well-built laminate bench is easy to live with. It doesn’t need sealing, it doesn’t stain easily, and it wipes clean. It does have limits, and the makers are honest about them.
Heat: what the test says and what to actually do
Laminex tests its HPL to ISO 4586-2, and the results are in the data sheet. In the dry heat test at 180°C, the sheet must look no worse than rating 4, a slight change of gloss or colour visible only at certain angles. In the wet heat test at 100°C it’s the same. Steam is harder on it: the result must be no worse than rating 3, a moderate change of gloss or colour.
A short lab test isn’t a pan straight off the hob, though. Laminex’s own care advice for its pre-made tops is blunt: never place objects from the oven or hob directly onto the laminate surface, as this may lead to blistering, and use heat-resistant mats. Treat the test figures as a measure of the surface, not permission. Treat the trivet as non-negotiable.
Knives and scratches
The data sheet is equally clear on cutting: do not cut directly on the laminate surface. The care guide adds that sliding rough-based objects across the top will leave fine scratches, so use a chopping board for food prep. A textured finish such as Natural or Velour hides fine scratches far better than gloss.
Sun through a north-facing window
Laminate has good colour stability indoors, but Laminex warns that prolonged exposure to direct sunlight may cause shrinkage and some change in colour, and says its laminate isn’t recommended for interior applications with prolonged exposure to direct sun. Its warranty also excludes fading or discolouration from direct and indirect light. In a kitchen with a big north-facing window over the bench, a blind or a UV-reducing film protects the top as well as the cabinetry.
Cleaning and the two spots to watch
Day to day, a damp cloth with mild detergent or a non-abrasive cleaner diluted in warm water is all the surface needs. Avoid abrasive powders, creams and polishes. The care guide singles out the two places that need attention: moisture won’t harm the laminate surface itself, but spills should be wiped away from joints and cut-outs immediately, because those are the critical areas. We cover the rest of the kitchen in our guide to cleaning and caring for kitchen cabinets.
💡 Design tip: Put a drying mat under the dish rack so it drains into the sink. Standing water at a join is the one thing a laminate top won’t forgive.
Pre-made tops or a fabricated bench?
You can buy laminate benchtops two ways: as a pre-made length off the shelf, cut to fit on site, or fabricated to your kitchen’s exact shape by a benchtop fabricator. Both have a place. They’re not the same product.
What a pre-made top gives you
Laminex’s Handitops are a good example of the pre-made option. Its information sheet lists the Standard tops at 3600mm or 1800mm long, 600mm wide and 30mm thick, and the HPL tops at 3600mm or 1800mm long, 615mm or 930mm wide and 36mm thick. They come with one factory bullnose long edge and a colour-matched laminate strip that’s glued onto any raw edge you cut.
That suits a laundry, a garage bench or a straight run of kitchen. Laminex’s Handitops installation guide says they can be installed by any kitchen installer or a confident DIYer, and then adds that fitting a kitchen benchtop is an advanced DIY task and any cutting mistake can prove costly. Corners, sink cut-outs and joins are where that warning bites.
Check it before anyone cuts it
Whichever route you take, look the top over before it’s cut. Laminex’s installation guide asks the installer to check for damage or defects first, and to check colour and surface finish compatibility before fitting, which matters if your bench is two lengths from different batches. Its other advice will be familiar to anyone who’s fitted a top: measure twice and cut once.
The guide is specific about the cut itself. With a handsaw, cut from the top. With a power saw, cut from the back. Because it’s hard to keep a sawn edge completely chip-free, it suggests cutting 5mm oversize and finishing the edge with a router run against a clamped straight edge, with the cutter entering through the postformed edge. A chipped laminate edge is a weak spot for water as well as an eyesore, so this isn’t fussiness.
What a fabricated bench gives you
A fabricated bench is made to the measurements of your installed cabinets. The data sheet notes that benchtops, breakfast bars and special shapes are made by independent fabricators to individual specifications. That’s what gets you a mason’s mitre on an L-shaped corner, a postformed edge carried around a return, a deeper island top, or a bench built up thicker at the front. It also means the cut-outs, joins and sealing are done in a workshop, under controlled conditions.
It’s also why we template benches after the cabinets go in. Our design and install process installs the cabinetry first, then templates the benchtops and splashbacks from what’s actually on the wall, so the bench is made to the walls and cabinets as they actually stand. That does leave a gap between the cabinets going in and the bench arriving, because the top can only be made once it’s measured. Your designer will give you the timing for your job, and it’s worth planning a few days of cooking around a temporary top.
What the warranties don’t cover
This is the part people skip, and it’s where the difference between the two routes shows. The Laminex Laminate warranty covers defects in the laminate itself. It excludes faulty workmanship by anyone other than Laminex’s authorised personnel, damage from failing to follow Laminex’s fabrication and installation procedures, and exposure to excessive heat or moisture. The Handitops warranty is more specific still, naming edge clashing and joins as examples of workmanship by others that it doesn’t cover.
In plain terms: the joins and the edges, the two places a laminate bench usually fails, are the fabricator’s and installer’s responsibility, not the laminate maker’s. So when you compare quotes, ask who stands behind the joins and the edges, and for how long. A supplier warranty on the sheet won’t help you if the core swells at a badly sealed mitre.
Two other conditions in the Laminex warranty are worth knowing. It requires Laminex to be notified within seven days of the first person becoming aware of a defect, and it applies to product that has stayed installed where it was first installed. If you notice a bench lifting, report it straight away.
💡 Design tip: Keep the laminate colour name, the product name and the fabricator’s details with your house papers. If you ever need a warranty claim or a matching repair, that’s the first thing anyone will ask for.
The paperwork points the same way. Laminex publishes a Building Products Information Requirements sheet for its HPL. It lists the benchtop among the HPL’s intended uses and says the HPL contributes to Building Code clause B2 durability when the fabrication guidelines in its laminate technical data sheet are followed. It’s a durability statement for compliance, separate from any warranty. The condition attached to it is the point of this whole guide: the maker’s numbers hold when the maker’s fabrication rules are followed.
Where laminate earns its place, and where we’d choose something else
Specified properly, laminate is the right answer in more rooms than people expect, and the wrong one in a few.
Where it suits
A scullery or butler’s pantry is the obvious one. It’s a working bench, often out of sight, and a hard-wearing laminate there frees up budget for a showier surface on the island. Laundries are another: a laminate top over a front-loading washer is light, easy to fit and easy to replace. Rental properties and first kitchens, where a clean, durable, well-built bench matters more than the material’s prestige, suit it too.
If you’re weighing laminate against the other options, our rundown of engineered stone alternatives sets laminate beside timber, porcelain, compact laminate and natural stone.
Where we’d think twice
Choose the sink with the bench. The Handitops installation guide describes a sink that sits down into the cut-out on a 10mm lip, with sealant under its rim and on every exposed edge of the board. If you have your heart set on a sink mounted under the bench, talk that through with your designer and the sink maker before you settle on laminate, because it leaves the cut edge of the core facing the wettest spot in the kitchen.
It’s also a stretch where a cook genuinely moves pans straight off the hob onto the bench. Some habits are easier to design around than to change, and a heat-proof surface beside the cooktop, or a stone island with laminate on the back run, can be the honest answer.
Splitting the materials
Plenty of the kitchens we design mix surfaces. A stone or porcelain island where people gather and look, with laminate on the back run, the scullery or the laundry, buys the impression where it shows and the practical surface where the work happens. The trick is to make the split look intentional: match the edge thickness, pick decors that sit together, and change material at a natural break such as a corner or a tall cabinet.
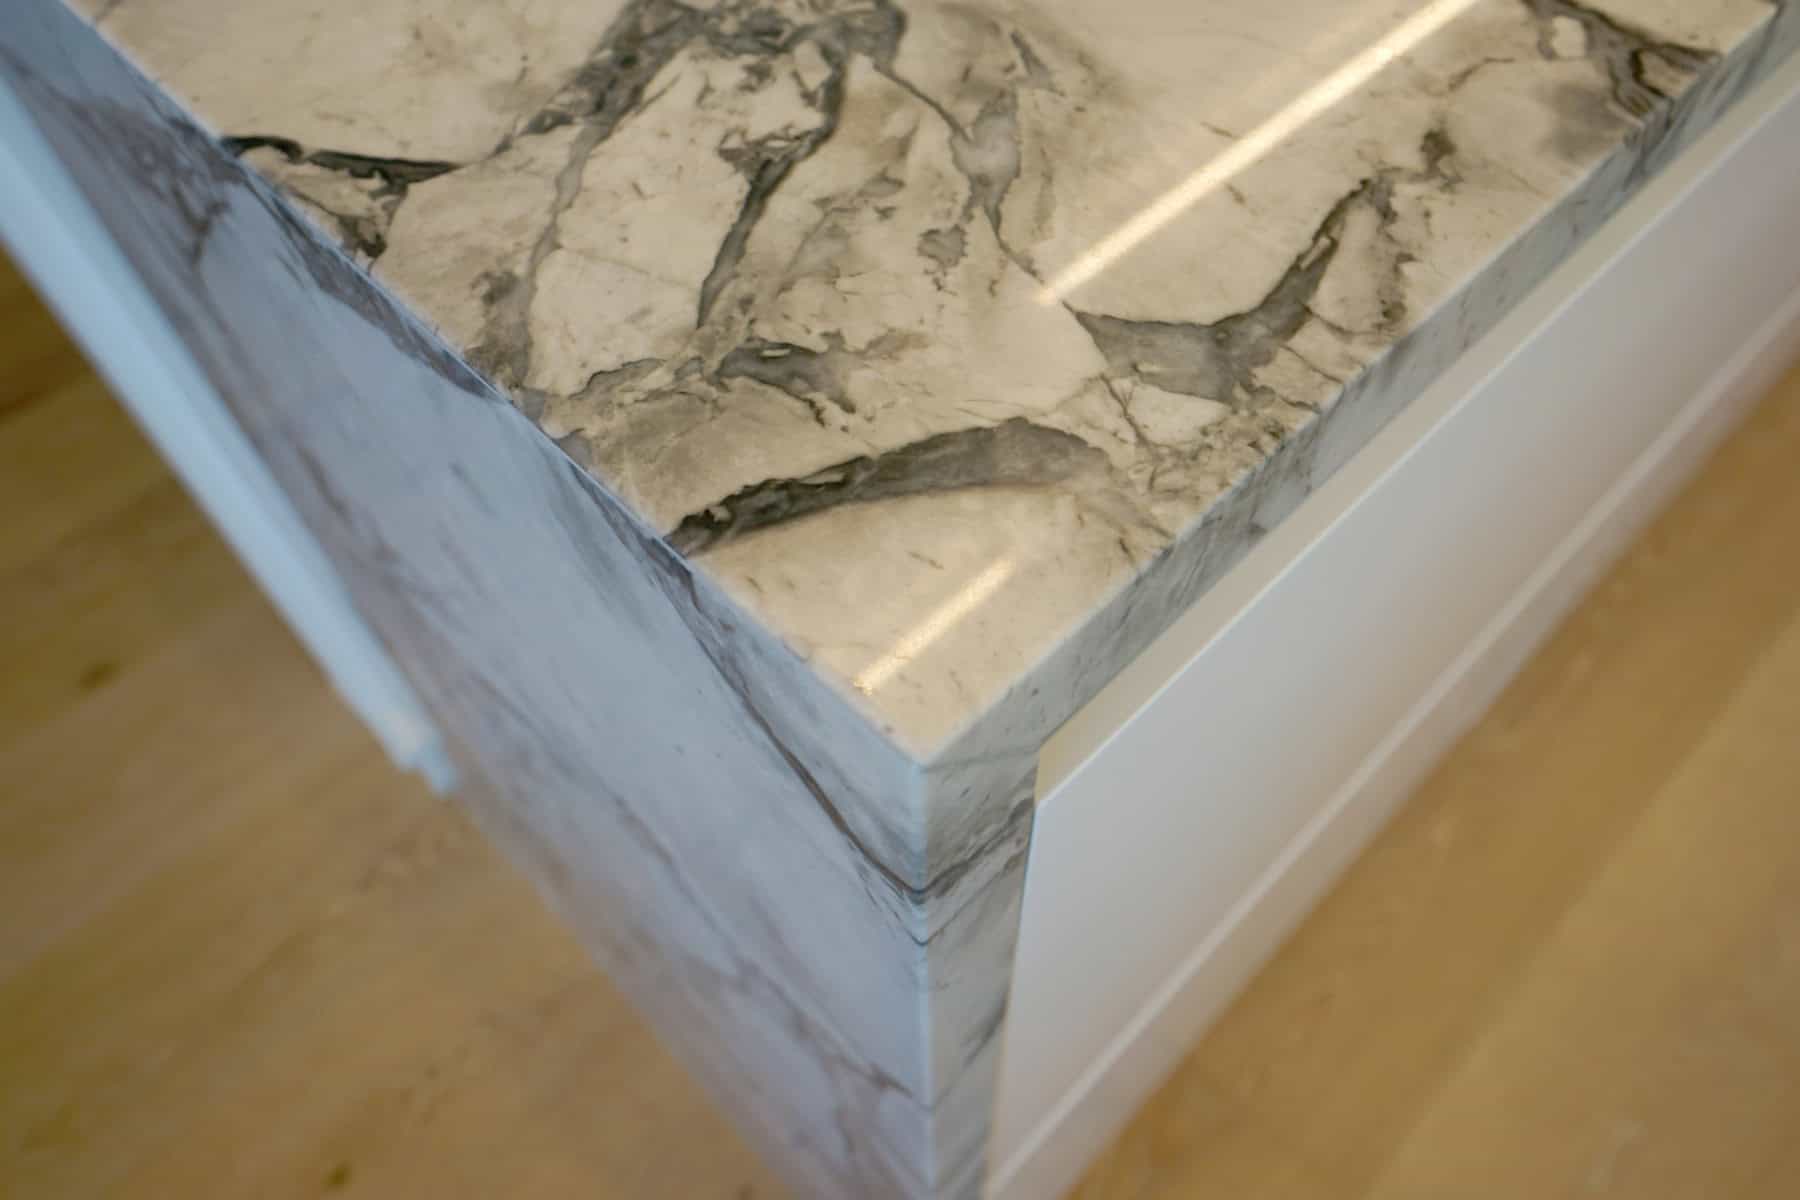
💡 Design tip: If you split materials, take the laminate sample and the stone sample home together and look at them under your own kitchen light at night. Two surfaces that match in a showroom can drift apart under warm downlights.
What to ask before you sign a quote
Whoever you buy from, these questions sort a well-specified laminate bench from a cheap one:
- Which laminate and grade is it: HPL or CPL, which maker, which finish?
- Is the core moisture-resistant particleboard, and how thick?
- Postformed or square edge, and if square, what adhesive goes on the edge in front of the sink?
- Where will the joins sit, and what kind of join is it?
- Will every cut-out be radiused at the corners, sanded and sealed?
- Will the underside be sealed over the dishwasher?
- Is there a support panel between appliances that sit side by side?
- Who stands behind the joins and edges, and how do you make a claim?
For what a laminate bench costs against stone, porcelain and timber, our breakdown of what each benchtop material costs installed sets out the ranges and the unit each one is quoted in. Laminate is often quoted per metre of bench rather than per square metre of surface, so check the unit before you compare two quotes.
The bench you’ll still like in ten years
A laminate benchtop is only as good as the parts you never see: the core, the seals, the joins and the supports. Get those right and you have a quiet, hard-working surface that looks good for years and costs a fraction of stone. Get them wrong and the best decor in the range won’t save it.
Choose the colour last. Settle the core, the edge, and where the joins sit first, because those are the decisions you’ll live with every time you wipe down the sink. If you’d like a designer to walk through yours, we’re on 09 837 3450, and we’ll draw the bench with the rest of the kitchen so every one of those details is on the plan before anything is made.
➡ Book your free in-home design consultation with Little Giant Interiors
➡ See how our design and build process works
➡ Plan a kitchen with the benchtop drawn in from the start
What are the downsides of laminate benchtops?
The weak points are the joins, the cut-outs and the edges. If water reaches the particleboard core through a badly sealed join or cut-out, the board swells and the laminate lifts, and that usually means replacing the length. Laminate also marks if a hot pan goes straight onto it, scratches if you cut on it, and can fade in strong direct sun. Specify a moisture-resistant core and sealed edges and most of these risks shrink.
Which type of laminate is best for a kitchen benchtop?
High-pressure laminate, or HPL, is the standard for fabricated kitchen benches. Laminex makes it from layers of kraft paper and a decorative layer fused with phenolic resin under heat and pressure. Some pre-made tops use continually pressed laminate instead, and Laminex says its Handitops Standard range should not be used for high wear. Melamine board such as Melteca is excellent for cabinets but Laminex rules it out for sink benches.
Can you use Melteca for a benchtop?
Not on a working kitchen bench. The Melteca technical data sheet tells you not to use Melteca in constant wear situations such as sink bench tops, high use shop counters, bar tops or restaurant tables. Melteca is a melamine surface pressed onto board, and it is a very good cabinet and door material. For the bench itself, use a high-pressure laminate on a moisture-resistant core, or a stone, porcelain or timber top.
What core should a laminate benchtop have?
Ask for moisture-resistant particleboard. Laminex's Superfine manual shows its moisture-resistant grade swelling 3 percent in a 24-hour test at 30 to 33mm thick, against 6 percent for the standard board. Laminex also says the moisture-resistant board is not waterproof and must not be in direct contact with water, so every cut edge still needs sealing with silicone, paint or polyurethane.
Is a postformed or square edge better on a laminate bench?
A postformed edge bends one sheet of laminate around a rounded front, so there is no seam on the front for water to find. A square edge is cut straight and covered with an edge strip, which looks crisper and more current. Square edges need a waterproof glue line in front of the sink, as Laminex's edge tape data sheet requires. Some decors, such as Prime Panels' Soft-Matt colours, can only be square-edged.
Where should the joins go on a laminate benchtop?
As far from the sink and hob as possible. Both the Laminex laminate data sheet and its benchtop installation guide say to keep joins away from sink areas to reduce the risk of water getting in. The guide prefers a mason's mitre for corner joins, for strength and appearance, which needs a benchtop jig and is usually cut by a fabricator. Mark the join positions on the kitchen plan before you approve it.
Can I put a hot pan on a laminate benchtop?
No. Laminex tests its laminate at 180 degrees Celsius dry heat for a slight change at most, but its care advice says never to place objects from the oven or hob directly onto the laminate, because it may blister. Use a trivet or heat-resistant mat every time. If you often move pans straight off the hob, plan a heat-proof surface beside the cooktop.
Can I fit a laminate benchtop myself?
A pre-made top on a straight run is within reach of a confident DIYer, and Laminex's Handitops guide says so, while warning that a kitchen benchtop is an advanced DIY task and cutting mistakes can prove costly. Corners, joins and cut-outs are the hard parts. Lifting a sink is work for an authorised plumber, and a hard-wired cooktop needs a registered electrician.
Does the laminate warranty cover a benchtop that swells at a join?
Usually not. Laminex's laminate warranty covers defects in the laminate itself and excludes faulty workmanship by anyone other than its authorised personnel, along with exposure to excessive moisture. Its Handitops warranty names edge clashing and joins as examples of workmanship it does not cover. Ask your fabricator who stands behind the joins and edges, and report any defect quickly, because Laminex requires notice within seven days.
How much does a laminate benchtop cost in NZ?
It depends on the length, the number of joins and cut-outs, the edge and whether the top is pre-made or fabricated. Laminate is often priced per metre of bench rather than per square metre, so check the unit before comparing quotes. Our kitchen benchtop costs guide sets out the ranges by material, and the benchtop cost calculator on our website will email you an Auckland price range.
Related guides
- Acrylic or laminate on your cabinet doors
- Planning a working scullery behind the kitchen
- What an island needs from its benchtop and cabinetry
Have you been putting off your kitchen renovation?
We offer flexible finance options to help you get your dream kitchen sooner. Learn more about our interest-free finance options.
References
- Laminex New Zealand, Laminex Laminate HPL Technical Data Sheet (04-2025)
- Laminex New Zealand, Laminex Formica Classic Collection HPL, BPIR information sheet v3
- Laminex New Zealand, Formica Handitop, BPIR information sheet v1.1
- Laminex New Zealand, Formica Handitops installation and maintenance guide
- Laminex New Zealand, Laminex Laminate Warranty (issued April 2022)
- Laminex New Zealand, ABS Edgetape for Benchtops Technical Data Sheet
- Laminex New Zealand, Melteca Technical Data Sheet (issued November 2022)
- Laminex New Zealand, Superfine and Superfine MR Particleboard technical manual
- Prime Panels NZ, Prime Laminate
- Plumbers, Gasfitters and Drainlayers Board, Advice for consumers