

Last updated:
Quick answer: Under stair storage in NZ homes is decided by what is already inside the void: the switchboard, whether the enclosing wall is a bracing element, the hot water cylinder, the stringer, and the way the headroom falls away. Measure one rise and one going and you can work out what fits before anyone visits.
There’s a cupboard under your stairs. It has a vacuum cleaner in it, a folded-up clothes airer, four pairs of shoes nobody wears, and a torch with dead batteries. The door is 600mm wide and the space behind it runs back three and a half metres into the dark.
Most Auckland two-storey homes have one. Most of them are barely used past the first metre, because that is as far as a single hinged door at the tall end can reach. The rest is a cave.
Search for under stair storage ideas and you’ll get a thousand photographs. Pull-out shoe racks in London terraces. A wine wall in a Melbourne apartment. A dog bed with the dog’s name routed into the door. All lovely, and none of it tells you the one thing you actually need to know first, which is what’s already in your void.
Before a single drawer gets drawn, the design is already limited by what is physically in there: the switchboard, whether the wall enclosing the space is doing structural work, the hot water cylinder, the stringer that carries the treads, and the way the headroom falls away as you go back. Miss any of those and the design gets redrawn on install day, which is the expensive way to find out.
We build this stuff out of our Rosedale factory most weeks, usually bolted onto a kitchen or a wardrobe job while we’re already in the house. So here’s the honest version: what’s in there, how to read the shape yourself, what fits in each part of it, what it’s made from, what moves the price, and how it gets fitted to a wall that isn’t straight.
Under Stair Storage NZ: What’s Actually Inside The Void
Open the door, get a torch, and look properly. The void under a staircase is dry, central and out of sight, which has made it a convenient home for services in New Zealand houses for decades. In plenty of the homes we measure, it is carrying a great deal more than shoes.
The switchboard is the first thing to find
The main switchboard is the first thing our designers look for when they open that door, because in a lot of two-storey Auckland homes it is mounted on the wall inside the under-stair cupboard. It went there for the same reasons you would put it there.
You cannot box a switchboard in behind joinery. It needs to stay accessible and unobstructed, and a registered electrician has to tell you how much clear space yours requires before the design is fixed. That isn’t a cabinetmaker’s call to make, and it isn’t one to guess at off a forum post.
If the board has to move to make the space work, that’s regulated work with paperwork attached. Regulation 65 of the Electricity (Safety) Regulations 2010 states that “no general prescribed electrical work may be treated as complete until a certificate of compliance is issued for it”. So the board moves, the electrician certifies it, and you keep that certificate. Budget for it as its own line, not as a rounding error inside the cabinetry price.
💡 Design tip: Photograph the inside of the void with the torch on and the door wide open, including the ceiling line, before you talk to anyone. Half the design conversation happens off those three photos.
Is the enclosing wall doing a job?
The wall that closes off the under-stair space is often just a lining. Sometimes it isn’t. And the difference matters legally, not just structurally.
Schedule 1 of the Building Act 2004 exempts building work “in connection with an internal wall (including an internal doorway) in any existing building unless the wall is — (a) load-bearing; or (b) a bracing element; or (c) a fire separation wall (also known as a firewall); or (d) part of a specified system”. Read (b) again, because that’s the one that catches people. A wall can carry no weight at all and still be a bracing element, which means it’s stopping the house racking sideways in a wind or an earthquake. Take it out and you’ve removed something the building relied on.
Fitting cabinetry inside an existing void is a different matter from cutting the wall about. Schedule 1 clause 12 exempts work “in connection with any internal linings or finishes of any wall, ceiling, or floor of an existing dwelling”, and shelving screwed to a lining sits comfortably in ordinary non-structural territory. The moment somebody proposes widening the opening, taking out the wall, or knocking through to the hallway, the question changes and it’s one for Auckland Council or a Licensed Building Practitioner, not for us and not for you.
Important note: We design and manufacture cabinetry. Whether a specific wall in your house is a bracing element, and whether a specific alteration needs consent, is a question for Auckland Council or a Licensed Building Practitioner. Ask before anything gets cut.
Cylinders, meters and the things that came with the house
The under-stair cupboard is also a favourite spot for the hot water cylinder, particularly in homes built through the 1990s and early 2000s. If yours is in there, the usable volume is whatever’s left around it, and the cylinder needs its access, its clearances and its drainage kept clear. Cabinetry can be built around it, and often is, but the space budget shrinks fast once a 180-litre cylinder is standing in the middle of it.
You’ll also find, depending on the vintage of the house: the gas meter, the data cabinet, a subfloor hatch, the alarm panel, the ducting for a ventilation system, and sometimes, in newer townhouses through Hobsonville and Flat Bush, sprinkler pipework serving the upper floor. None of that is a dealbreaker. All of it changes the drawing.
The stringer and the floor
The treads sit on a stringer, and the stringer is the diagonal that forms the roof of your void. Underneath the stair it’s usually boxed in and lined, which means the actual clear height is less than the raw geometry suggests, often by 150mm or more once the stringer depth, the tread build-up and the lining are counted. That is what we find measuring them, not a published figure, so yours needs checking on site.
The floor matters too. If the stair sits over a suspended timber floor, the joinery needs to sit on adjustable feet and be scribed to a floor that runs out of level. If it’s on concrete, you’re dealing with a slab that’s flat but rarely perfectly so. Either way, nothing under there is square, and we’ll come back to that when we get to installation.
Reading The Shape Before Anyone Measures
Here’s the part nobody publishes, and it’s the most useful thing in this article. You can work out roughly what fits under your stairs with a tape measure and one multiplication, before you book anything.

Two measurements, one number
Measure the rise (the vertical height of one step) and the going (the horizontal depth of one tread, front edge to front edge). Divide rise by going and you have the slope of the underside of your stair.
From there, the raw height of the void at any point is simply the horizontal distance from the bottom of the flight multiplied by that slope. Then take off the boxing: the stringer, the tread build-up and the lining, which you’ll need measured properly on site but which is commonly in the region of 150mm to 200mm.
Say your stair measures 190mm rise and 250mm going. Slope is 0.76. Walk back one metre from the bottom step and the raw height is 760mm; take off 180mm of build-up and you’ve got roughly 580mm of clear height at that point. Walk back two metres and it’s about 1,340mm. That’s a worked example off one measured stair, not a rule, but the arithmetic is the same on yours.
| Distance back from bottom step | Approx. clear height (190/250 stair, 180mm build-up) | What that height is good for |
|---|---|---|
| 0.5m | ≈ 200mm | Nothing upright. A shallow drawer on runners, pulled out to reach it. |
| 1.0m | ≈ 580mm | Shoes on angled racks, a drawer bank, folded linen in a pull-out. |
| 1.5m | ≈ 960mm | Bench height. A drop zone, a bag shelf, a seat with storage under. |
| 2.0m | ≈ 1,340mm | Short hanging for jackets, a broom cupboard, a tall pull-out pantry. |
| 2.5m+ | ≈ 1,720mm and up | Full-height doors, coat hanging, the vacuum standing upright. |
The pattern is always the same: the tall useful part of the void is at the back, and the door is usually at the front. That single mismatch is why so many under-stair cupboards are half empty. The good space is the bit you can’t reach.
Which way does your stair run?
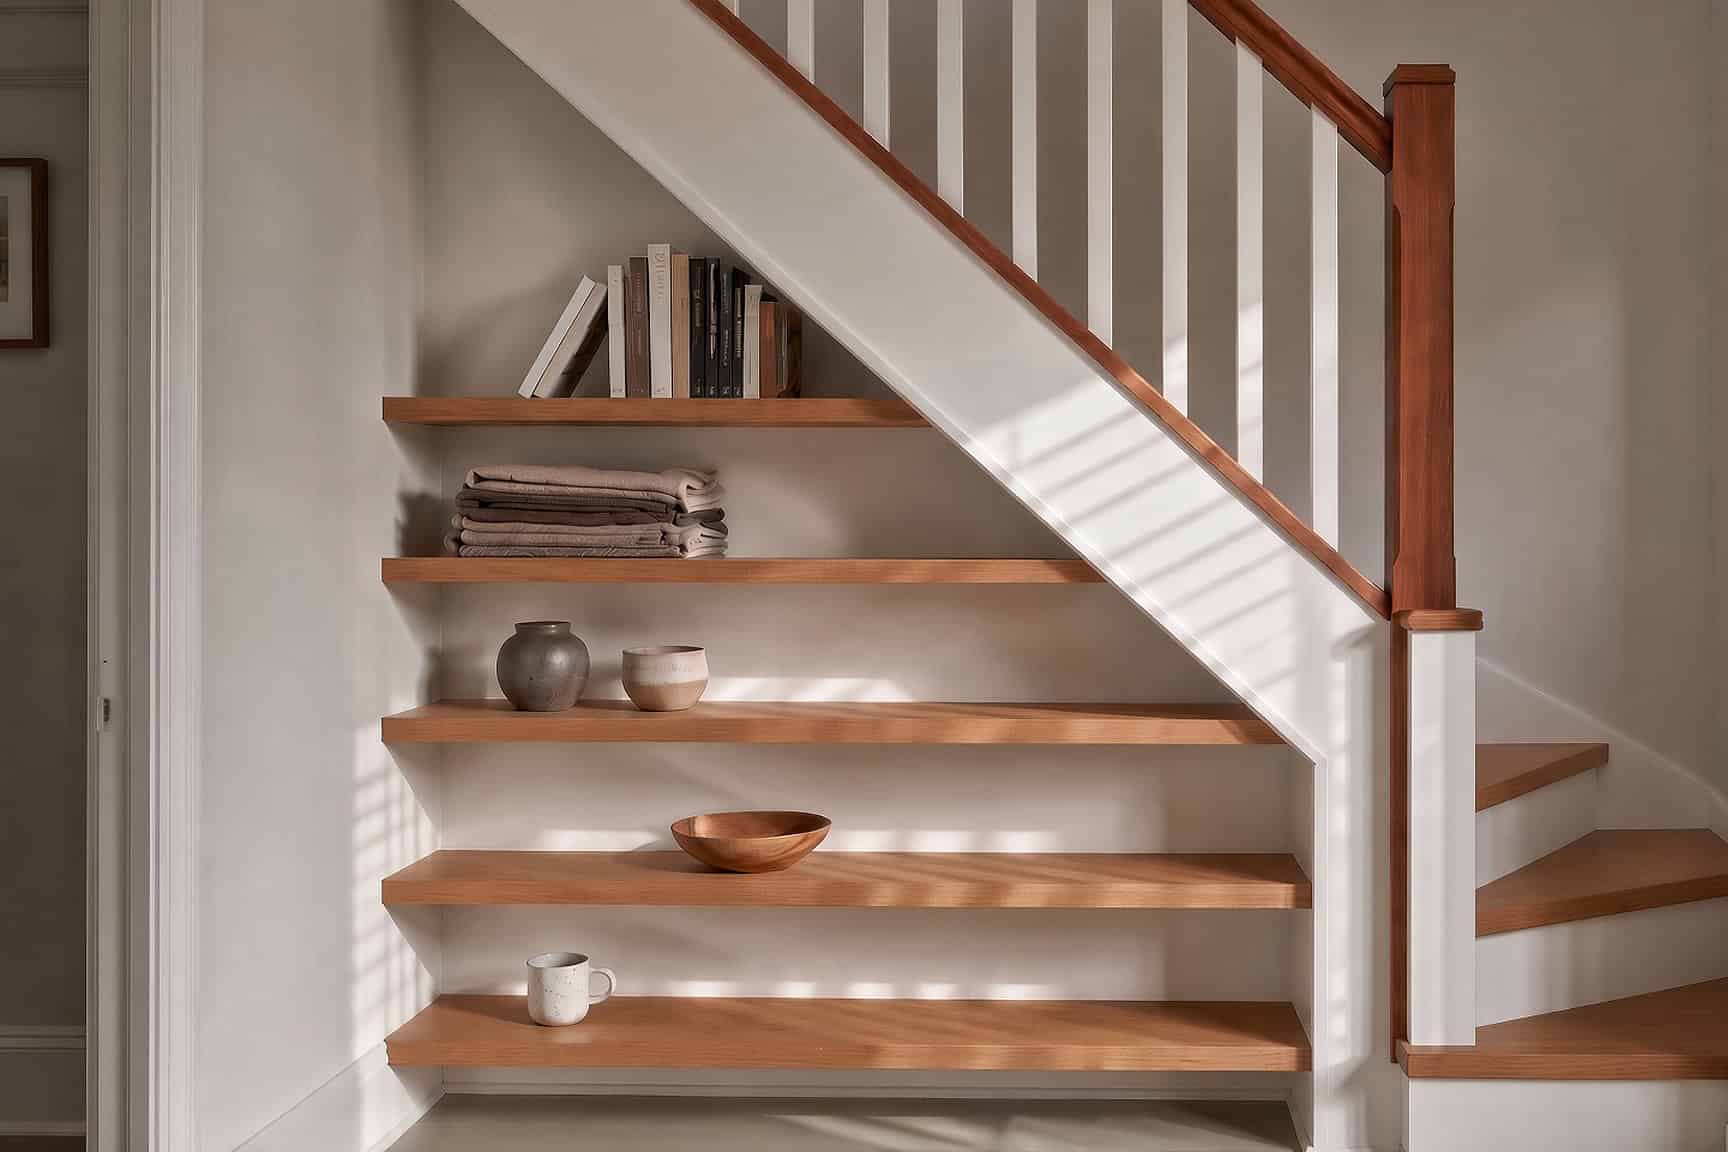
A straight flight gives you one clean wedge. A quarter-turn with a landing gives you a tall square block under the landing and a wedge running off it, which is usually the best-value under-stair space in the house because the landing section can take full-height doors. A winder stair, common in narrow townhouses, gives you a void with an awkward pinch point where the treads fan.
Open-riser stairs are a different conversation again. If you can see through the treads, whatever goes underneath is on display, and it needs to be designed as a piece of furniture rather than a cupboard.
💡 Design tip: Stand at the front door and look at the stair the way a visitor does. If the under-stair space faces the entry, it’s the first joinery anyone sees in your house, and it’s worth spending the finish money there rather than on the garage cupboards.
Matching Under Stair Storage To The Height You’ve Got
Once you know the height at each point along the run, the design almost writes itself. Work from the tall end back, and give each height band the job it’s actually suited to.
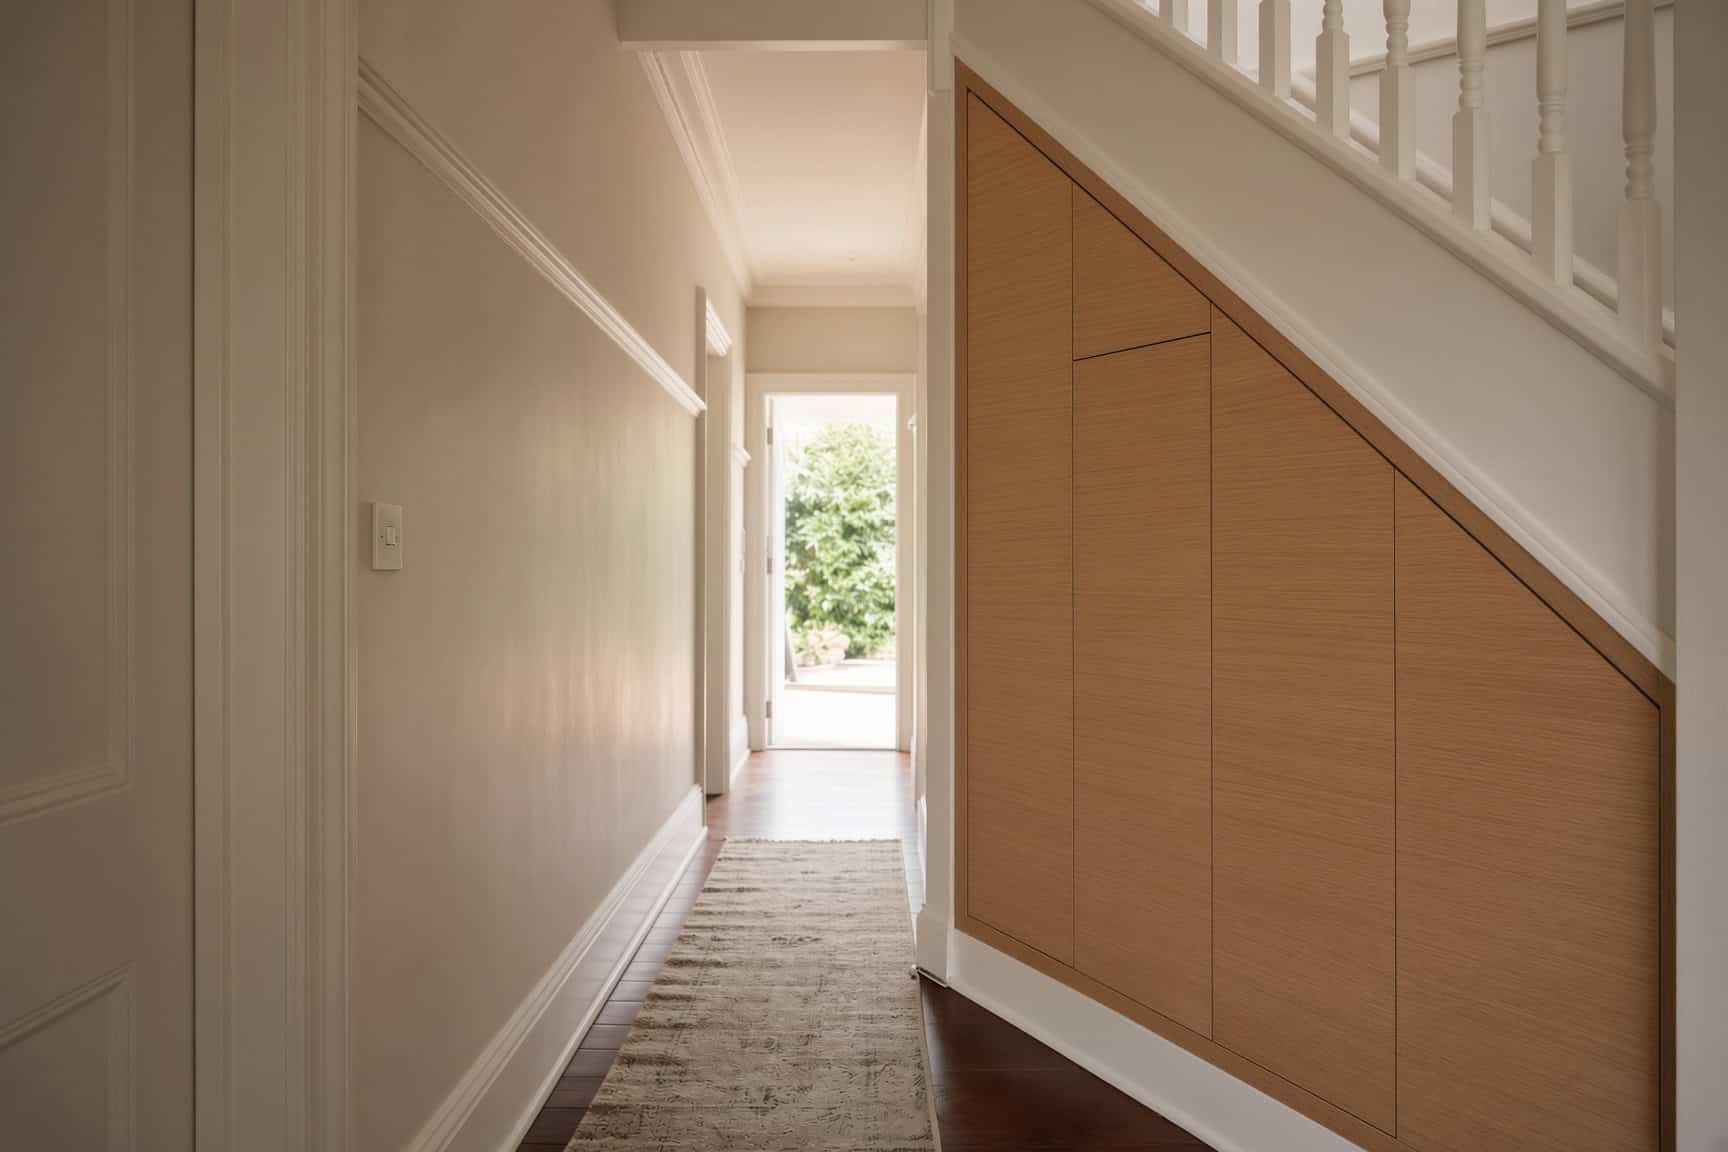
The tall end: hanging, brooms and the things that stand up
Anything over about 1.5m of clear height can take a full-height door and behave like a normal cupboard. This is where the vacuum lives, where the ironing board goes, where a short hanging rail for coats and school bags earns its keep, and where you put the sports gear that never fits anywhere else.
If the space faces a front entry in a Grey Lynn villa conversion or a Takapuna townhouse, a coat rail plus a bench is the highest-value use of that end. Storage that removes the pile by the front door is the storage people notice every single day.
The middle: drawers, and only drawers
Between roughly 500mm and 1.2m of height, drawers beat doors every time. A hinged door into a low space means kneeling on the hall floor with a torch. A drawer brings the contents out to you standing up.
This is the band where an under-stair build justifies itself. Deep drawers for linen and towels, shallower ones for gloves, chargers, batteries, the dog lead and the sunscreen. In a laundry-adjacent void, this band takes the detergent, the pegs and the drying rack. If you’re already thinking about the wider problem of squeezing storage into rooms that don’t have any, our guide to custom wardrobe and storage for small spaces works through the same trade-offs in bedrooms.
The low tail: pull-outs on the horizontal
Below about 500mm, the only thing that works is a unit that comes out sideways on runners. Shoe racks on a vertical carcass that slides into the wedge, a wine rack on a pull-out frame, or a simple deep tray for the things you use twice a year.
Be honest with yourself here. The tail of the wedge is expensive per litre of storage, because the hardware costs the same as it would on a full-height unit and you get a fraction of the volume. Plenty of jobs stop the joinery at the point where the height drops below usable and simply line and paint the rest.
💡 Design tip: Write down what you want to put under there before you look at any photos. Nine times out of ten the list is shoes, coats, vacuum, linen and sports gear, and the design that suits that list looks nothing like the wine cellar on Pinterest.
The one nobody plans for: a desk
A nook under the landing with a benchtop at 720mm, a power point and a light is a genuinely good study spot for a kid, and it uses the awkward mid-height band well. It’s the same logic we apply to built-in study joinery elsewhere in the house, and it’s worth reading alongside our notes on floating shelves NZ if you want open shelving above the desk rather than closed cupboards.
“The mistake we see most often is a single big door at the tall end and a light bulb inside. It looks like storage and it behaves like a skip. Break the run into three or four separate units, each with its own front, and you’ll use the whole thing instead of the first metre of it.”
— Little Giant Interiors Design Team
Drawers, Doors Or Pull-Outs In A Wedge-Shaped Space
The hardware decides how the space behaves, and in a wedge it’s a harder problem than in a rectangular room. Every unit has a different height, several have a sloping top, and the runners have to be dead parallel in a space where nothing else is.
What a drawer can carry
Load capacity is the question people forget to ask, and it’s the one that decides whether a linen drawer still glides in five years. Blum publishes its figures for the LEGRABOX system on its New Zealand site: the box systems run to “high dynamic carrying capacities of 40 kg or 70 kg”. That’s the rating for the runner assembly, and it’s the number that matters once you fill a 900mm-wide drawer with towels or tinned food.
Blum hardware is what we specify for drawer boxes as standard, and Häfele covers the wider category — hinges, handles, corner and pull-out mechanisms, sliding and folding gear. In an under-stair build the pull-out mechanisms often matter more than the hinges, because so much of the space is reached from the side rather than the front.
Doors that can actually open
Hallways are narrow. A 600mm hinged door swinging into a 900mm hall is manageable; two of them side by side, both open at once, is not. In tight hallways through Ponsonby and Mt Eden, sliding or bi-fold fronts solve a problem that a hinged door creates.
Push-to-open fronts are worth considering for a hallway run, because handles on a wall people brush past every day get caught on sleeves and bags. The trade-off is that push-to-open needs a consistent gap around the front and is less forgiving of a floor that moves seasonally, which is worth weighing on an older suspended timber floor.
The sloping top is the real design problem
Every unit under a stair has a diagonal above it, so a standard cabinet won’t fit. There are three honest approaches. Step the units so each one is a rectangle of a different height, which is the cheapest and the most forgiving on site. Rake the tops to follow the stringer, which uses every millimetre but costs more to make. Or build a single carcass with a raked front, which looks the best and is the hardest to get right on an out-of-square wall.
Stepped units are what we recommend for most homes, because they’re easier to adjust on site when the wall isn’t where the drawing says it is. Raked tops make sense when the space is on show or when the extra volume genuinely changes what fits.
💡 Design tip: Put a light in it, wired properly, switched at the door or on a motion sensor. Task light inside the unit rather than one bulb at the front, and a warm colour temperature around 2700K if the void opens onto a hallway, so it doesn’t read as a cold spot next to your other lighting. A dark under-stair cupboard gets used for the first metre only, no matter how well the inside is fitted out.
Board, Spans And Finish: What Under-Stair Joinery Is Made Of
Under-stair cabinetry is made from the same materials as a kitchen or a wardrobe: melamine-faced board for the carcasses and interiors, edgetaped on the exposed edges, with the fronts in whatever finish suits the hallway. The interesting part is the spans, because a shelf under a stair is often longer than a shelf anywhere else in the house.
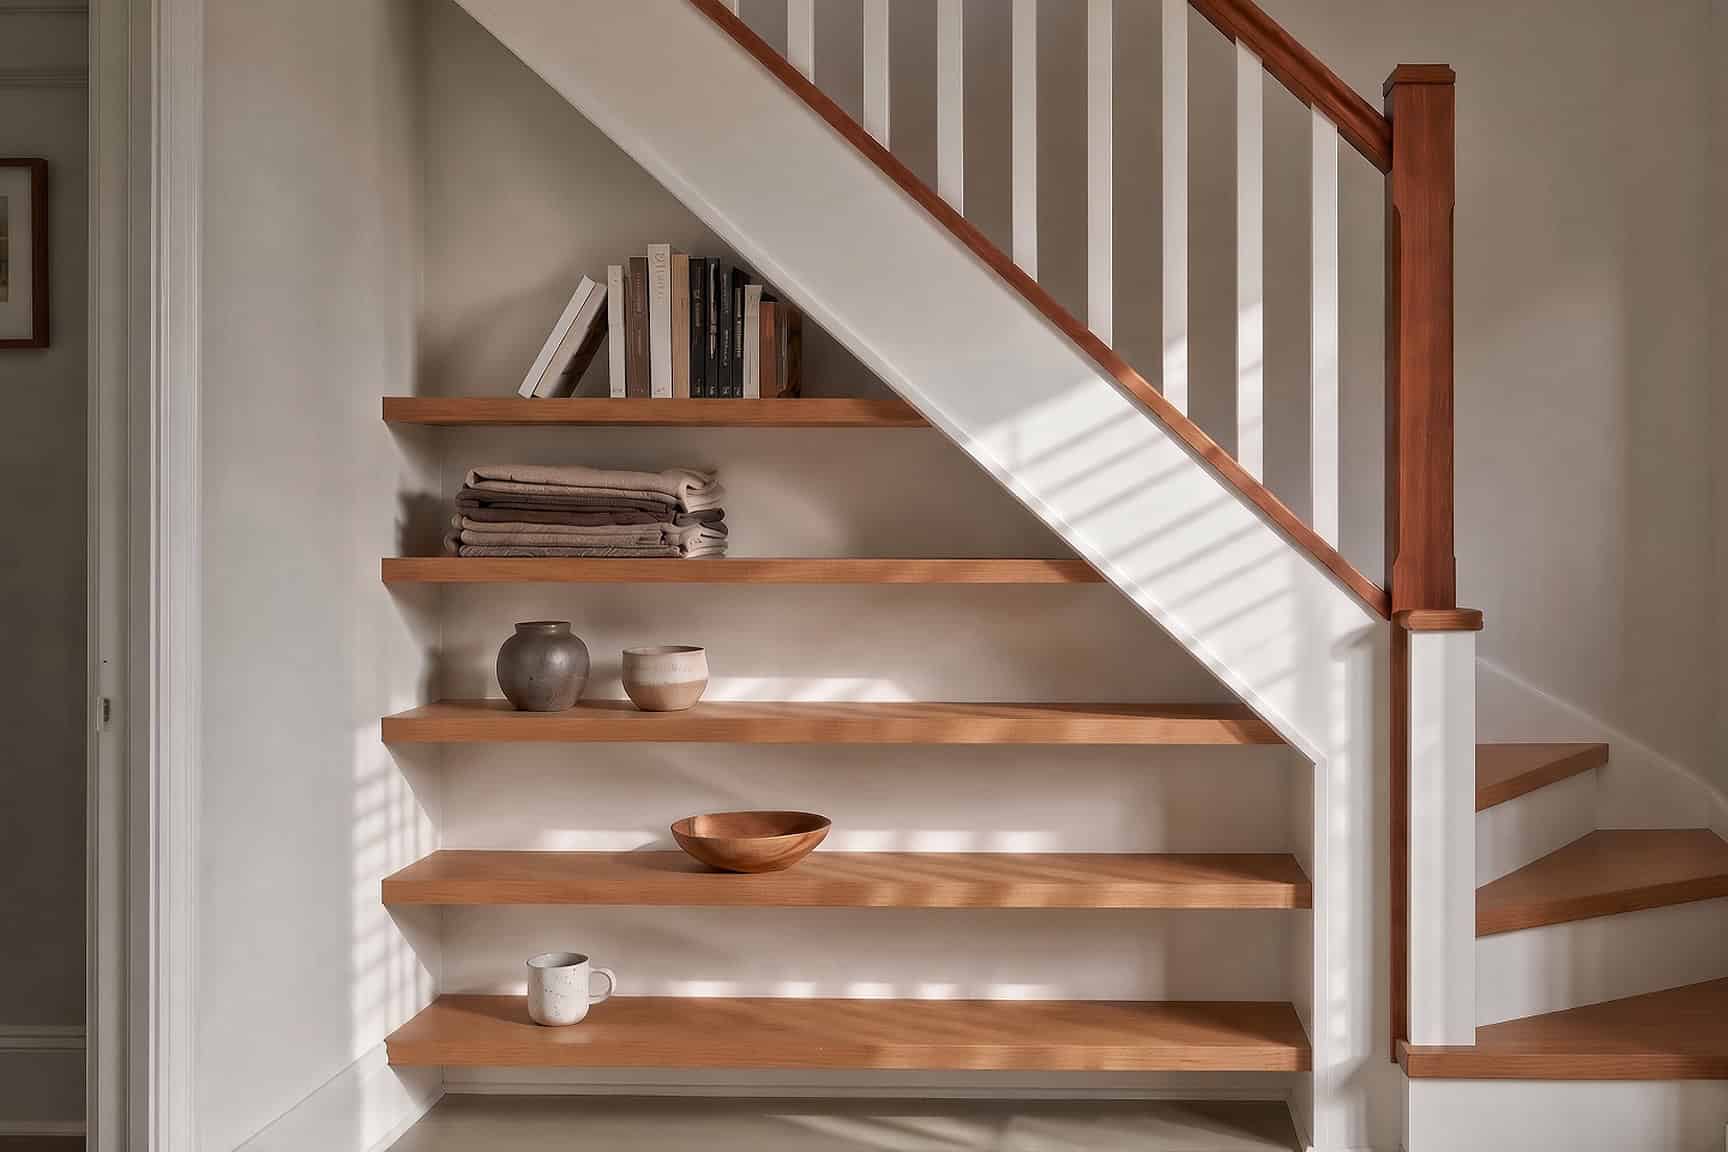
How far a shelf can span before it sags
This is published data, and almost nobody uses it. Laminex New Zealand’s Melteca Technical Data Sheet states that Melteca “is suitable for load bearing applications such as shelving, tables, desks, store displays, shop fittings, and kitchen cabinets”, and it prints the span tables to prove it. Here are the 18mm rows, which is the thickness we build shelving from.
| Shelf loading (kg/m²) | 18mm, single span (mm) | 18mm, multiple span (mm) |
|---|---|---|
| 25 | 1040 | 1330 |
| 50 | 830 | 940 |
| 75 | 720 | 770 |
| 100 | 660 | 670 |
| 200 | 470 | 470 |
| 300 | 380 | 380 |
| 400 | 330 | 330 |
| 500 | 310 | 310 |
Laminex notes that those spans are “based on creep factor of 2 with final deflection of 0.006 x span” and that the loadings are “uniformly distributed”. Creep is the slow, permanent sag that happens under a constant load over years, which is exactly what a linen shelf experiences.
Look at the 100 kg/m² row: an 18mm shelf is limited to 660mm between supports. A 600mm-deep shelf carrying 100 kg/m² is carrying 60kg for every lineal metre of it. That’s a serious stack of towels or a run of tinned goods, and it means the vertical dividers land a lot closer together than most people expect. If your designer draws a 1.2m unsupported shelf for linen, that’s the conversation to have.
Worth knowing too: Laminex lists the weight of 18mm Melteca on Lakepine substrate at 13.72 kg/m², so a 600 × 900mm shelf is about 7.4kg before you put anything on it.
Damp, and why substrate choice matters here
The Melteca data sheet is blunt about its limits. It’s “Interior use only”, it “must not be used in high humidity or wet areas such as saunas or showers”, and “any exposed substrate must be sealed before service”. Standard melamine board on particleboard is not a moisture-resistant product, and an under-stair void can be a damper corner of the house than you’d think, particularly where it backs onto an exterior wall or sits over an unlined subfloor in an older Titirangi or Henderson home.
The answer isn’t to avoid the material. It’s to specify the right substrate. Laminex lists moisture-resistant options alongside the standard ones, Superfine MR Particleboard and Lakepine MRZero, and every cut edge gets sealed.
If your void has ever smelled musty, say so at the design stage, because it changes the board we order. It’s the same discipline that applies to garage storage ideas NZ, where the environment is harsher again.
Making it disappear into the hallway
Under-stair joinery lives in a circulation space, so the finish decision is different from a kitchen. Two approaches work. Match the wall: same white, same sheen, flush fronts, no handles, so the whole run reads as wall. Or make it furniture, with a timber-look front and a contrasting colour, visible as a deliberate piece.
What doesn’t work is landing halfway between the two. A slightly-different white next to your hallway paint reads as a mistake from three metres away. Skirtings and architraves are the other detail that separates a good job from an average one: joinery that dies into an existing skirting cleanly looks built-in, and joinery that sits proudly in front of it looks like a wardrobe someone pushed into a hole.
💡 Design tip: Take a photo of your hallway skirting profile and send it with your enquiry. Whether we scribe to it, cut around it, or run the joinery in front of it changes both the look and the price.
What Moves The Price Of An Under-Stair Build
We’re not going to print a number here, and we’d be suspicious of anyone who does. An under-stair job has a wider spread than almost anything else we quote: a single lined cupboard with two shelves and a light, and a fully fitted run with nine drawers, three pull-outs and raked tops, are different jobs by a factor of several. Publishing an average would only mislead you. What we can do is tell you exactly which decisions move the figure, in rough order of impact, and then give you a fixed quote on your actual space once the design is settled.
Hardware is the biggest single lever
Drawers cost more than doors. Pull-outs cost more than drawers. Every runner set, every soft-close mechanism and every pull-out frame is a purchased component with a price, and in a storage-dense build the hardware line can rival the board line. Nine drawers will always cost meaningfully more than nine shelves behind three doors, and it’s usually still the right call, because drawers are the reason the space gets used.
The honest middle path in most under-stair jobs is drawers in the mid-height band where they earn their keep, and simple shelving behind doors at the tall end where a door works perfectly well.
Straight lines versus raked ones
Stepped rectangular units are the efficient option: standard cutting, standard assembly, straightforward install. Raked tops that follow the stringer line mean angled cuts, custom-sized fronts and slower fitting. The extra volume is real, but so is the extra cost, and on a low-slope stair the gain can be small enough that it isn’t worth it.
Services, and whether anything has to move
If the switchboard, the cylinder or the meter stays exactly where it is and the joinery is designed around it, that’s a cabinetry job. If something has to move, you’ve added a registered trade, their certification, and the coordination between them and us. That’s the single most common reason an under-stair quote comes back higher than a homeowner expected.
The same goes for a new light and power point inside the void, which we’d almost always recommend, and which is prescribed electrical work rather than something to run off a plug-in extension lead.
The size of the run, and what it’s next to
Cost scales with the lineal metres of joinery and the number of separate fronts, not with the floor area of the void. A three-metre run under a straight flight has more cabinetry in it than a compact quarter-turn, even though both are “the space under the stairs”.
💡 Design tip: Ask for the quote broken down by unit rather than as one figure for “under-stair storage”. You’ll immediately see which drawer bank is carrying the cost, and you can drop one without redesigning the whole run.
One practical saving: if you’re already having a kitchen, laundry or wardrobe made, adding the under-stair run to the same job shares the delivery, the install crew and the site visit rather than paying for a separate mobilisation. It’s the reason a lot of our under-stair work rides along with something bigger. Our wardrobe cost calculator is the closest tool we have for putting a range around a storage build before we’ve measured, and it’s a better starting point than a number off a UK renovation blog.
How An Under-Stair Fit-Out Actually Gets Built
This is where the Rosedale factory matters, and where the difference between a made-to-measure build and an off-the-shelf unit stops being a marketing line. Nothing standard fits a stair void. Every panel in it is cut for that one house.
Design, estimate and 3D
Our 6-step design and build process starts with a consultation at your place rather than a showroom, which for an under-stair job is the only sensible way to do it — you can’t design around a switchboard you haven’t seen. We aim to make contact within one working day of an enquiry, and the estimate and preliminary 3D design come back within one to two days of the consultation.
The 3D matters more here than on most jobs, because a wedge is genuinely hard to picture. Seeing where the drawers stop and where the height runs out is what stops people over-buying storage they can’t reach.
The measure that counts
The consultation measure is for design and pricing. The measure that goes to the machines happens after the deposit, on a second site visit, and that’s the one that has to be right to the millimetre. At that visit we also confirm the locations for any electrical work with the sparky, so the light and the power point end up where the joinery expects them.
Those measurements feed the German machinery in our Rosedale factory, which cuts and edge-bands automatically with no manual finishing. It’s the same production route as a kitchen; the difference is that an under-stair job has more one-off panel sizes in it than almost anything else we make. Every panel a different width, every top a different angle, and not one of them repeated. That is a good use for laser-guided cutting and a poor use for a circular saw in a hallway.
Installing into a house that isn’t square
Here’s the truth about existing homes: no wall in your hallway is plumb, no floor is level, and the stringer isn’t perfectly straight either. A 1970s brick-and-tile in Pakuranga and a 1920s bungalow in Mt Eden will both be out, just in different directions.
The fix is scribing. Cabinets are made slightly under the measured opening, sat on adjustable legs to correct the floor, then scribe fillers are cut on site to close the gap against the wall so the fronts sit in a straight line even when the wall doesn’t. Done properly you’ll never see it. Done badly, you get a tapering gap down one edge that will annoy you every day for a decade.
💡 Design tip: Clear the void completely before install day, including whatever has migrated to the back of it. Our installers can’t scribe to a wall they can’t reach, and an hour spent shifting your gear is an hour off the fit.
Install on a job this size is typically a day or two, in line with the one to two days we allow for cabinetry installation generally. Then it’s signed off and you get the warranty paperwork, which for us is a full-satisfaction installation guarantee sitting over the individual supplier warranties — the schedule is set out on our guarantee page, and Blum and Hettich hardware carry lifetime warranties from their manufacturers.
One note on warranty periods, because it catches people out: the Melteca data sheet says Melteca “carries a 10 year limited warranty” from Laminex, while our own guarantee page now lists Melteca laminates at 10 years to match. Terms and conditions still vary by product line, so ask for the specific warranty document for the specific board that goes into your job.
Is It Worth Doing?
Honestly, not always. If your void is a small quarter-turn with the cylinder in it and a switchboard on the back wall, you might get one decent cupboard out of it and that’s the ceiling. Sometimes the right answer is a good light, a rail, two shelves and move on.
But if you’ve got a straight flight over a clear void, three metres of run and nothing in there but a vacuum cleaner, you’re looking at the cheapest square metres of storage in the house. No walls to build, no floor to lay, no consent question as long as nothing structural gets touched. Just joinery into a hole that already exists.
The homes where this pays off hardest are the ones with no attic access, no basement and a garage that’s already full — which describes most townhouses built in Auckland in the last fifteen years. Storage has to come from somewhere, and the stairs are usually holding the only spare volume in the building.
Start with the torch and the tape measure. Find the switchboard, measure one rise and one going, and take three photos. That’s ten minutes of work and it turns a vague “could we do something under the stairs” into a conversation with actual dimensions in it. From there it’s the same process as any other piece of storage joinery we build across Auckland — and if the stairs are one part of a bigger storage problem, it’s worth looking at the built-in storage we design and manufacture for awkward Auckland spaces at the same time.
➡ Book your free in-home design consultation with Little Giant Interiors
➡ See our 6-step design and build process
➡ Learn more about our residential cabinetry in Auckland
Do I need building consent for under stair storage in NZ?
Fitting cabinetry inside an existing void is normally non-structural work. Schedule 1 of the Building Act 2004 exempts work on internal linings and finishes of an existing dwelling, and work on an internal wall unless that wall is load-bearing, a bracing element, a fire separation wall or part of a specified system. Widening the opening or removing the wall is a different question. Ask Auckland Council or a Licensed Building Practitioner before anything gets cut.
What if the switchboard is in the under stair cupboard?
It stays accessible. A switchboard cannot be boxed in behind joinery, and a registered electrician has to confirm how much clear space yours needs before the design is finalised. If the board has to be relocated, that is prescribed electrical work. Regulation 65 of the Electricity (Safety) Regulations 2010 states that no general prescribed electrical work may be treated as complete until a certificate of compliance is issued for it, so keep that certificate.
How do I work out how much space is under my stairs?
Measure the rise of one step and the going of one tread, then divide rise by going to get the slope. Multiply that slope by the horizontal distance back from the bottom step and you have the raw height at that point. Take off the stringer, tread build-up and lining, which is commonly around 150mm to 200mm but needs measuring on site. That gives you a workable idea of what fits before anyone visits.
How far can an under stair shelf span before it sags?
It depends on the load. Laminex New Zealand publishes span tables in the Melteca Technical Data Sheet. For 18mm board on a single span, the limits are 1040mm at 25 kg per square metre, 830mm at 50, 720mm at 75, 660mm at 100 and 470mm at 200. Those spans assume a creep factor of 2, a final deflection of 0.006 times the span, and uniformly distributed loading. A heavily loaded linen shelf needs supports far closer together than most people expect.
Are drawers or doors better under stairs?
Drawers, in the mid-height band. Below about 1.2m of clear height, a hinged door means kneeling on the hall floor with a torch, while a drawer brings the contents out to you. Doors make sense at the tall end where you can stand up inside the space, and horizontal pull-outs are the only thing that works in the low tail of the wedge. Most good under-stair builds use all three.
Can under stair storage handle heavy items?
Within the hardware rating, yes. Blum states that its LEGRABOX box systems have high dynamic carrying capacities of 40 kg or 70 kg, which covers most household loads including a drawer of tinned goods or wet linen. The limit is usually the shelf span rather than the runner, so check both. Tell your designer what is going in each drawer at the design stage rather than after it is built.
Is the space under the stairs damp?
It can be, particularly where it backs onto an exterior wall or sits over an unlined subfloor in an older home. Standard melamine board is an interior product. The Melteca data sheet states it is for interior use only, must not be used in high humidity or wet areas, and that any exposed substrate must be sealed before service. Moisture-resistant substrates are available, so raise any musty smell before the board is ordered.
How long does an under stair storage fit-out take?
From our side, we aim to make contact within one working day of an enquiry, and the estimate and preliminary 3D design follow within one to two days of the in-home consultation. Manufacturing begins after the deposit and a second, precise site measure. Installation on a job this size is typically one to two days, in line with the timeframe we allow for cabinetry installation generally.
What is the best use for the space under the stairs?
Match the use to the height. Over about 1.5m of clear height, use full-height doors for coats, the vacuum and the ironing board. Between roughly 500mm and 1.2m, use drawers for linen, shoes and everyday clutter. Below 500mm, use a horizontal pull-out or line and paint it and stop the joinery there. The single most valuable use in most homes is removing the shoe and bag pile at the front door.
Why does under stair joinery need to be custom made?
Because every panel is a one-off. The space is a wedge, the walls are not plumb, the floor is not level and no two staircases produce the same void. Standard cabinets do not fit, so the units are made to the measured opening, sat on adjustable legs to correct the floor, and scribe fillers are cut on site to close the gap against the wall. That is what makes the fronts sit in a straight line when the wall does not.
Can you build under stair storage around a hot water cylinder?
Usually yes, but the usable volume shrinks. The cylinder needs its access, clearances and drainage kept clear, and the joinery is designed around that rather than enclosing it. In homes built through the 1990s and early 2000s the cylinder in the under-stair cupboard is common. Photograph it and note its dimensions before your consultation so the first design already accounts for it.
Have you been putting off your kitchen renovation?
We offer flexible finance options to help you get your dream kitchen sooner. Learn more about our interest-free finance options.