
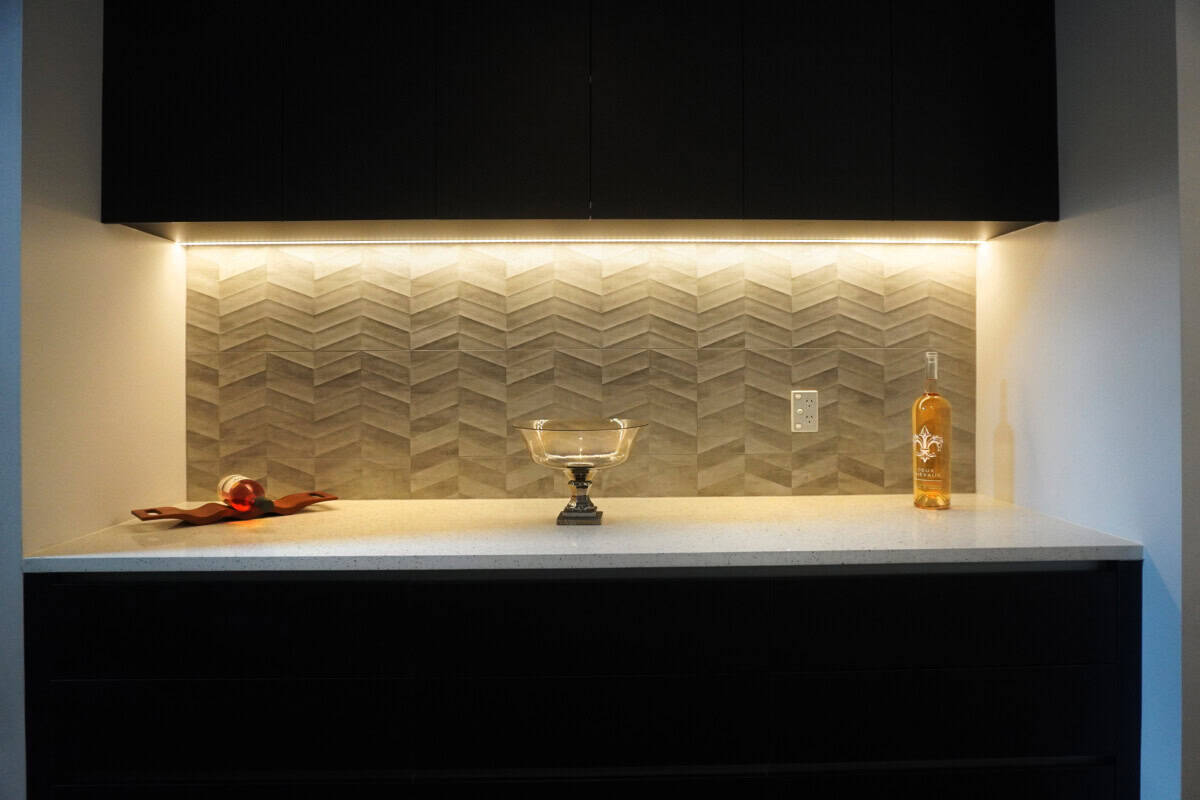

Last updated:
Quick answer: The best kitchen splashback for an Auckland home depends on three things — your cooktop type (gas vs induction), how the kitchen sits relative to coastal salt air, and how much daily cleaning you’re willing to do. For most Auckland kitchens we specify, the call comes down to porcelain tile, full-height toughened glass, engineered stone, or stainless steel. The 20 options below cover everything from premium picks to budget-friendly choices, with the cleaning and safety reality of each.
Kitchen splashbacks do two jobs at once. They take the daily hit from oil splatter, steam, and the inevitable spill behind the sink — and they set the visual tone of the whole kitchen. Get the splashback right and the rest of the kitchen lifts. Get it wrong and you’ll be scrubbing grout lines on a Sunday morning for the next decade.
This guide walks through the 20 splashback options our designers actually specify in Auckland homes, what they cost in rough terms, how they handle Auckland’s humidity, and which ones to avoid near a gas hob. Real materials. Real trade-offs. No fluff.
Splashback cost sits inside the wider cabinetry budget, so it helps to have a rough total before you fall in love with a material. Answer a few questions in the calculator above and we’ll email you an Auckland range for your kitchen footprint.
What’s changed for Auckland splashbacks in 2026
Two things matter more in 2026 than they did five years ago: where your home sits in Auckland, and what cooktop you’re running.
Auckland’s humidity and coastal exposure put more pressure on splashback materials than inland NZ kitchens. Homes in Takapuna, Devonport, Mission Bay, and the wider coastal strip get salt-laden air on top of normal kitchen moisture. That accelerates two specific failures: grout darkening on tiled splashbacks if the grout isn’t sealed, and surface pitting on lower-grade stainless steel. The fix isn’t exotic — it’s specifying the right material for the location and sealing or maintaining it properly.
On the cooktop side, more Auckland kitchens are moving to induction, which is one of the shifts we track in our round-up of current NZ kitchen design trends. That widens the splashback options dramatically — induction generates almost no radiant heat at the wall, so heat-clearance restrictions that rule out timber, laminate, and some engineered stone near gas burners largely disappear. If you’re on gas, the clearance rules still apply and the material list narrows. Both are flagged through this guide.
💡 Design tip from the Little Giant team: The single most common splashback regret we hear is “I should’ve gone full-height”. Splashbacks that stop at the underside of overhead cabinets leave an awkward seam and a strip of painted wall that takes the hit during cooking. Full-height almost always looks better and ages better. The cost difference is usually marginal once you’re already specifying the material.
Five things to weigh before you pick a splashback
Before scrolling through the 20 options, run your shortlist past these five checks. They’ll cut the field in half on their own.
- Cooktop type — gas burner, induction, or ceramic. Gas has heat-clearance rules; induction and ceramic don’t.
- How much you cook — heavy daily cookers need wipe-down surfaces. Light cooks can prioritise looks.
- Cleaning tolerance — grouted tiles need more upkeep than an unbroken sheet of glass or stone.
- Suburb exposure — coastal salt air is hard on porous materials and lower-grade metal.
- Budget reality — the area, the number of cut-outs and the hours a tiler or fabricator spends on the wall move the price more than the material does. Get a measured number before you fall in love with a look.
20 kitchen splashback ideas for Auckland homes
1. Toughened glass splashbacks
| Feature | Details |
| Look | Clean, modern, no visible joins |
| Cleaning | Wipe with glass cleaner — no grout lines |
| Durability | High — toughened safety glass |
| Cost tier | $$–$$$ |
| Gas cooktop OK? | Yes — clearance per your cooktop’s installation manual |
Why we specify it: Glass is back-painted in any colour, so you get one unbroken wall of colour with no grout to maintain. Walls need to be flat — any imperfection telegraphs through. Best for modern kitchens where the splashback is meant to recede into the design.
2. Printed glass splashbacks
| Feature | Details |
| Look | Custom — print any image or pattern |
| Cleaning | Easy — same as toughened glass |
| Durability | High |
| Cost tier | $$$ |
| Gas cooktop OK? | Yes — clearance per your cooktop’s installation manual |
Why we specify it: Suits clients who want a strong visual statement — a printed graphic, a textured pattern, or a colour gradient. Heat-resistant and moisture-proof. Print is locked behind the toughened glass so it can’t fade or scratch.
3. Mirrored or silvered glass splashbacks
| Feature | Details |
| Look | Reflective — bounces daylight, opens up the space |
| Cleaning | Easy — glass cleaner |
| Durability | High — must be toughened safety glass |
| Cost tier | $$$ |
| Gas cooktop OK? | Yes — clearance per your cooktop’s installation manual |
Why we specify it: Particularly good for small Auckland apartments — Britomart, Viaduct, Newmarket, where bouncing daylight matters. Visually doubles the perceived width of a galley kitchen. Choose smoked or antique mirror finishes if a clear mirror feels too bright.
4. Slumped glass splashbacks
| Feature | Details |
| Look | Textured, three-dimensional |
| Cleaning | Harder — grime catches in the textured grooves |
| Durability | High |
| Cost tier | $$$ |
| Gas cooktop OK? | Not directly behind a gas burner |
Why we specify it: A feature splashback — used for one statement run, not the whole kitchen. Suits clients who want visual texture without going to stone. Light catches the surface and creates depth.
5. Stainless steel splashbacks
| Feature | Details |
| Look | Industrial, professional kitchen feel |
| Cleaning | Easy to wipe, but shows fingerprints and streaks |
| Durability | High — but grade matters |
| Cost tier | $$$ |
| Gas cooktop OK? | Yes — clearance per your cooktop’s installation manual |
Why we specify it: Hygienic, heat-resistant, and ages well in busy cooking environments. For coastal Auckland suburbs, specify grade 316 (marine grade) rather than 304 — the salt resistance matters. Brushed finishes hide fingerprints better than mirror polish.
6. Pressed metal splashbacks
| Feature | Details |
| Look | Vintage, decorative, period-appropriate |
| Cleaning | Difficult — pattern catches grease |
| Durability | Moderate — softer metal dents |
| Cost tier | $$ |
| Gas cooktop OK? | Check your cooktop’s manual and the panel maker’s spec |
Why we specify it: Almost exclusively for villa and character home renovations where period detailing matters. Beautiful behind a freestanding range. Less practical for daily heavy cooking — the pressed pattern traps grime.
7. Glass tile splashbacks
| Feature | Details |
| Look | Colour and pattern variety — mosaic to large format |
| Cleaning | Easy on tile face — grout needs sealing |
| Durability | High |
| Cost tier | $$$ (installation labour is the cost driver) |
| Gas cooktop OK? | Yes — varies by tile type |
Why we specify it: Versatile across modern and classic kitchens. Sealed grout is non-negotiable in Auckland — particularly coastal homes, or grout darkens within a year. Transparent and translucent glass tiles need expert install to manage the visible adhesive layer.
8. Ceramic tile splashbacks
| Feature | Details |
| Look | Classic — subway, herringbone, square, hex |
| Cleaning | Easy on tile face — grout still needs sealing |
| Durability | High |
| Cost tier | $ |
| Gas cooktop OK? | Yes — clearance per your cooktop’s installation manual |

9. Porcelain tile splashbacks
| Feature | Details |
| Look | Refined — stone-look, concrete-look, marble-look |
| Cleaning | Easy — porcelain is essentially non-porous |
| Durability | Very high — denser and harder than ceramic |
| Cost tier | $$–$$$ |
| Gas cooktop OK? | Yes — clearance per your cooktop’s installation manual |
Why we specify it: Our most-recommended tile option for busy kitchens. The water-absorption rate is significantly lower than ceramic, so it handles Auckland humidity and coastal exposure well. Stone-look porcelains let clients get a marble look without the maintenance overhead.
10. Large-format porcelain splashbacks
| Feature | Details |
| Look | Slab look, minimal or zero grout lines |
| Cleaning | Easy — fewer grout lines means less to seal |
| Durability | Very high |
| Cost tier | $$$$ |
| Gas cooktop OK? | Yes — clearance per your cooktop’s installation manual |
Why we specify it: The premium specification for clients who want the look of a stone slab without the cost or maintenance. Large-format sheets — typically 1200×2400mm or larger, run floor-to-ceiling with minimal jointing. Specialist install only. Plan ahead for the access path: these sheets don’t fit through standard doorways without careful handling.
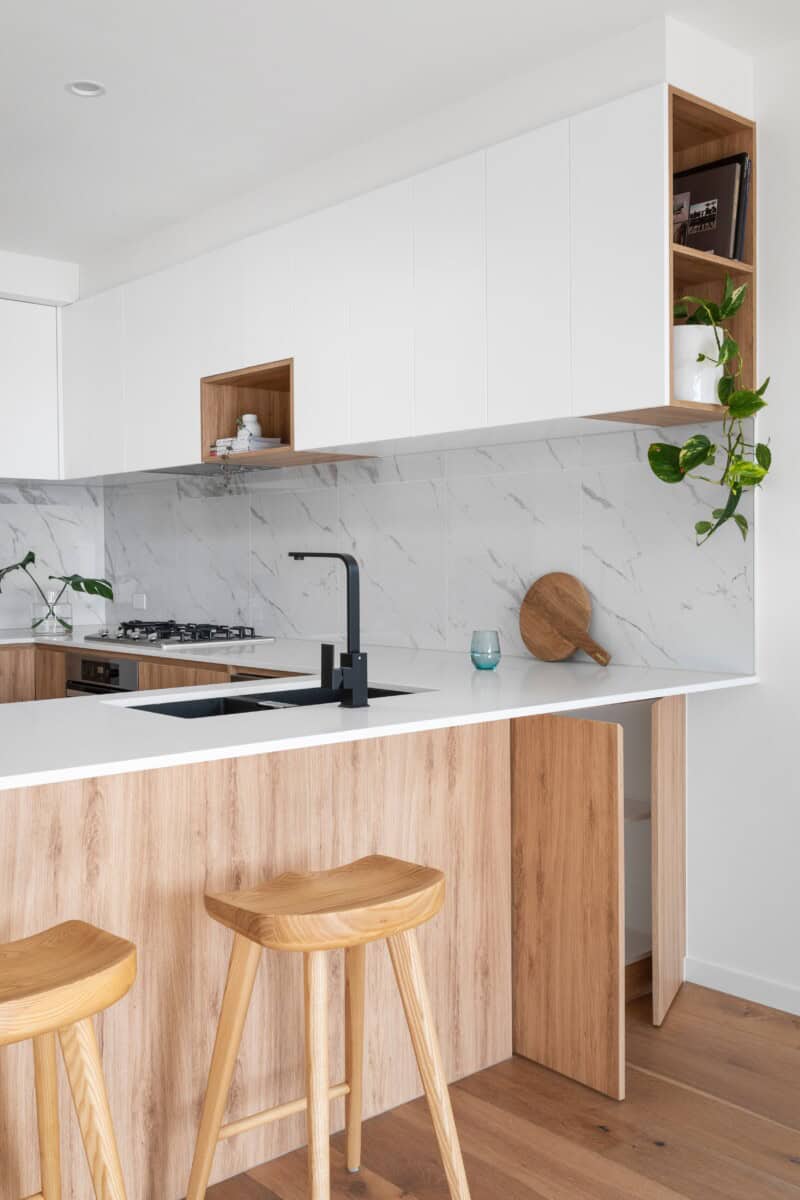
11. Timber lining board splashbacks
| Feature | Details |
| Look | Warm, rustic, natural |
| Cleaning | Hard — porous timber holds grease |
| Durability | Moderate — denting and staining over time |
| Cost tier | $ |
| Gas cooktop OK? | Not directly behind a gas burner |
Why we specify it: Bach kitchens, secondary kitchens, butler’s pantries — settings where the rustic look earns its place and daily heavy cooking isn’t the use case. Requires sealing and periodic re-sealing. Not a long-term match for Auckland coastal humidity.
12. Timber veneer splashbacks
| Feature | Details |
| Look | Natural timber grain, smoother finish than lining boards |
| Cleaning | Easy if sealed properly |
| Durability | Moderate |
| Cost tier | $–$$$ (depending on veneer) |
| Gas cooktop OK? | Not directly behind a gas burner |
Why we specify it: When clients want the warmth of timber without the lining-board texture. Specify a polyurethane or two-pack lacquer finish for cleanability. Pairs particularly well with stone benchtops and matte cabinetry.
13. Natural stone splashbacks (granite, marble)
| Feature | Details |
| Look | Each slab is unique — veining, depth, character |
| Cleaning | Wipe with neutral pH cleaner — never acidic |
| Durability | Very high — granite is harder than marble |
| Cost tier | $$–$$$$ (depends on stone choice) |
| Gas cooktop OK? | Yes — clearance per your cooktop’s installation manual |
Why we specify it: For clients who want the real thing. Marble is softer and shows etching from acidic spills (lemon, wine, vinegar) — book-matched marble splashbacks suit kitchens where cooking is more occasional than daily. Granite handles daily use better. Both need sealing every 12–18 months.
14. Engineered stone splashbacks
| Feature | Details |
| Look | Consistent stone-look pattern, continues straight off the benchtop |
| Cleaning | Easy — non-porous, no sealing required |
| Durability | Very high |
| Cost tier | $$–$$$ |
| Gas cooktop OK? | Not directly behind a gas burner (check the brand’s own guidance) |
Why we specify it: The most common premium specification we install. Caesarstone, Silestone, and similar quartz-based products let you run the same surface from benchtop straight up the wall. If the silica question is on your mind, we compare the alternatives to engineered stone available in NZ in a separate guide — a single material run that reads as one continuous surface. Confirm heat clearance with the specific product brand before specifying near gas.
15. Laminate splashbacks
| Feature | Details |
| Look | Wide colour and pattern range — affordable solid-look options |
| Cleaning | Easy |
| Durability | Moderate — edges can chip; not heat-resistant |
| Cost tier | $ |
| Gas cooktop OK? | Not near burners — high heat damages laminate |
Why we specify it: Budget refits, rental property kitchens, and bach kitchens where cost matters more than longevity. NZ-made brands like Laminex offer hundreds of colours and finishes. Best paired with induction or ceramic cooktops where heat isn’t a factor.
16. Corian (solid surface) splashbacks
| Feature | Details |
| Look | Joins sand out invisibly, and it can be back-lit for a feature wall |
| Cleaning | Easy — non-porous |
| Durability | Moderate — scratches, but repairable on site |
| Cost tier | $$$ |
| Gas cooktop OK? | Not directly behind a gas burner |
Why we specify it: Particularly good where the splashback flows into other Corian elements — vanities, integrated sinks. Scratches sand out with the right finishing. Best for clients who value an unbroken surface over outright toughness.
17. Roller shutter splashbacks
| Feature | Details |
| Look | Functional — hides appliances and storage behind a shutter |
| Cleaning | Wipe down the shutter face |
| Durability | High — mechanical components matter |
| Cost tier | $$$ |
| Gas cooktop OK? | Not directly behind a gas burner |
Why we specify it: Appliance garages — kettle, toaster, coffee machine, that disappear when not in use. Suits clients who want a visually quiet kitchen where benchtop clutter is hidden. Specify quality hardware, cheap shutter mechanisms fail.
18. Painted plaster splashbacks
| Feature | Details |
| Look | Simple — flush with the wall |
| Cleaning | Difficult — paint absorbs oil and stains |
| Durability | Low — needs repainting often |
| Cost tier | $ |
| Gas cooktop OK? | Not near burners |
Why we specify it: Almost never for the cooking zone. Works for the section of wall above a coffee station or scullery prep zone where there’s no cooking happening. Use a washable paint formulation if you’re going this route.
19. Raw brick splashbacks
| Feature | Details |
| Look | Industrial, characterful, exposed |
| Cleaning | Very difficult — porous and textured |
| Durability | High |
| Cost tier | $ |
| Gas cooktop OK? | Yes — clearance per your cooktop’s installation manual |
Why we specify it: Industrial-style kitchens and renovations where existing brick walls are being exposed deliberately. Always seal the brick — unsealed brick absorbs grease and stains permanently. Brick-look tiles offer a similar look with much easier cleaning.
20. Raw bluestone splashbacks
| Feature | Details |
| Look | Natural stone, dense, textured |
| Cleaning | Very difficult — porous, needs sealing |
| Durability | High — heat-resistant |
| Cost tier | $$ |
| Gas cooktop OK? | Yes — clearance per your cooktop’s installation manual |
Why we specify it: A rarer specification — usually paired with a stone benchtop in the same material for a fully integrated look. Sealing is essential and ongoing. Worth the upkeep for the right design but not a low-maintenance pick.
Kitchen Splashback Tiles: Formats, Layouts and Grout Lines
Tile is the most-searched splashback material in New Zealand and the one where the format decision matters more than the tile itself. Two kitchens can use the identical ceramic tile and look completely different depending on size, orientation and grout colour. This is also where install labour lives: the smaller the tile, the more of your budget goes to the tiler rather than the tile.
Tile formats and what each one does to a kitchen
| Format | Typical size | Grout lines | Grout per m² of wall | Where it works |
|---|---|---|---|---|
| Mini subway | 75 x 150mm | Many | about 20 m | Villas and bungalows in Ponsonby, Grey Lynn and Mt Eden where fine detail suits the era |
| Standard subway | 100 x 200mm or 100 x 300mm | Moderate | 13 to 15 m | The safest all-rounder, works in period and modern kitchens equally |
| Square | 200 x 200mm or 300 x 300mm | Moderate | 7 to 10 m | Quiet, grid-like backdrop when the cabinetry is the feature |
| Hexagon | 100mm to 200mm across the flats | Many | 10 to 20 m | A feature run behind a freestanding range rather than a whole kitchen |
| Mosaic sheet | Small tiles mesh-mounted on 300 x 300mm sheets | Most of any format | 40 to 80 m (50mm down to 25mm pieces) | Texture and colour depth, but the highest cleaning and sealing load |
| Large format | 300 x 600mm up to 600 x 1200mm | Few | 2.5 to 5 m | Small or galley kitchens, where fewer joins make the wall read wider |
| Slab or sheet | 1200 x 2400mm and larger porcelain panels | None to one | about 1 m or less | Premium specification with the lowest maintenance of any tiled option |
The grout column is plain arithmetic, and it is the one that predicts your maintenance. For a rectangular tile, the length of grout joint per square metre of wall is 1 divided by the tile’s width plus 1 divided by its height, both in metres. A 75 x 150mm mini subway works out at about 20 metres of joint in every square metre; a 600 x 1200mm tile works out at 2.5. That is eight times the joint to seal, eight times the joint to discolour behind a cooktop, and a lot more of the tiler’s time. Perimeter joints and cuts come on top, so treat the figures as a floor rather than a total.
Tile layouts: the pattern changes the labour, not just the look
- Stack bond — tiles aligned in a straight grid. The most contemporary look and the least forgiving, because any wall that isn’t plumb shows up in the joins immediately.
- Running bond (brick lay) — each row offset by half a tile. The classic subway pattern. Hides small wall irregularities better than stack bond.
- Vertical stack — subway tiles turned on end. Draws the eye up, which is useful under a low soffit or in a kitchen with 2.4m ceilings.
- Herringbone — tiles set at 45 degrees in an interlocking V. Beautiful and the most expensive to lay, because every edge tile needs cutting and the setout has to be right from the first row.
- Basketweave and pinwheel — period patterns that suit character homes. Same labour warning as herringbone.
💡 Design tip: pick the tile and the grout colour together, in the actual kitchen, under the light the room really gets. A mid-grey grout with a white tile stays looking new for years. Brilliant white grout behind a cooktop starts looking tired within months.
Tiled splashbacks and the Auckland maintenance reality
Grout is the weak point in every tiled splashback, and Auckland’s humidity accelerates it. Two rules we hold to on every tiled splashback we specify: seal the grout at install, and top the seal up every 12 to 18 months. Unsealed grout darkens, holds moisture in the joint, and eventually grows mould behind the face where you can’t clean it.
If the maintenance schedule doesn’t appeal, the honest answer is not a better grout. It is fewer grout lines. Move up the format table to large-format porcelain or a single sheet, or switch material to toughened glass or engineered stone. If you’re pairing the splashback with a stone benchtop, our guide to kitchen benchtop costs in NZ covers how the two decisions interact on price.
What a kitchen splashback costs, and what actually moves the price
A splashback is priced on area, cut-outs and labour, and the material is often the smallest of the three. That is why two quotes for the same tile can sit a long way apart, and why a per-square-metre figure off a website rarely survives contact with your actual wall. The table below ranks the 20 options on the same relative scale used in the option tables above, from $ (lowest typical installed cost) to $$$$ (highest). It is a ranking, not a quote.
| Relative cost | Options | What you are mostly paying for |
|---|---|---|
| $ | Ceramic tile, laminate, timber lining board, painted plaster, raw brick (existing) | Materials are cheap; on tile, most of the bill is the tiler laying and grouting it |
| $$ | Pressed metal, raw bluestone, porcelain tile in standard sizes, toughened glass at the simpler end | A mix of material and specialist fixing or sealing |
| $$$ | Printed, mirrored and slumped glass, stainless steel, glass tile, Corian, roller shutters, engineered stone | Fabrication to measure, templating, and the cut-outs for power points and rangehoods |
| $$$$ | Large-format porcelain slabs, premium natural stone | Slab cost, specialist handling, and getting a very large sheet into the room |
The five things that move a splashback quote
- Area. Full-height costs more than a strip to the underside of the overheads, simply because there is more of it. Measure height as well as length before you compare anything.
- Cut-outs. Every power point, switch and window return on a glass or stone splashback has to be measured and cut. A run with six cut-outs is a different job from one with two, even in the same material.
- Tile size and pattern. Smaller tiles and cut-heavy patterns such as herringbone put more of the budget into labour, which is the grout-length arithmetic above showing up on an invoice.
- The wall behind it. Glass and large-format porcelain need a flat, true wall. Out-of-plumb GIB in an older villa gets straightened before anything goes on it.
- Access. A slab that has to come up a narrow Devonport staircase or into a fifth-floor apartment costs more to deliver and fit than the same slab going into a new build in Hobsonville.
The cheapest kitchen splashbacks that still hold up
Cheap is mostly about labour, so the budget options are the ones that keep hours off the wall.
- Standard ceramic subway in running bond. The cheapest tile to buy and the most forgiving pattern to lay. Go up from mini subway to 100 x 300mm and you cut the grout, the sealing and the laying time in one move.
- A laminate upstand or panel off the benchtop. If you are already putting in a laminate benchtop, carrying the same surface up the wall is one of the lowest-cost splashbacks going. Keep it away from gas burners.
- Pre-finished wall panels. Laminex NZ lists Seratone AQUA as suitable for interior wet and dry applications including kitchen splashbacks. Large sheets mean few joins and quick installation, and the jointer profiles close the gaps that tile grout would otherwise fill.
- One material behind the cooktop, a cheaper one elsewhere. A short run of glass or stainless behind the hob, with tile across the rest of the wall, puts the expensive material only where the heat and splatter are.
Painted plaster is the one budget option we steer people away from in the cooking zone, because it stains and needs repainting. If you are working to a tight number overall, the budget-conscious kitchens we build across Auckland are planned with the splashback in the first estimate rather than squeezed in at the end.
How to compare two splashback quotes
Check that both quotes cover the same area, the same number of cut-outs, the same edge detail and the same wall preparation, and that neither is quoting material only. Our guide to comparing kitchen quotes in NZ walks through the same scope check for the whole kitchen.
💡 Design tip: Splashback cost is dominated by three variables — run length, material grade, and install complexity around cut-outs (power points, rangehoods, windows). Two splashbacks of the same material and the same length can quote differently by $500–$1,000 just based on how many cut-outs are involved. When you’re comparing quotes, make sure the scope is identical.
What pushes the number up: running the splashback full-height to the ceiling, specifying marine-grade or low-iron material, multiple cut-outs for power points and rangehoods (around $40 per cut-out for glass), wall prep work, and access challenges for large-format slabs.
What keeps the number down: sticking to a single material across the whole run, choosing standard sizes that don’t need custom fabrication, specifying induction or ceramic cooktops that remove heat-clearance constraints, and planning the splashback alongside the cabinetry rather than as a late addition.
Our designers measure the run, confirm material specs, and run the splashback through the 3D design alongside the cabinetry before quoting. If you are choosing a slab, Laminex NZ, which distributes Laminam here, lists its 12mm-plus Laminam porcelain as suitable for splashbacks as well as benchtops, so the bench can run straight up the wall with no grout at all. That’s the only way to get an accurate kitchen splashback cost — every kitchen has its own quirks. You can get a quick first-pass cabinetry budget through our cabinetry cost calculator, or book a free in-home consultation to spec the splashback with one of our designers.
Splashback materials for Auckland’s coastal suburbs
If your kitchen sits within a few kilometres of the coast — Takapuna, Devonport, Mission Bay, St Heliers, Browns Bay, Castor Bay, Milford, Whangaparāoa, salt air will affect material choice more than people expect.
Three rules we apply to coastal Auckland splashback specifications:
- Specify marine-grade (316) stainless steel if you’re going with stainless. Grade 304 is more prone to tea-staining and surface pitting once salt air gets at it, and a brushed finish shows it less than a mirror polish.
- Seal grout properly and re-seal it — tiled splashbacks in coastal suburbs need their grout sealed at install and topped up every 12–18 months. Ignored grout darkens, holds moisture, and starts growing mould in the back of the joint.
- Favour non-porous surfaces where possible — toughened glass, engineered stone, large-format porcelain, and stainless steel hold up better than natural stone or timber over the long run.
For homes in Mt Eden, Grey Lynn, Ponsonby, Remuera, and other central or inland Auckland suburbs, salt exposure isn’t the issue. Auckland’s general humidity still matters — particularly through the wetter autumn and winter months, but the material list opens up considerably.
Working with gas cooktops
If you’re running a gas cooktop, there are minimum clearances between the burner and combustible or heat-sensitive materials, and they are set per appliance. The figure comes from the cooktop maker’s installation instructions and the gas installation standard your gasfitter works to, so it differs from hob to hob. A few materials are off the list near a gas hob whatever the figure:
- Off the list: timber lining boards, timber veneer (without specialist heat-shield backing), laminate, painted plaster, slumped glass within the clearance zone, engineered stone within the clearance zone (check the stone brand’s own heat and care guidance before specifying it near gas).
- Workarounds: use a different material for the section of splashback directly behind the burner — typically toughened glass, stainless steel, porcelain tile, or natural stone, and continue the preferred material across the rest of the run.
For the exact clearance that applies to your hob, check the manufacturer’s installation manual before the splashback is ordered, not after. Gas connection and sign-off is work for a registered gasfitter, and Building Code clause G11 (gas as an energy source) on MBIE’s building.govt.nz is the framework they work within.
How Little Giant Interiors Designers Think About Splashbacks
Most splashback regrets are caused by the same three mistakes: stopping at the underside of the cabinetry, not sealing the grout, and choosing a material that looks great in the showroom but doesn’t hold up to daily cooking.
When we run a splashback through our 3D design process, we treat it as the single visual element that ties the kitchen together. Cabinetry, benchtop, and splashback are the three surfaces clients actually see — and the splashback is usually the easiest to get wrong because it’s the latest decision in the process, often made under budget pressure.
Our practical advice to anyone planning a kitchen reno:
- Pick the splashback at the same time as the cabinetry, not last. Specifying it last forces compromises. The door finish and the splashback are read together from across the room, which is why our guide to kitchen cabinet doors in NZ is worth reading alongside this one.
- Go full-height where the budget allows. The seam at the underside of overhead cabinets is the most common source of “I wish I’d done it differently”.
- Match the maintenance level to your life. If grout-sealing every year sounds like a chore, choose a non-porous material from the start. Our kitchen cabinet care guide covers the cleaning products that are safe on the cabinetry around it.
- Sample everything in the actual kitchen light — Auckland’s natural light shifts a lot between summer and winter. A splashback sample that looks beautiful at 11am in summer can look completely different on a grey July morning.
💡 Design tip: If you’re considering more than one material — say, glass behind the cooktop and porcelain tile across the rest of the run, sample both side by side at the design stage. Mixed-material splashbacks can look amazing or look fragmented. The difference is in the joint detail, which is a designer call, not a tradie call.
Five final pointers before you commit
- Confirm the gas clearance figure for your specific hob — manufacturer’s manual is the reference, not a general rule.
- Match the material to your cleaning tolerance — there’s no point in raw brick if a sponge isn’t your idea of a good Saturday.
- Specify marine-grade stainless if you’re coastal.
- Plan for installation access — large-format slabs need a clear path into the kitchen.
- Get a real quote — splashback cost varies enormously by material, run length, and prep work. Don’t budget from a per-m² figure alone.
If you’d like our designers to specify the right splashback for your kitchen, book a free in-home consultation — we’ll bring samples, talk through your cooktop and cleaning situation, and run the design through our 3D process before quoting. You can also use our cabinetry cost calculator for a quick first-pass budget, or see how we design, manufacture and fit kitchens for Auckland homes for the full picture of what a Little Giant Interiors kitchen build involves.
Frequently Asked Questions
What's the best kitchen splashback for an Auckland kitchen?
It depends on your cooktop and your suburb. For coastal homes (Takapuna, Devonport, Mission Bay), we lean toward toughened glass, large-format porcelain, marine-grade 316 stainless steel, or engineered stone, all of which are non-porous and salt-tolerant. For inland Auckland kitchens, the field opens up to include natural stone, ceramic tile, and timber veneer. Cooktop type matters too: gas requires heat clearances that rule out timber, laminate, and some engineered stones near the burner.
How much does a kitchen splashback cost in Auckland?
It depends less on the material than most people expect. A splashback is priced on its area, the number of cut-outs for power points and rangehoods, and the labour to lay or fit it. Ceramic tile, laminate and painted plaster sit at the low end. Glass, stainless steel, glass tile, Corian and engineered stone sit in the middle to upper range. Large-format porcelain slabs and premium natural stone sit at the top. Get it priced on your measured wall as part of the kitchen quote.
Can I use any splashback material near a gas cooktop?
No. NZ standards require minimum heat clearances between gas burners and surrounding materials. Timber lining boards, timber veneer, laminate, and painted plaster are off the list entirely. Slumped glass, engineered stone, and Corian all need extra clearance from the burner — the cooktop’s installation manual sets the figure. Toughened glass, stainless steel, porcelain tile, ceramic tile, natural stone, and pressed metal generally suit gas with the right clearance. Always check the cooktop manufacturer's manual for the exact figure that applies.
What's the easiest splashback to keep clean?
Non-porous materials with no grout lines: toughened glass, mirrored glass, large-format porcelain, engineered stone, stainless steel, and Corian. These wipe clean with a normal kitchen spray and a microfibre cloth. Tiled splashbacks (ceramic, porcelain, glass tile) clean easily on the tile face but have grout lines that need sealing and occasional regrouting. Timber, raw brick, raw bluestone, and pressed metal are the hardest to keep clean.
Do I need full-height splashbacks?
It's not required, but it's the most common spec we run and the most common regret when clients don't do it. Splashbacks that stop at the underside of overhead cabinets leave a strip of painted wall that takes the hit during cooking. Full-height splashbacks look more resolved and age better. The cost difference is usually marginal once you're already paying for the material and install.
Can a splashback be the same material as the benchtop?
Yes — running engineered stone or natural stone from benchtop up the wall is one of the most popular premium specs we install. It reads as one continuous surface and removes the visual break between benchtop and wall. Check the heat clearance rules for the specific stone brand if you're running gas.
Does grout colour matter for tiled splashbacks?
More than people think. Light grout (white, cream, pale grey) darkens visibly within months in a working kitchen, particularly behind the cooktop. Mid-grey or matched-tone grout stays looking new longer. Whatever colour you choose, the grout must be sealed at install and re-sealed every 12-18 months in Auckland — humidity and coastal salt air accelerate grout failure.
Are mirrored splashbacks practical or just a design feature?
Practical in small kitchens where bouncing daylight matters — Auckland apartments in Britomart, Viaduct, and Newmarket are typical fits. They visually expand a galley kitchen and lift the natural light. Less useful in larger, well-lit kitchens where there's no light-bouncing problem to solve. Always specify toughened safety glass.
What splashback works best for a villa or character home?
Ceramic subway tile is the classic spec — it suits period kitchens without looking aggressively retro. Pressed metal works for kitchens leaning into the heritage look. For villa renovations going more modern inside, toughened glass and porcelain tile both look right and don't fight the character of the home. We've specified all of these across Mt Eden, Grey Lynn, Ponsonby, and Remuera villas.
How long does splashback installation take?
Most splashback installs take 1-3 days depending on material. Tiled splashbacks need install, grouting, and sealing — typically 2-3 days end to end. Toughened glass and engineered stone slabs install in a single day once the material is on site, but lead time on the material itself can run 2-4 weeks. Large-format porcelain needs specialist handling and may add a day. Plan splashback timing into the overall kitchen build sequence, because it usually sits late in the install schedule.
Should I pick the splashback before or after the cabinetry?
Pick both together. Specifying the splashback last forces compromises on colour, scale, and budget. Our designers run cabinetry, benchtop, and splashback as a single visual decision during the 3D design phase — it's the only way to make sure the three surfaces work together rather than fighting each other.
What size splashback tiles work best in a kitchen?
Standard subway at 100 x 200mm or 100 x 300mm is the safest all-rounder and suits both period and modern Auckland kitchens. Large-format tiles from 300 x 600mm up to 600 x 1200mm are the better call in a small or galley kitchen, because fewer grout lines make the wall read wider and there is far less to seal. Mini subway, hexagon and mosaic sheets look superb but carry the most grout, which means the most cleaning and the most sealing.
Which splashback tile layout is cheapest to install?
Running bond, the classic offset subway pattern, is the cheapest to lay and the most forgiving of walls that are not perfectly plumb. Stack bond costs a little more because the setout has to be exact. Herringbone, basketweave and pinwheel patterns are the most expensive, as every edge tile needs cutting and the first row dictates the whole wall. Larger tiles also cut labour, since the tiler is placing fewer pieces per square metre.
What is the cheapest kitchen splashback that still lasts?
Standard ceramic subway tile in a running bond pattern is the cheapest tiled option, and moving from mini subway up to 100 x 300mm tiles cuts both the laying time and the grout you have to seal. A laminate upstand off a laminate benchtop is cheaper again if you are on induction. Pre-finished wall panels such as Seratone AQUA, which Laminex lists as suitable for kitchen splashbacks, go up quickly with few joins. Avoid painted plaster in the cooking zone.
➡ Book your free in-home design consultation with Little Giant Interiors
➡ See how our design and build process works
➡ Learn more about our custom kitchens in Auckland
Have you been putting off your kitchen renovation?
We offer flexible finance options to help you get your dream kitchen sooner. Learn more about our interest-free finance options.