Laundry Cabinetry Cost Calculator (results in under 60 seconds)
The average cost of laundry cabinetry in Auckland can vary greatly depending on several factors, including the size and layout of your laundry, the materials you choose, and the complexity of the design. Try our laundry cabinetry cost calculator tool to generate an estimate, this cost calculator was developed to provide you a quick and easy way to get a rough idea of how much it would cost for your size laundry.
Laundry Cabinetry Cost Calculator
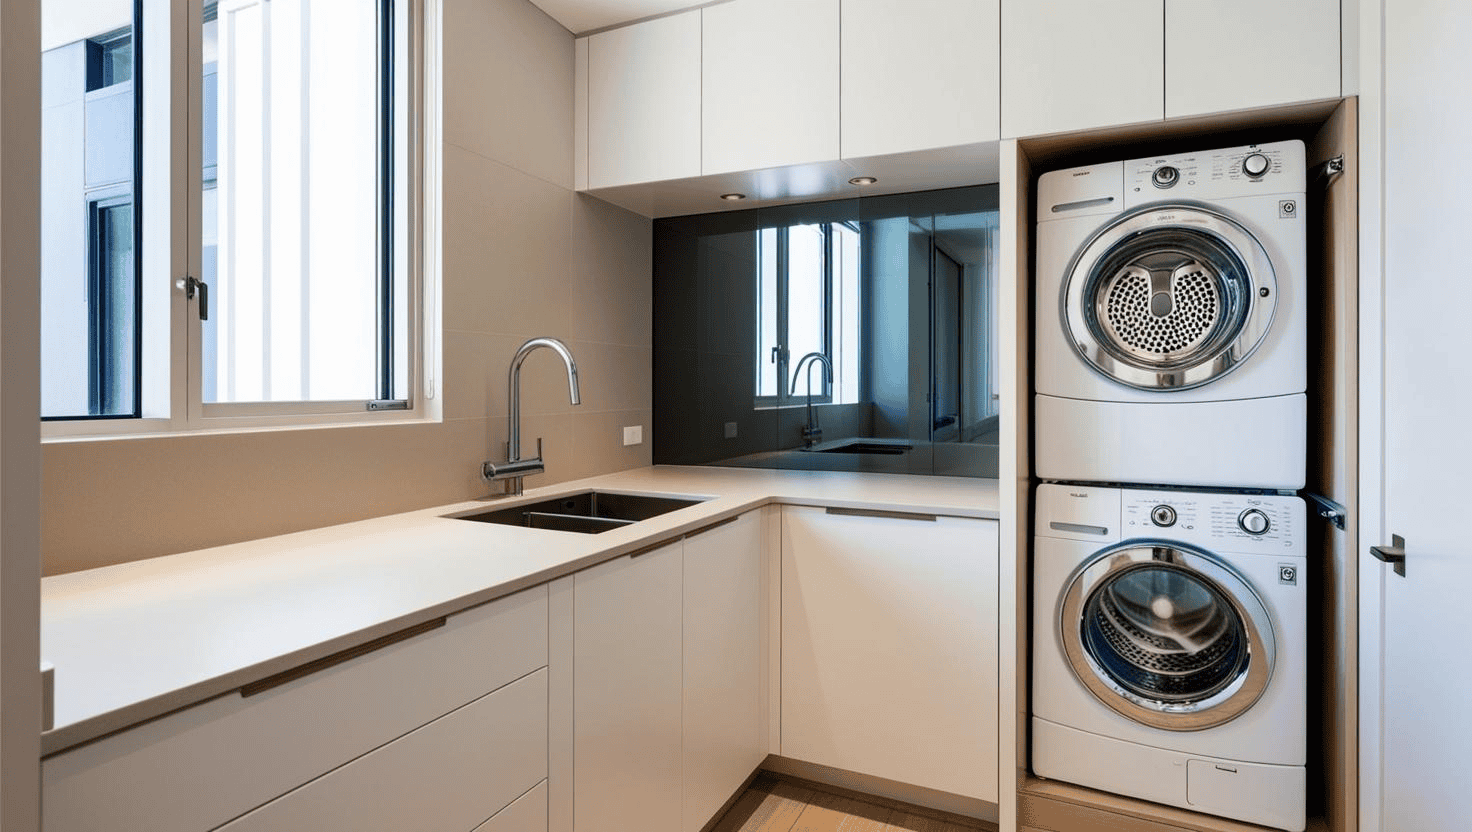
1. Stack Your Appliances for a Compact Laundry Solution
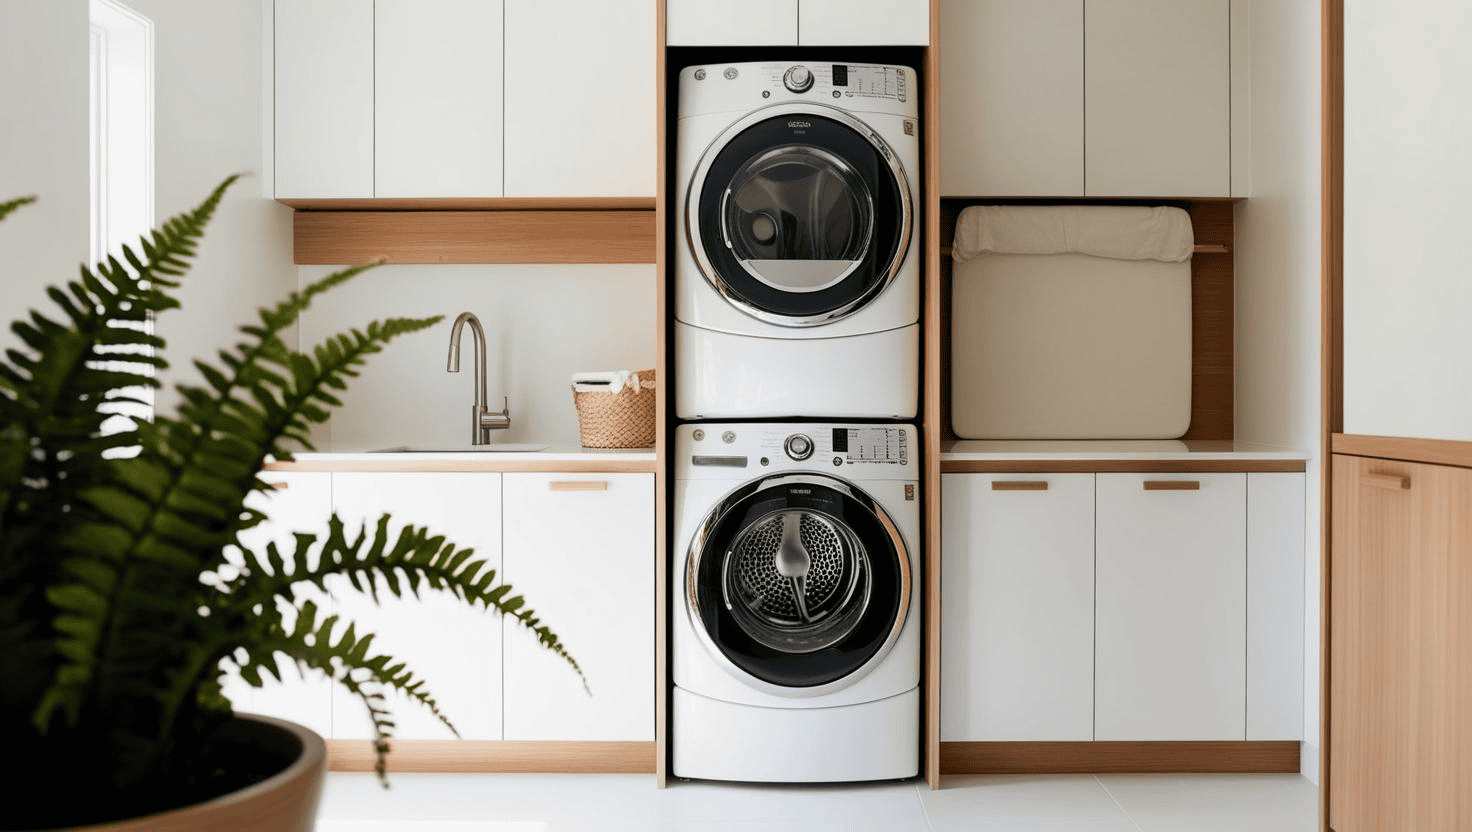
Why Stack Your Appliances?
Choosing the Right Stackable Appliances
Start by selecting front-loading machines designed for stacking. Look for models with compatible stacking kits—many brands offer these as add-ons to ensure stability. We recommend compact units (around 600mm wide) that suit Auckland’s smaller homes without sacrificing capacity. For a family in Mount Eden, a 7kg washer and 7kg dryer combo works wonders, while singles or couples in Parnell apartments might opt for 5kg models. Check for energy-efficient ratings too; New Zealand’s focus on sustainability makes this a smart choice for your wallet and the planet.
Installation Tips for Auckland Homes
Installing a stacked setup requires a bit of planning, especially in older Auckland homes like bungalows or villas with quirky layouts. First, ensure your space has a sturdy wall or cabinet frame to support the weight—vibrations from washing machines can be intense! A power point and plumbing access are non-negotiable, so position your stack near existing connections to avoid costly renovations. For apartments in the Auckland CBD, where space is at a premium, consider a corner nook or a cupboard enclosure to keep things tidy. Our team at Little Giants can custom-build a frame or cabinet to secure your stack, blending it seamlessly into your laundry design.
Enhancing Your Stacked Laundry Space
Aesthetic Touches for Kiwi Style
Cost Considerations
Expect to spend $1,500–$3,000 on a quality stackable washer-dryer combo in New Zealand, depending on brand and features. Installation costs in Auckland might range from $200–$500, factoring in plumbing and electrical work. At Little Giants, we offer tailored cabinetry solutions starting at $1,000 to encase your stack, ensuring a polished finish. It’s an investment that pays off in space saved and resale value added.
Real-Life Example
2. Utilize Wall Space with Clever Storage for Small Laundry Ideas NZ
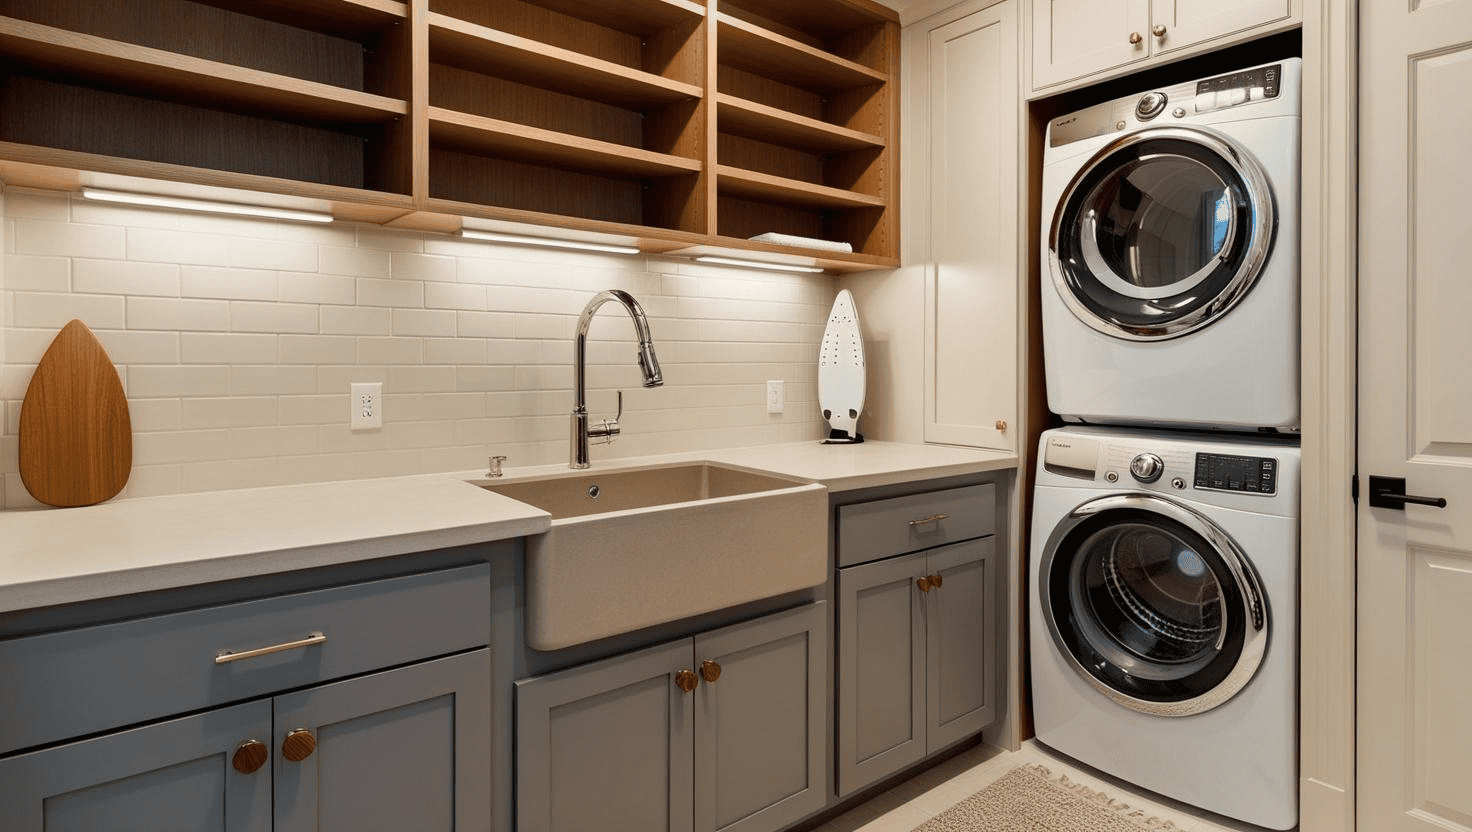
Wall-Mounted Shelves: Simple and Effective
Slim Wall Cabinets for Hidden Storage
Fold-Down Drying Racks: Space-Saving Genius
Pegboards: Customizable and Stylish
Borrow a trick from workshops and add a pegboard to your laundry wall. Paint it in a bold color—like a deep teal or muted green—to make it a feature, then hang hooks for brushes, lint rollers, or even a small iron. It’s a versatile, low-cost option that adapts to your needs, ideal for Auckland renters who can’t commit to permanent fixtures.
Before hammering away, check your walls. Older Auckland villas might have plasterboard or lath-and-plaster, requiring anchors or studs for support. In apartments, concrete walls need a drill and masonry bolts—don’t skimp on quality fixings, especially with earthquakes in mind. Measure your space carefully; a 1.5m-wide wall can hold two shelves or a cabinet-rack combo. If plumbing or wiring runs behind, consult a pro to avoid surprises. Little Giants can assess your layout and install custom storage that’s secure and stylish.
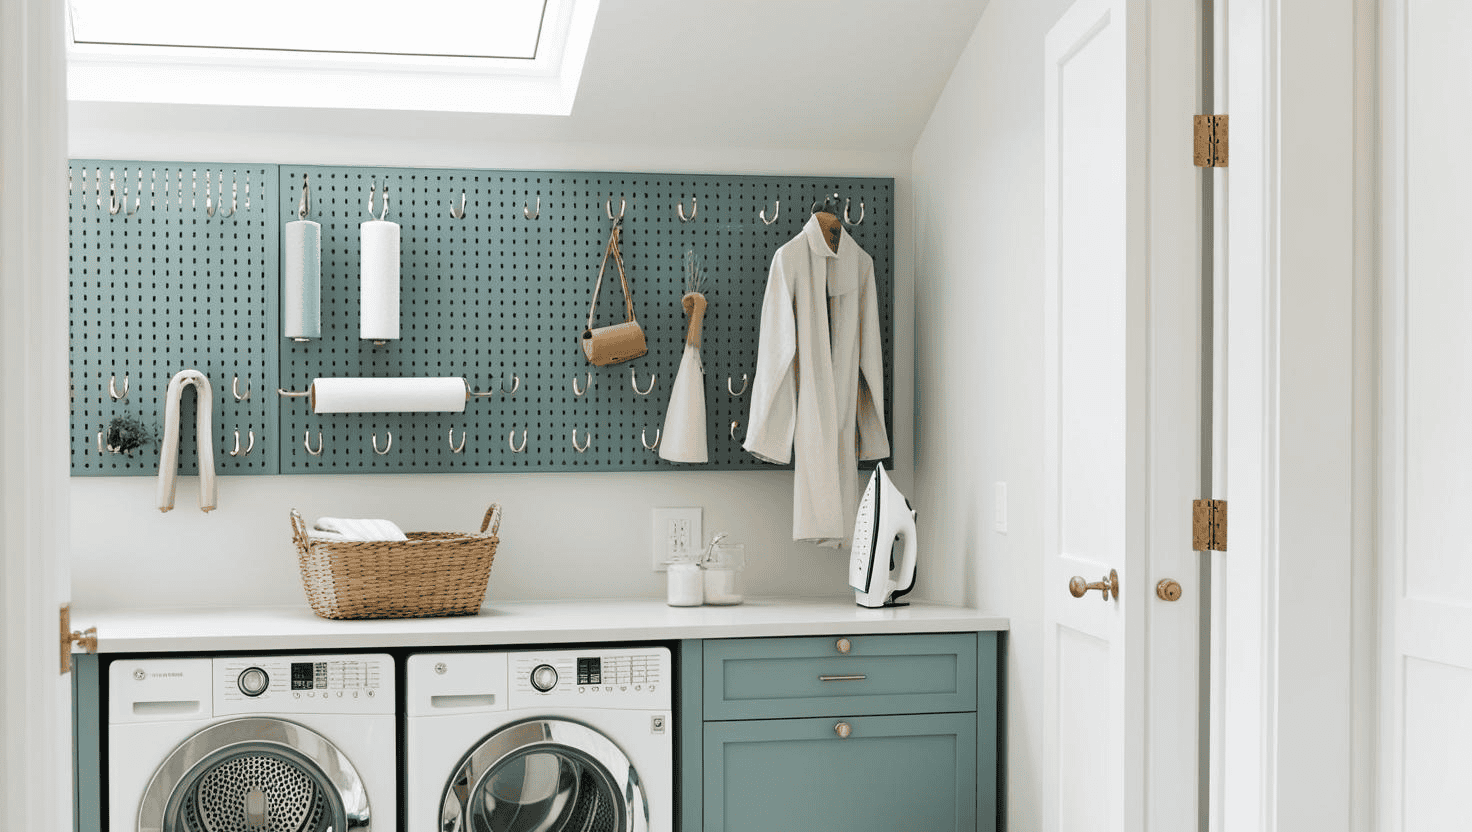
Blending Form and Function
Cost Breakdown
Floating shelves start at $50–$100 each in Auckland, depending on size and material. Slim cabinets range from $150–$400, while a fold-down drying rack costs $80–$200. Installation might add $100–$300, though DIY is an option for the handy. At Little Giants, our custom wall storage solutions begin at $500, tailored to your space and style.
3. Incorporate a Pull-Out Laundry Bench for Compact Laundry Solutions
In Auckland’s small homes, where space is a precious commodity, finding room for a folding area or extra workspace in the laundry can feel impossible. Why Choose a Pull-Out Bench? A pull-out laundry bench slides out when you need it and tucks away when you don’t, offering a compact laundry solution that adapts to your needs. In Auckland, where homes range from tight apartments to narrow villa nooks, this design eliminates the need for a permanent countertop that eats up floor space. Use it to fold clothes, sort laundry, or even prep cleaning supplies—then slide it back to keep your laundry open and uncluttered. It’s a practical answer to the space crunch many Aucklanders face.
![]()
Designing Your Pull-Out Bench
Start by assessing your laundry’s layout. A pull-out bench works best in a cabinet or between stacked appliances (see point number 1). We recommend a bench 500–600mm wide and 400–500mm deep—enough for folding a towel or stacking baskets, but slim enough to fit small spaces. Choose durable materials like laminated timber or engineered stone for a surface that handles spills and wear. In Auckland’s humid climate, opt for moisture-resistant finishes to prevent warping.
Adding Functionality
Installation Tips
4. Hide Your Laundry in a Cabinet for Sleek Laundry Design
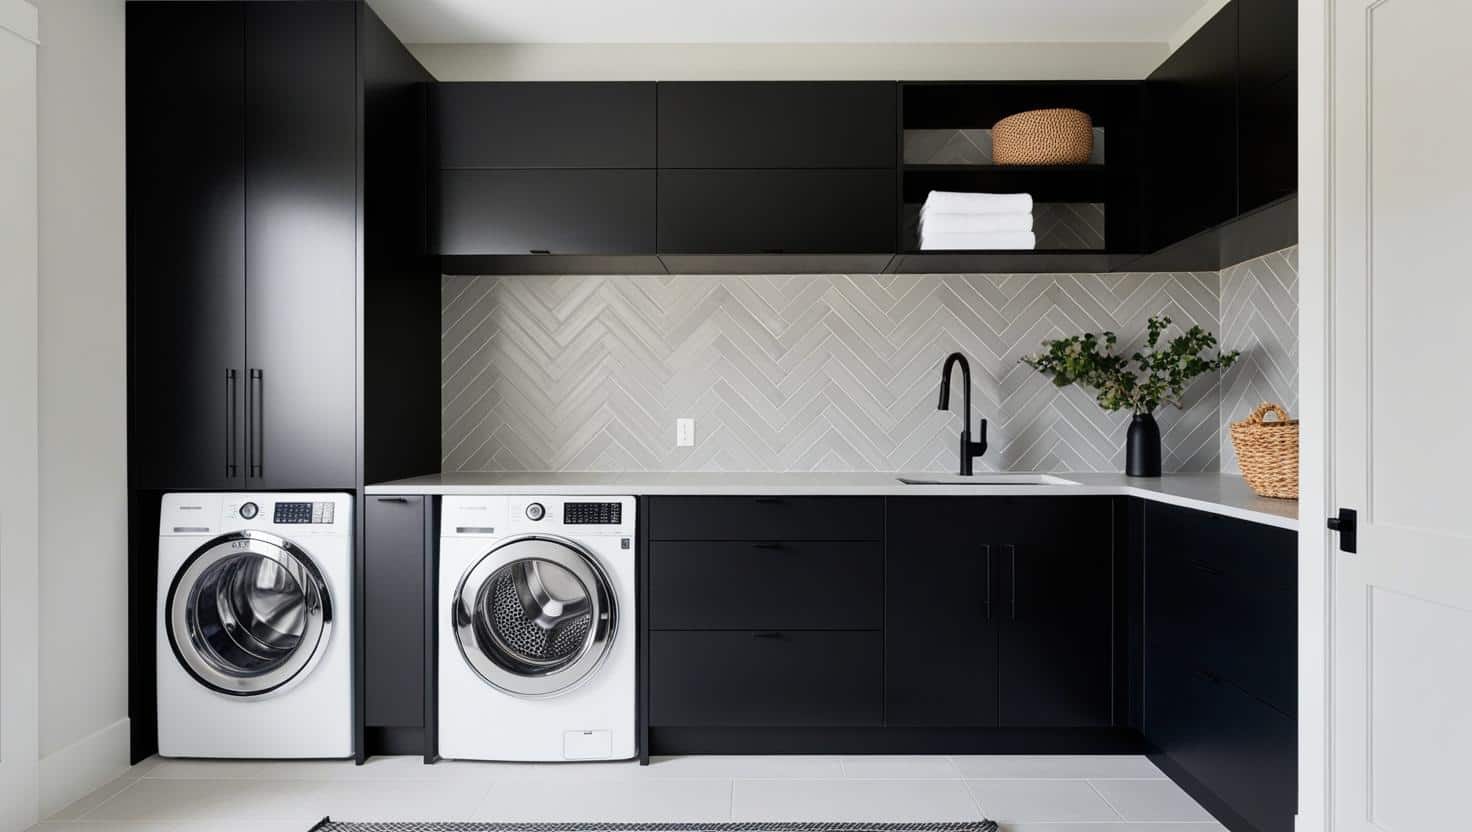
Choosing the Right Cabinet Setup
Pick a cabinet that fits your appliances snugly. For a stacked washer-dryer combo (see Blog 1), a tall, narrow unit (700mm wide, 650mm deep, 1,800mm high) works best. For side-by-side setups, go wider (1,200–1,500mm) but keep depth shallow to save floor space. At Little Giants, we recommend bi-fold or sliding doors over swinging ones—they don’t eat into your room when opened, a must for Auckland’s tight layouts. Opt for ventilated panels to prevent heat buildup, crucial in New Zealand’s humid summers.
Installation Tips
Measure twice, build once. Ensure your cabinet allows 50mm clearance around appliances for ventilation and easy access—vital for maintenance. In Auckland’s older homes, check for uneven floors or walls; custom builds from Little Giants adjust for quirks like these. Secure the unit to studs or a concrete wall, especially with earthquakes in mind. Plumbing and power must align—retrofits in villas might need a plumber, while apartments often have connections ready. Our team can handle the details, ensuring a flawless fit.
Multi-Functional Magic
A hidden laundry cabinet does more than conceal—it multiplies your space’s potential. In a Grey Lynn bungalow, we topped a cabinet with a countertop for folding, doubling as a kitchen prep zone. In an Epsom apartment, a cabinet with a pull-out bench (see Blog 3) became a mini office when not in use. This versatility suits Auckland’s multi-purpose living, where rooms often wear multiple hats. Add a mirror or artwork on the doors for extra flair, turning a utility into a design feature.
Cost Breakdown
A pre-made cabinet starts at $500–$1,000, depending on size and finish. Custom units from Little Giants begin at $1,200, including design and installation—ideal for Auckland’s unique spaces. Factor in $200–$500 for plumbing or electrical adjustments if needed. It’s a worthwhile spend for the space and style it delivers.
5. Create a Multi-Purpose Laundry Nook for Small Laundry in NZ.
Customize your nook to your home’s style. In a Devonport villa, timber cubbies and a tiled floor echo heritage charm while managing muddy shoes. In a Newmarket apartment, sleek cabinets and a fold-down table keep it modern and uncluttered. Use moisture-resistant materials—laminated wood or powder-coated metal—to withstand Auckland’s humidity. Our team at Little Giants crafts bespoke solutions, ensuring your nook fits both your space and your aesthetic.
Storage Smarts
Maximise storage without crowding. Wall cabinets above appliances (Point 2) hold cleaning supplies or bulk buys, while under-bench drawers stash shoes or toys. In a Mount Eden home, we added a slim pull-out basket for dirty laundry, keeping it hidden yet accessible. Open shelves with baskets bring a Kiwi touch—woven or natural finishes are popular. This keeps your multi-purpose nook organised and airy.
A multi-purpose laundry nook stretches your square footage, a game-changer in Auckland’s smaller homes (often 120–180m²). It’s ideal for open-plan layouts where a standalone laundry feels wasteful. Landlords can market it as a premium feature, appealing to tenants who value versatility. Plus, it’s budget-friendly—add a few elements to your existing setup rather than renovating an entire room.
Installation Tips
Plan your plumbing and power first—sinks or extra outlets need professional hookup in Auckland’s older homes. Secure heavy features like cabinets to studs or concrete, especially with earthquakes in mind. Allow airflow around appliances; a multi-purpose nook gets busy, so ventilation prevents dampness. Little Giants can install a custom setup, ensuring every piece works together seamlessly. DIYers can start with off-the-shelf units, but pros handle the quirks of Auckland’s diverse builds.
Cost Considerations
A basic multi-purpose nook (bench, hooks, shelves) costs $500–$1,200. Add a sink for $300–$700, including plumbing. Custom designs from Little Giants start at $1,500, offering a tailored fit for your laundry design. Installation might add $200–$500, depending on complexity. It’s an affordable way to boost functionality in small spaces.
![]()
6. Opt for a Corner Laundry Layout for Compact Laundry Solutions
Designing Your Corner Laundry
Start with your appliances. Stack a washer and dryer (Point 1) in one corner arm to save floor space, then use the adjacent arm for a slim countertop or sink. A 1.5m x 1.5m corner is enough for a basic setup—perfect for Auckland’s smaller footprints. At Little Giants, we suggest a 600mm-wide stack paired with a 300–400mm-deep bench, leaving room to maneuver. Add a corner cabinet above for detergents, blending form and function.
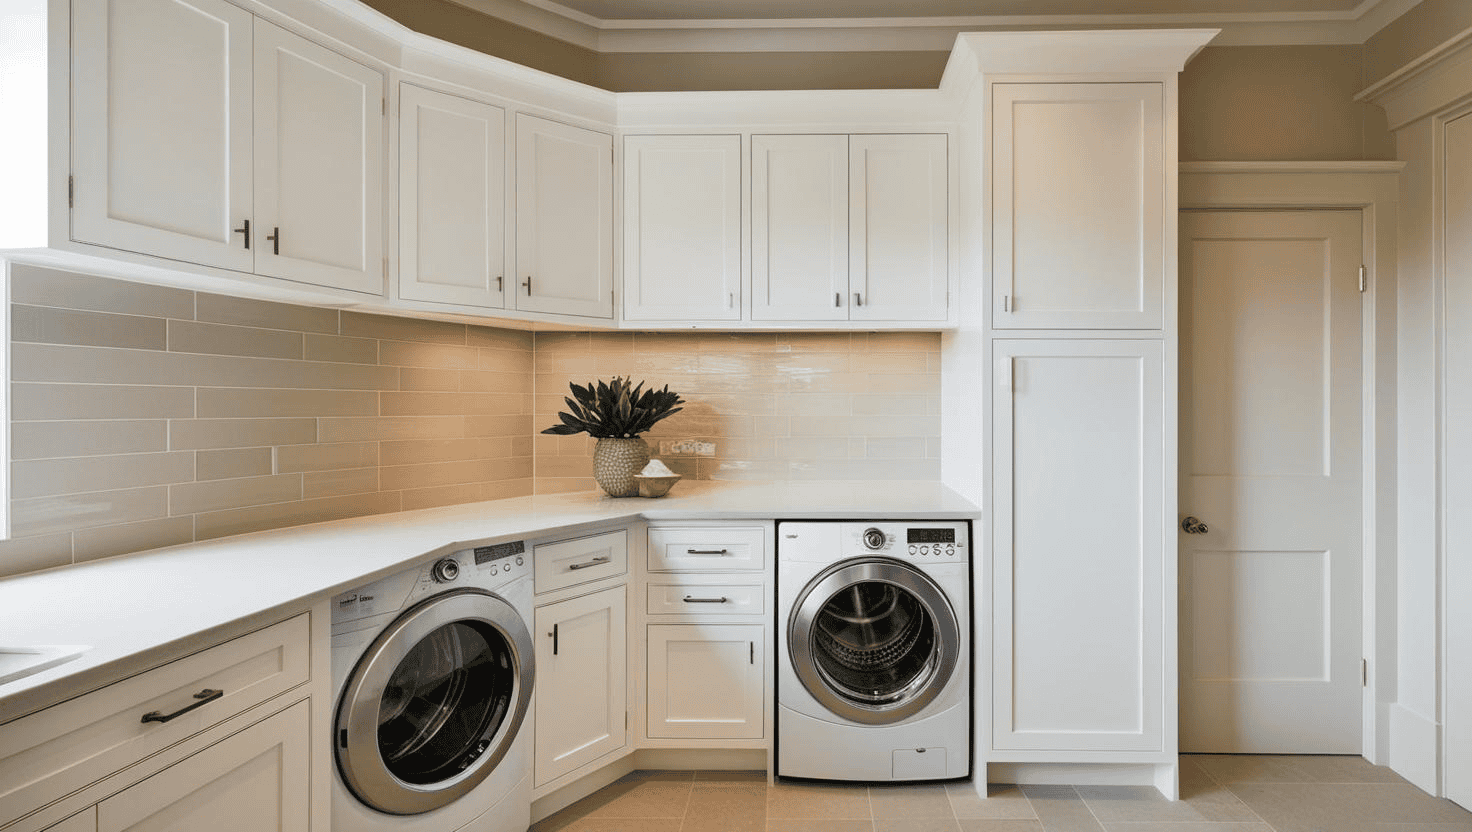
Adapt your corner layout to your space. In a Newmarket apartment, we stacked appliances in a kitchen corner, topping them with a bench that doubles as a breakfast bar. For a Grey Lynn bungalow, a bathroom corner became a laundry with a sliding door (point 4) to hide it. Use moisture-resistant materials like laminated timber or tiles—key in Auckland’s damp climate—to keep your setup durable. Little Giants can customise the layout, ensuring it fits your home’s unique quirks.
Enhancing Functionality
Styling Your Corner Laundry
Installation Tips
Measure your corner precisely—angles aren’t always 90 degrees in Auckland’s older builds. Ensure plumbing and power reach the spot; retrofitting a villa might need a pro, while apartments often have nearby connections. Secure cabinets or appliances to walls for earthquake safety—a must in NZ. Little Giants can install a custom corner unit, handling everything from leveling to ventilation. DIYers can use flat-pack kits, but pros ensure a polished finish.
Cost Breakdown
A basic corner setup (stacked appliances, slim bench) costs $1,000–$2,000. Add $300–$600 for a sink or extra cabinetry. Custom designs from Little Giants start at $1,800, including installation—tailored to your laundry design. Plumbing or electrical work might add $200–$500. It’s a mid-range investment with big space-saving returns.
![]()
7. Install a Sliding Barn Door for Stylish Laundry Design
Why Choose a Sliding Barn Door?
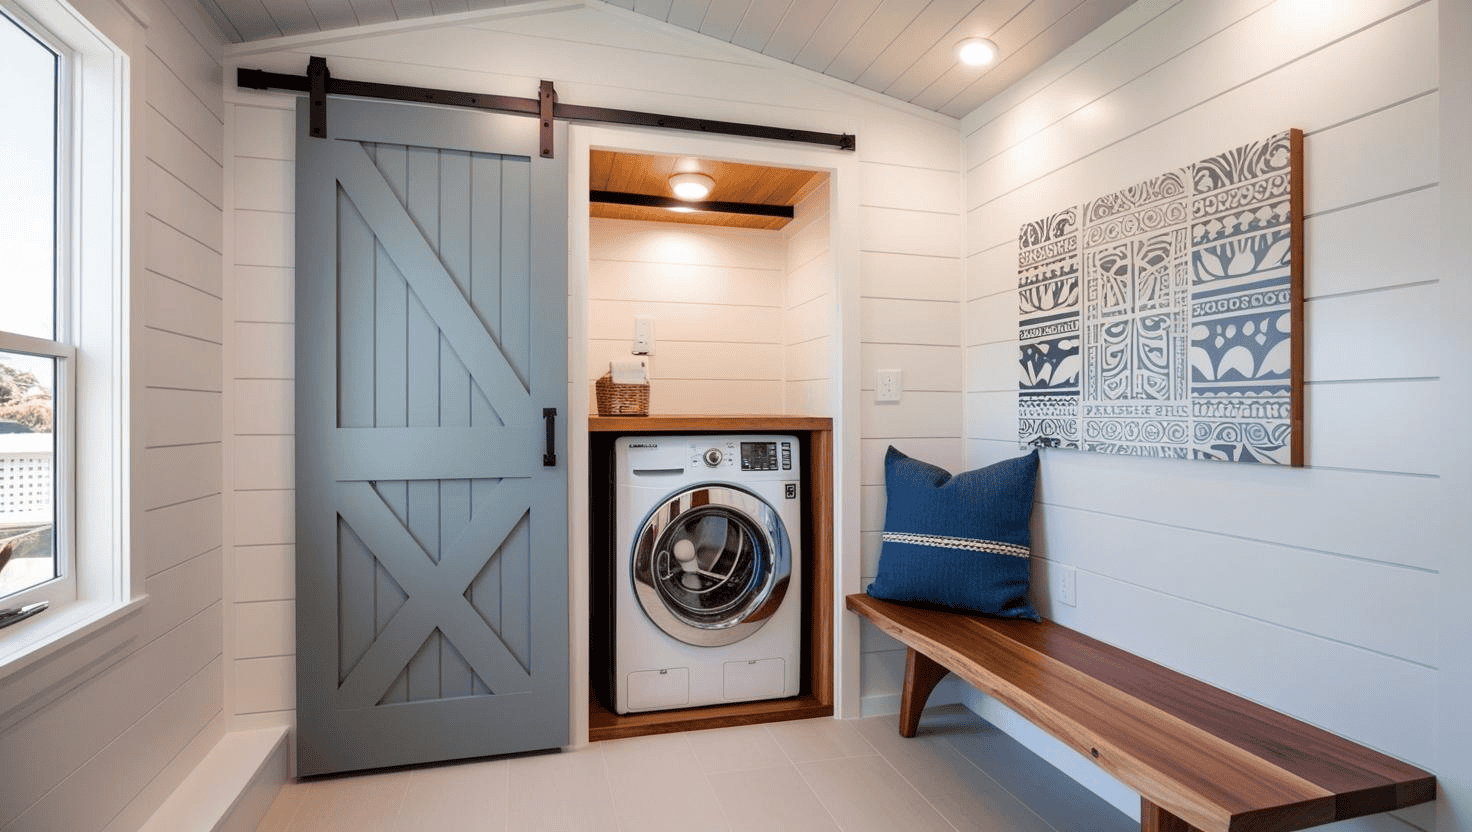
A sliding barn door glides along a track, eliminating the swing radius of a traditional door that eats into your room. In Auckland’s tight apartments and narrow villa hallways, this small laundry idea frees up space for appliances, benches, or storage. It also hides your laundry nook, keeping it out of sight when not in use—a bonus for open-plan homes in Ponsonby or Mount Eden. Plus, its bold design doubles as a statement piece, blending Kiwi love for natural textures with urban flair.
Picking the Perfect Barn Door
Choose a door that suits your space and style. A 700–900mm-wide door covers most laundry nooks; go taller (2m+) for a dramatic effect. Timber is a Kiwi favorite—reclaimed wood or stained pine nods to New Zealand’s rustic roots, while painted finishes (white, grey, or black) suit modern Auckland apartments. At Little Giants, we recommend lightweight materials like MDF for easy sliding, paired with a sturdy track system.
Where to Install It
Place your barn door strategically. In a Grey Lynn bungalow, slide it across a laundry nook off the kitchen, hiding stacked appliances (point 1). For a Newmarket apartment, use it to enclose a corner layout (Point 6) in the bathroom. It works in multi-purpose nooks (point 5) too—shield a mudroom-laundry combo in Ellerslie without crowding the entry. Ensure you’ve got 1–1.5m of wall space beside the opening for the door to slide fully open. Little Giants can tweak the fit for Auckland’s quirky layouts.
Installation Tips
Mounting a barn door takes planning. Install a strong header above the opening—timber or steel—to support the track, especially in Auckland’s earthquake-prone zone. Check your wall; plasterboard needs studs or anchors, while concrete takes masonry bolts. Keep the track level for smooth sliding, and leave 10mm clearance below to avoid scraping floors—vital in older homes with uneven surfaces. Our team at Little Giants handles the details, ensuring a secure, seamless setup.
Adding Functionality
Boost your door’s utility. Attach a slim shelf or hooks to the back for hanging bags or drying delicates—a compact laundry solution that uses every inch. In a Parnell home, we added a chalkboard panel to the front for notes, perfect for busy families. Pair it with a pull-out bench (point 3) inside the nook for a hidden workspace that slides away. These extras make your barn door a multi-tasker, not just a cover.
Styling for Kiwi Homes
A barn door shines with the right finish. In a Herne Bay villa, a weathered timber door with black hardware echoes heritage charm, paired with subway tiles (point 4). For a CBD apartment, a sleek white door with a minimalist track keeps it contemporary. Add a woven rug or potted plant nearby—to soften the look. It’s laundry design that’s as stylish as it is practical.
Cost Breakdown
A basic barn door with track costs $300–$800, depending on material and size. Custom designs from Little Giants start at $1,000, including installation—tailored to your laundry design. Factor in $100–$300 for a tradie if DIY isn’t your thing. It’s a stylish investment that pays off in space and appeal.
8. Integrate a Fold-Down Ironing Board for Small Laundry Ideas NZ
In Auckland’s compact homes, where ironing often spills into living rooms or bedrooms, a fold-down ironing board keeps this chore contained and clutter-free. This laundry design trick saves space while adding sleek functionality, making it a standout among small laundry ideas NZ homeowners can embrace. At Little Giants, we’ve installed these clever boards to transform tiny Auckland laundries into efficient hubs. In this eighth blog of our series, we’ll show you how a fold-down ironing board maximizes space and fits seamlessly into compact laundry solutions.
Why a Fold-Down Ironing Board?
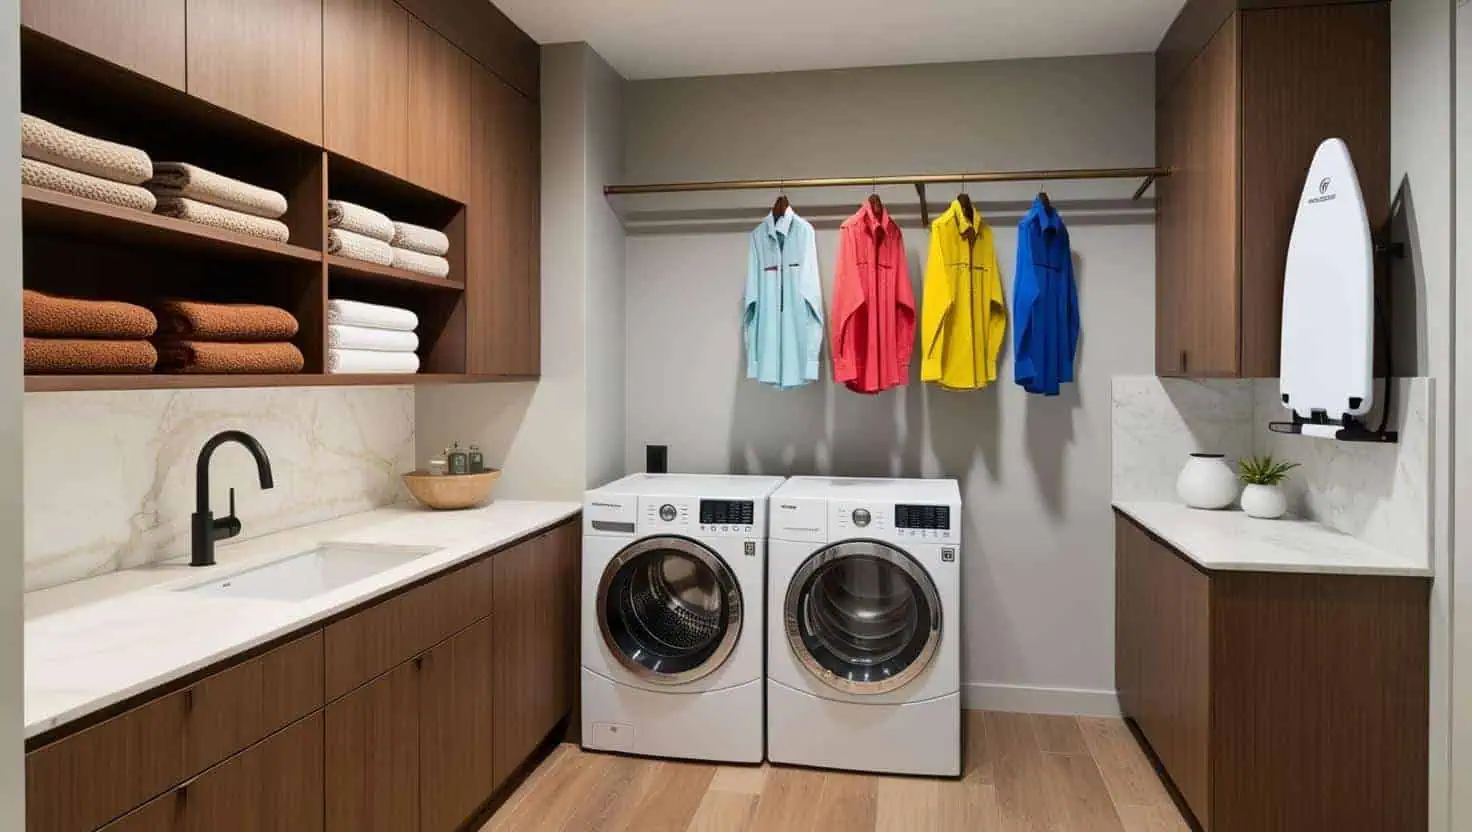
A traditional ironing board hogs floor space and demands storage when not in use—impractical in Auckland’s small apartments and villas. A fold-down version mounts to a wall or tucks into a cabinet, flipping out only when needed. This compact laundry solution frees up your laundry for other tasks, like folding or drying, and hides away to keep the space tidy. It’s perfect for a Grey Lynn bungalow with a narrow nook or a CBD apartment where every square meter counts.
Choosing Your Fold-Down Board
Pick a model that suits your space. Wall-mounted boards (600mm wide, 1,200mm long when open) work in open areas, while cabinet-integrated versions fit inside a hidden laundry setup (point 4). At Little Giants, we recommend sturdy steel frames with heat-resistant covers—essential for Auckland’s humid summers. Opt for a slim design that folds to 50–100mm thick, ensuring it doesn’t protrude when stowed. Check hardware stores or online for options that balance size and durability.
Where to Install It
Place your board for convenience. In a Ponsonby villa, mount it on a wall above a stacked washer-dryer (point 1), keeping it at elbow height (around 900mm off the floor). For a Parnell apartment, tuck it into a cabinet beside a pull-out bench (point 3), creating a folding-ironing combo. In a Mount Eden home, we installed one in a multi-purpose nook (point 5), doubling as a craft station. Ensure 1.5m of clearance in front when open—Little Giants can assess your Auckland layout for the perfect spot.
Installation Tips
Secure your board properly. Fix wall-mounted units to studs or use heavy-duty anchors in plasterboard—crucial in Auckland’s earthquake zone. For cabinet installs, reinforce the frame to handle the board’s weight (10–15kg with an iron). Check for nearby wiring or pipes; older villas might need a pro to navigate quirks. Little Giants crafts custom setups, integrating the board into your laundry design with precision. DIYers can manage with a drill and level, but pros ensure safety and a flush fit.
Enhancing Functionality
Add extras to boost utility. Install a shelf above the board for your iron and spray bottle—a small laundry idea NZ that keeps essentials handy. In a Newmarket flat, we added a hook below for hangers, streamlining the process. Pair it with a wall cabinet (point 2) to store linens or cleaning gear nearby. These tweaks make ironing quick and efficient, even in Auckland’s busiest households.
Make your fold-down board a design feature. Paint the surrounding wall or cabinet in a soft grey or crisp white—trending in Auckland—to brighten the nook. For a Devonport villa, a timber-trimmed board nods to Kiwi heritage, paired with a tiled backsplash (point 4). In a CBD apartment, a sleek metal finish keeps it modern, reflecting light to open the space.’
A fold-down ironing board saves floor space and declutters Auckland’s smaller homes (often 120–200m²). It’s ideal for renters who can’t lug a full board between flats—remove it with minimal wall damage. Landlords can tout it as a premium perk, appealing to tenants who value smart design. Plus, it’s a low-cost upgrade that punches above its weight in functionality.
![]()
Cost Breakdown
A basic fold-down board costs $100–$300, depending on size and features. Cabinet-integrated models range from $400–$700. Custom installs from Little Giants start at $600, including design and fitting—tailored to your laundry design l. Add $50–$200 for a tradie if DIY isn’t your forte. It’s an affordable way to enhance small spaces.
9. Add a Slim Sink for Versatile Compact Laundry Solutions
n Auckland’s small homes, where laundry spaces often pull double duty, a slim sink adds versatility without gobbling up precious room. This laundry design feature squeezes into tight nooks, making it a top pick among small laundry ideas homeowners can rely on. At Little Giants , we’ve installed these sleek sinks to boost functionality in Auckland laundries, from soaking stains to washing muddy boots. In this ninth blog of our series, we’ll explore how a slim sink saves space and enhances compact laundry solutions for New Zealand living.
Why a Slim Sink?
A full-sized sink dominates a small laundry, but a slim version—narrow and shallow—fits where others can’t. In Auckland, where rain and humidity demand indoor solutions, a sink handles pre-soaking delicates or scrubbing kids’ gear without needing a separate utility area. This small laundry idea NZ keeps your space multi-functional, perfect for a Ponsonby apartment or a Mount Albert villa with limited square footage. It’s a practical upgrade that punches above its size.
Choosing the Right Slim Sink
Select a sink that maximizes utility. Look for models 300–400mm wide and 200–300mm deep—enough to soak a shirt but slim enough for a cramped corner. Stainless steel resists rust in Auckland’s damp climate, while ceramic adds a chic touch. At Little Giants, we recommend wall-mounted or under-counter sinks to free up floor space, paired with a compact tap. Check local suppliers for options that fit your laundry design without overwhelming it.
Fit your sink strategically. In a Grey Lynn bungalow, place it beside a stacked washer-dryer (point 1) for a seamless workflow. For a Parnell apartment, mount it above a pull-out bench (point 3), doubling as a prep station. In a multi-purpose nook (point 5) in Ellerslie, a slim sink near the door tackles muddy shoes before they track inside. Ensure plumbing access—villas might need a retrofit, while apartments often have nearby lines. Little Giants can position it perfectly in your Auckland space.
![]()
Installation Tips
Plumb your sink with care. Tie into existing water and waste lines to save costs—common in Auckland’s newer builds. In older homes, reinforce the wall for a mounted sink, securing it to studs or concrete for earthquake safety. Allow 50mm clearance around it for cleaning and maintenance. Little Giants handles the install, ensuring a leak-free fit that blends into your compact laundry solution. DIYers can manage with basic plumbing skills, but pros navigate tricky layouts.
Boosting Functionality
Add features to make your sink shine. Install a wall-mounted drying rack (point 2) above to drip-dry hand-washed items—a must in Auckland’s wet seasons. In a Newmarket home, we paired a slim sink with a fold-down ironing board (point 8) nearby, creating a stain-to-press station. Add a soap dish or small shelf beside it for detergents, keeping your workspace tidy. These extras turn a simple sink into a laundry powerhouse.
Dress up your slim sink with Kiwi flair. Surround it with white subway tiles—a timeless Auckland look for a clean backdrop. In a Devonport villa, a timber bench beneath ties it to natural textures, while a matte black tap in a CBD apartment keeps it sleek. Paint nearby cabinets in a soft grey or sage green to brighten the nook, reflecting New Zealand’s love for airy spaces. It’s laundry design that’s both functional and fabulous.
Benefits for Small NZ Homes
A slim sink squeezes utility into Auckland’s compact homes (often 150–200m²), where standalone utility rooms are rare. It’s renter-friendly—uninstall it with minimal fuss—or a landlord’s dream, adding appeal.. Plus, it’s eco-friendly; hand-washing small loads saves energy, aligning with NZ’s green ethos. This small laundry idea delivers big impact in tiny spaces.
Cost Breakdown
A slim sink costs $150–$400, depending on material and style. Plumbing and installation add $200–$500, more if retrofitting an older Auckland home. Custom setups from Little Giants start at $700, including sink and fitting—tailored to your needs. It’s a mid-range upgrade with lasting value.
![]()
10. Use a Vertical Drying Rack for Space-Saving Laundry Design
In Auckland, where unpredictable weather and small homes collide, drying clothes indoors without cluttering your space is a challenge. A vertical drying rack rises to the occasion, offering a laundry design solution that saves floor space and keeps laundry manageable. This final small laundry idea NZ is a favorite.
Why a Vertical Drying Rack?
A traditional drying rack sprawls across your floor, eating up room in Auckland’s tight laundries. A vertical rack stacks drying space upward, folding flat against a wall or ceiling when not in use. This small laundry idea NZ tackles Auckland’s rainy days—common even in summer—without relying solely on a dryer, saving energy and space. It’s perfect for a Ponsonby apartment with no balcony or a Mount Eden villa with a tiny laundry nook.
Choosing Your Vertical Rack
Pick a rack that fits your needs. Wall-mounted accordion styles (600mm wide, extending 500mm) suit small loads, while ceiling-mounted pulley systems (1m x 1m) handle bigger batches. At Little Giants, we recommend rust-resistant materials like powder-coated steel or aluminum—key in Auckland’s humid climate. Opt for a foldable or retractable design to keep it out of sight when idle. Local hardware stores stock options that balance size and strength.
Where to Install It
Position your rack for maximum use. In a Grey Lynn bungalow, mount it on a wall above a slim sink (point 9) to drip-dry delicates. For a Parnell apartment, hang a pulley rack from the ceiling over a corner layout (Point 6), lowering it only when needed. In a multi-purpose nook (Point 5) in Ellerslie, a vertical rack beside a stacked washer-dryer (Point 1) keeps air-drying handy. Ensure 1.5–2m of vertical clearance—Little Giants can find the sweet spot in your Auckland home.
Installation Tips
Secure your rack firmly. Wall mounts need studs or anchors—vital in Auckland’s plasterboard-heavy villas—while ceiling racks require joist support for earthquake safety. Leave 50mm around it for airflow, preventing dampness in NZ’s muggy weather. Little Giants installs custom racks, tailoring height and placement to your laundry design. DIYers can manage with a drill and level, but pros handle heavier systems or tricky ceilings.
Enhancing Functionality
Add features to boost efficiency. Pair your rack with a slim shelf below for folding—a compact laundry solution that streamlines your routine. In a Newmarket flat, we hung a pulley rack with adjustable bars, perfect for towels or sheets. Add a small fan nearby to speed drying in Auckland’s still air—eco-friendly and dryer-free. These tweaks make your vertical rack a laundry hero, not just a hanger.
Turn your rack into a design asset. Paint it matte black or white to match Auckland’s modern palettes, blending with a sliding barn door (point 7). In a Devonport villa, a timber-accented rack nods to Kiwi warmth, paired with a tiled floor (point 5). For a CBD apartment, a sleek metal rack reflects light, keeping the space open.
Cost Breakdown
A basic vertical rack costs $50–$150, depending on style. Ceiling pulley systems range from $200–$400. Custom installs from Little Giants start at $300, including fitting—crafted for your laundry design. Add $50–$200 for a tradie if DIY isn’t your thing. It’s a budget-friendly upgrade with lasting impact.
11. Install a Wall-Mounted Drying Carousel
Add a wall-mounted drying carousel to optimise air-drying in your small laundry. This rotating, circular rack extends from the wall and collapses flat when not in use, saving space. Perfect for Auckland’s eco-conscious households, it supports sustainable drying while keeping floors clear. The carousel handles various items, from delicates to towels, and its sleek design adds a modern touch to compact spaces.
How to Achieve This Look: Purchase a wall-mounted drying carousel from homeware retailers or Houzz NZ. Install it on a sturdy wall near a window for airflow, common in Auckland’s climate. Choose a stainless steel or white finish for durability and style. Paint walls in Resene Half Sea Fog to enhance brightness, inspired by Archipro’s airy designs. Secure the carousel to support wet laundry weight. Add a small basket below for pegs, maintaining a tidy, functional space.
12. Create a Vertical Peg Storage System
Organise laundry essentials with a vertical peg storage system mounted on a narrow wall strip. This solution uses hooks or clips to hang pegs, brushes, and small tools, keeping surfaces clear in Auckland’s tight laundries. Its slim profile maximises space, while the customisable layout adds a contemporary, organised aesthetic to your laundry.
How to Achieve This Look: Install a vertical peg storage strip, available from organisation retailers or Houzz NZ, on a slim wall section. Choose a metal or timber design for durability. Attach clips or hooks for pegs and tools, painted in Resene Cobalt for a vibrant pop, as seen in Archipro’s bold designs. Pair with Resene Alabaster walls to keep the space bright. Add a small shelf above for extra storage, ensuring the system is securely mounted for daily use.
13. Add a Glass Partition for Openness
Incorporate a glass partition to separate your small laundry from adjacent spaces while maintaining an open feel. This stylish solution is ideal for Auckland’s open-plan homes, allowing light to flow and making the laundry feel larger. The transparent barrier keeps noise and odours contained without sacrificing aesthetics, creating a modern, airy vibe.
How to Achieve This Look: Hire a professional to install a frameless glass partition, ensuring compliance with Auckland’s building codes. Choose tempered glass for safety, as seen in Houzz NZ’s modern interiors. Paint adjacent walls in Resene Quarter Pearl Lusta for a soft, bright look, inspired by Archipro’s open-plan designs. Add a slim track for smooth sliding if space allows. Include a frosted strip for partial privacy, ensuring the partition enhances both style and functionality in your compact laundry.
14. Use a Wall-Mounted Laundry Basket Shelf
Streamline sorting with a wall-mounted laundry basket shelf that holds removable fabric baskets for whites, colours, and delicates. This elevated solution keeps baskets off the floor, saving space in Auckland’s small laundries. Its sleek design adds a modern, organised look, ensuring dirty clothes stay out of sight while simplifying laundry tasks.
How to Achieve This Look: Purchase a wall-mounted basket shelf from Houzz NZ or organisation retailers, choosing a slim, white, or timber frame. Install it at a comfortable height, around 120cm. Select breathable fabric baskets in neutral tones to match Resene Half Villa White walls, as seen in Archipro’s minimalist layouts. Add a small hook rail below for hanging items. Secure the shelf to handle weight, ensuring a tidy, functional addition to your laundry’s design.
15. Install a Foldable Wall Ladder
Add a foldable wall ladder for accessing high storage or drying areas in your small laundry. This collapsible ladder mounts flat against the wall when not in use, saving space. Ideal for Auckland’s compact homes, it provides safe access to overhead shelves or ceiling racks, blending practicality with a modern, industrial aesthetic.
How to Achieve This Look: Choose a foldable wall ladder from hardware stores or Houzz NZ, opting for a lightweight aluminium or timber design. Install it on a sturdy wall, ensuring it folds seamlessly. Paint the ladder in Resene Black White to blend with walls, as inspired by Archipro’s sleek designs. Add high shelves above for storage, painted in Resene Quarter Foggy Grey. Secure the ladder to support weight, creating a functional and stylish solution for your small laundry.
16. Incorporate a Wall-Mounted Spray Station
Enhance laundry tasks with a wall-mounted spray station for pre-treating stains. This compact unit includes a spray bottle holder and a small shelf for stain removers, keeping essentials accessible without cluttering surfaces. Perfect for Auckland’s small laundries, it adds efficiency and a polished, organised look to your space.
How to Achieve This Look: Install a wall-mounted spray station from organisation retailers or Houzz NZ, choosing a slim, stainless steel, or white design. Position it near your washing area for convenience. Paint walls in Resene Barely There for an airy feel, as seen in Archipro’s clean layouts. Add a small basket for cloths, ensuring easy access. Secure the station firmly, creating a practical, modern addition that streamlines your laundry routine in a compact space.
17. Add a Modular Wall Grid System
Organise your small laundry with a modular wall grid system for hanging baskets, hooks, and shelves. This customisable solution adapts to your needs, storing pegs, detergents, or tools in Auckland’s tight spaces. Its industrial-chic design adds a modern flair, keeping the laundry functional and visually appealing.
How to Achieve This Look: Purchase a modular wall grid from Houzz NZ or homeware retailers, selecting a black or white finish. Install it on a free wall, arranging hooks and baskets for essentials. Paint the grid in Resene Atlas for a bold statement, paired with Resene Rice Cake walls, as inspired by Archipro’s organiser designs. Add labelled baskets for tidiness. Secure the grid to handle weight, ensuring a versatile, stylish storage solution for your compact laundry.
18. Install a Wall-Mounted Drying Tube
Incorporate a wall-mounted drying tube for air-drying delicate or small items. This retractable, accordion-style tube extends from the wall and collapses when not in use, saving space. Ideal for Auckland’s eco-friendly households, it promotes sustainable drying while maintaining a sleek, uncluttered aesthetic in small laundries.
How to Achieve This Look: Choose a wall-mounted drying tube from Houzz NZ or hardware stores, opting for a stainless steel or white finish. Install it near a window for airflow, ensuring it extends fully. Paint walls in Resene Half Spanish White for brightness, as seen in Archipro’s airy designs. Add a small fan to enhance drying in Auckland’s humidity. Secure the tube to support light loads, creating a functional, modern drying solution for your compact laundry.
19. Create a Wall-Mounted Folding Station
Add a wall-mounted folding station with a hinged, drop-down panel for folding clothes. This space-saving solution provides a temporary surface that folds flat against the wall, perfect for Auckland’s small laundries. Its clean design enhances workflow, keeping the space tidy and stylish when not in use.
How to Achieve This Look: Purchase a wall-mounted folding panel from Houzz NZ or hardware retailers, choosing a timber or white finish. Install it at 90cm height for comfort. Paint the panel in Resene Quarter Tea to match walls, as seen in Archipro’s warm designs. Add a small shelf above for folding essentials. Secure the hinges to support weight, ensuring the station blends seamlessly into your laundry’s modern, functional aesthetic while maximising space.
Laundry Cabinetry Cost Calculator (results in under 60 seconds)
The average cost of laundry cabinetry in Auckland can vary greatly depending on several factors, including the size and layout of your laundry, the materials you choose, and the complexity of the design. Try our laundry cabinetry cost calculator tool to generate an estimate, this cost calculator was developed to provide you a quick and easy way to get a rough idea of how much it would cost for your size laundry.
Laundry Cabinetry Cost Calculator
Frequently Asked Questions
Can any washer and dryer be stacked?
No, only front-loading machines designed for stacking (with a matching kit) should be used. Check with the manufacturer before buying.
How much space do I need for a stacked laundry?
A minimum of 700mm wide, 650mm deep, and 1,700mm high is ideal, though compact models can fit tighter spaces. Measure your Auckland nook first!
Is stacking safe in an earthquake-prone city like Auckland?
Yes, if installed correctly. Secure the stack to a wall or frame with brackets, and hire a professional for peace of mind.
Will stacking affect appliance performance?
Not at all—modern stackable units are built for efficiency. Just ensure proper ventilation to avoid overheating.
Can I DIY the installation?
Basic setups are DIY-friendly, but for plumbing and electrical safety in Auckland, we recommend a licensed pro.
How much weight can wall shelves hold?
Timber or metal shelves secured to studs can hold 20–30kg—plenty for laundry supplies. Check your wall type first.
Are drying racks practical for big loads?
They’re best for small batches or delicates. Pair with a dryer for larger washes, common in Auckland’s busy households.
Can I install storage in a rented Auckland home?
Yes, opt for removable options like pegboards or floating shelves with minimal wall damage. Get landlord approval for drilling.
How do I keep wall storage looking neat?
Use matching containers or baskets, and declutter regularly—less is more in small spaces.
What’s the best height for shelves?
Place them 1.5–1.8m above the floor, high enough to clear appliances but low enough to reach comfortably.
How much space do I need for a pull-out bench?
A cabinet at least 600mm wide and 500mm deep works. Measure your laundry to ensure clearance when extended.
Can I install it in a rented home?
Yes, opt for a freestanding unit or get landlord permission for a fixed one. It’s minimally invasive.
What’s the best material for a pull-out bench?
Laminated timber or engineered stone resists moisture and wear—key for Auckland’s climate.
Can it hold heavy items?
With strong runners, yes—up to 40kg. Avoid overloading to protect the mechanism.
How do I maintain it?
Wipe with a damp cloth and avoid harsh chemicals. Check sliders yearly for smooth operation.
Will a cabinet trap heat from my dryer?
Not if ventilated properly. Use slatted doors or leave gaps to let air circulate—essential in Auckland’s climate.
Can I fit a cabinet in a tiny space?
Yes, even a 700mm-wide nook works for a stacked setup. Measure your appliances and clearance first.
Is it hard to access hidden appliances?
No, sliding or bi-fold doors make it easy. Ensure your design allows full door opening.
Can I DIY this?
Basic cabinets are DIY-friendly with flat-pack kits, but custom fits need a pro for precision.
How do I clean behind the cabinet?
Build it with removable panels or pull-out sections—Little Giants can design this in.
How small can a multi-purpose nook be?
A 1m x 1.5m space works with stacked appliances and slim features—measure your Auckland nook first.
Can I add a sink in an apartment?
Yes, if plumbing’s nearby. Check with your landlord or body corp for approval in Auckland rentals.
What’s the best flooring for a mudroom-laundry?
Tiles or vinyl resist water and mud—perfect for Auckland’s wet seasons.
Will a multi-purpose nook feel cluttered?
Not with smart storage. Use hidden compartments and keep surfaces clear.
How small can a corner laundry be?
A 1m x 1m corner works with compact appliances—measure your Auckland space first.
Can I fit a corner laundry layout in an apartment?
Yes, kitchens or bathrooms often have corners to spare. Check plumbing access with your landlord.
What’s the best countertop for a laundry corner?
Laminated timber or engineered stone resists moisture—ideal for Auckland’s humidity.
Will my corner laundry it feel cramped?
Not if the laundry has been designed right. Keep counters slim and use light colors to open it up.
How do I ventilate a corner laundry?
Add a vented cabinet door or small exhaust fan—crucial for drying in tight spaces.
How much wall space do I need for a barn door for a laundry?
At least the door’s width (700–900mm) beside the opening—check your Auckland nook first.
What’s the best material for a barn door?
Timber or MDF works—lightweight yet durable for Auckland’s humid climate.
How much space does a fold-down board need?
A 600mm-wide wall and 1.5m in front when open—measure your Auckland nook first.
How narrow can a slim sink be for a laundry?
As little as 300mm wide—ideal for Auckland’s tight nooks. Measure your space first.
How do I fit it in a tiny laundry?
Mount it high or pair with stacked appliances—Little Giants can design the layout.


